DBA Day at the AWC
10 October, 2016
Sunday a week ago there was a very successful DBA day at the Auckland Wargames Club. As it led to other projects being planned, I’ve not got around to writing up any report until now. The format was friendly games; no set armies or points. I had five very enjoyable games.
- 1 – Marian Romans v. Alexandrian Imperial
My first game was against John, whose army is still being painted, so he borrowed figures from me. I’m pleased to say that they knew who their paymaster was, and fought accordingly!

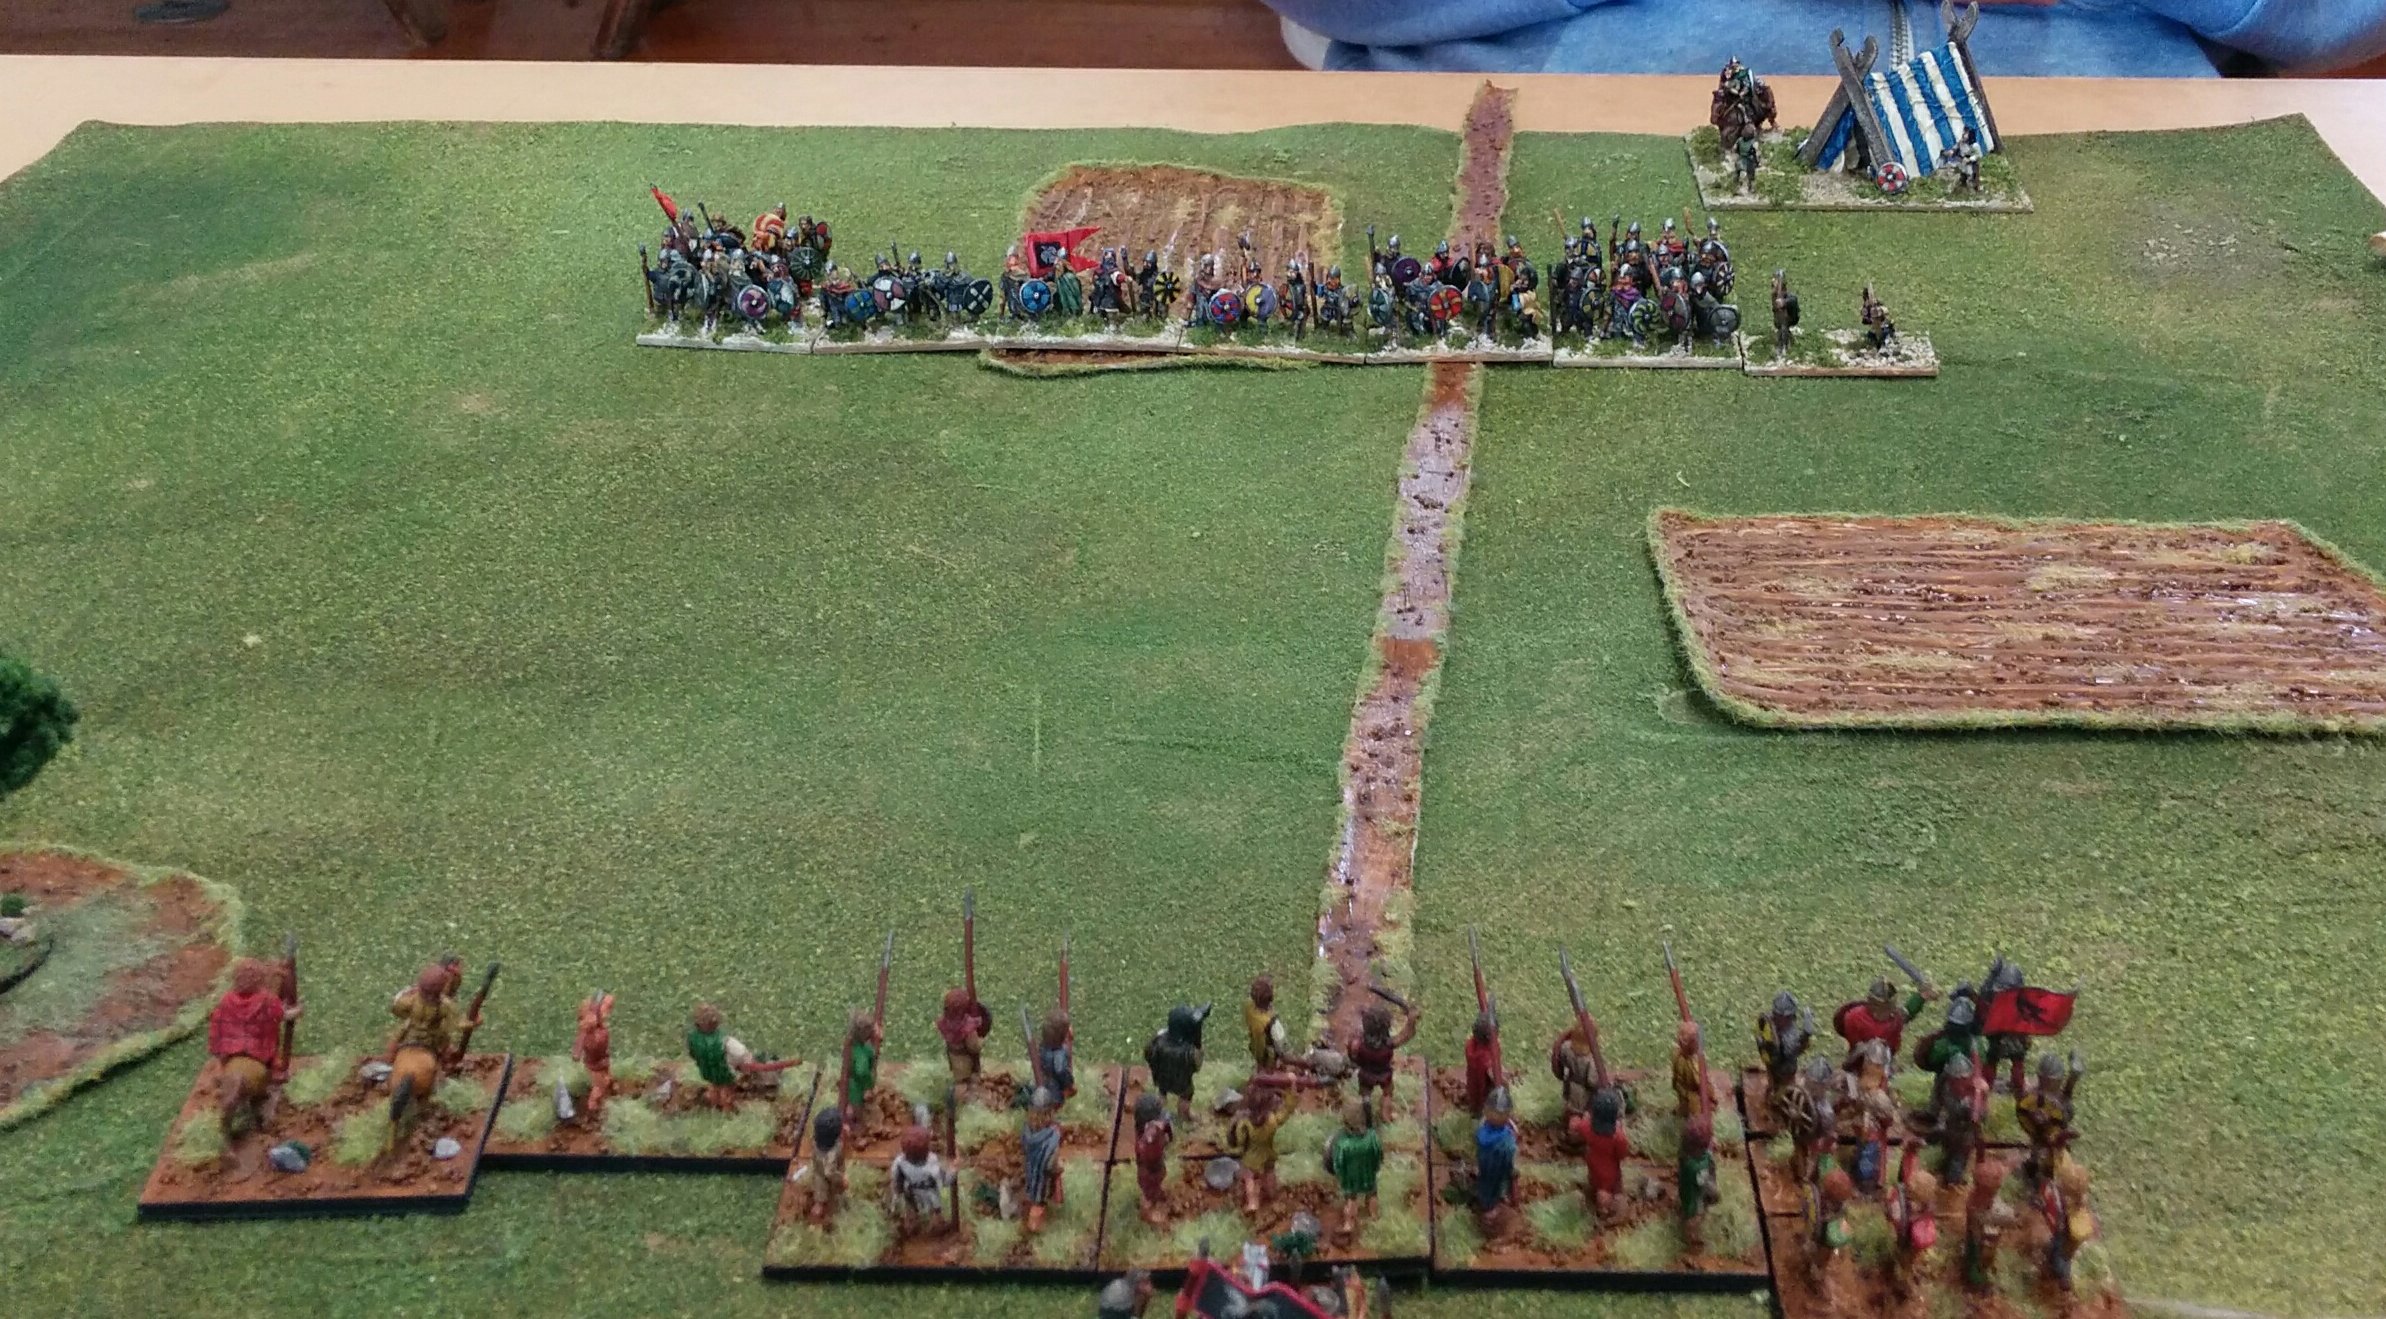
A bird’s-eye view of the Marian Romans.
I was the defender and laid down some Marsh and ploughed fields (I’d just made some new terrain; I realised later that Marsh is not valid for Arable armies). Appropriate to the weather that day the fields were boggy.

The Romans, complete with an elephant.
![[a666: The Alexandrian deployment.]](https://hesperiana.files.wordpress.com/2016/10/a666.jpg)
The Alexandrian deployment.

The situation at the end. Not a single companion cavalryman left!
The surprising resilience of the Kappadocians secured a quick victory.
- 2 – Prefeudal Scots v. Vikings
The second combat was against Kieran’s Vikings. Again I was the defender and went for a marsh and a wood, which ended up being in the same corner.
The Viking invaders of Scotland.

The defenders of Scotland (helped by some friendly Vikings on their right flank.
The battle was a close one, where the Scots won first blood, when the Galwegians broke an element of Vikings. However, the centre was somewhat of a stalemate, with a lot of toing and froing. On the Scots’ right their Viking allies did good execution and contributed to a close-fought 4-2 victory. Terrain and the greater mobility of the Scots were significant factors.

The finals situation; the wood has saved the fragile Scots left flank. Their Viking allies have hared up the field on the right flank, while a schiltron has collapsed in the centre.
- 4 – Later Macedonians v. Polybian Romans
After lunch I faced Joel’s freshly painted Polybian Romans. I decided I really should get my Later Macedonians out to meet them. Naturally in the face of unprovoked Roman aggression I was the defender again. I took two large terrain pieces to anchor my flanks and restrict the battlefield to the advantage of the phalanx.

The valiant Macedonians line up to hold Roman depredation at bay.

Scurrilous Romans set on spreading tyranny.
The battle was close fought, with the battle going in the Romans’ favour on their left flank, while the Macedonians secured the advantage on their own left flank, destroying both elements of Roman velites. However, it was the steadfastness of the Macedonian blueshields that secured victory; despite being flanked by Roman cavalry they repeatedly refused to break. In the centre the Galatians made noble execution of Roman legionaries and the whiteshields (leukaspides) broke their opposing legionaries.

The situation at the end; the Macedonian right flank is lucky not to have broken after their light horse fled, but the centre has triumphed.
- 3 – Later Macedonians v. Polybian Romans
Actually, there is a report that prior to this battle the Macedonian general was troubled by a nasty dream in which his thureophoroi proved his undoing. Romans report that this was an actual battle, but the more reliable Greek chronicler disagree (the battle just described was actually our second, as the first was over so fast!). The Macedonians defended again. Their terrain was too small to constrain the battlefield.

The Macedonian deployment.

The Roman deployment.
The Macedonian thureophoroi attempted to defeat the Roman velites and were disgracefully defeated (they are prone to this; witness their routing by Spartan artillery). Philip V tried to stabilise things, but was defeated himself; the battle was over without the main lines having contacted.

The final position. The thureophoroi were quickly routed and Philip was flanked and defeated. There was a scary big hole in the Macedonian line.
- 5 – Prefeudal Scots v. Carolingian Franks
The last battle was against Mike’s Carolingian Franks. The Scots had got on their boats and visited France. It didn’t go well for them.

The Carolingian Franks. The red beads denote those that can dismount.

The Prefeudal Scots.
How the Galwegians got to be in the centre facing knights I don’t remember (I think I deployed and then moved the line along a bit to fit it in the legal area and didn’t check who was facing who. Unlike the bold Kappadocians at the start of the day, the Galwegians didn’t produce an upset against the Carolingian commander. The schiltons were under pressure and collapsed, but not before a few knights had fled in the face of the Scots cavalry.

The final situation after the Scottish centre had collapsed.
All in all, it was a great day; there is another account of it here, and there are plans for more DBA action there soon.
Philip V makes trouble (again)!
21 September, 2016
An old friend, Craig, visited today, over from Brisbane. We played a couple of games of DBA. He was over earlier this year and we played a couple of game then too. One was Syracusans against Pyrrhus. Craig was impressed at how the Syracusan bolt shooter performed (it pretty well won the game from memory, even destroying pike in hand-to hand!).
He was keen to try out a pike army, and likes the Late Spartans (II/31e, who had the option of a bolt shooter to his delight). I went with the Later Macedonians, who are significantly better than the 2.2 list (and pike play differently under 3.0 too).
- Spartans v. Later Macedonians
The Philip V, leading the Macedonians, was the defender and went for ploughed fields and two large gentle hills and a road. It then rained (1 PIP first up).

The Macedonians with cavalry and a Galatian warband on the left and Thureophoroi and Thorakitai on the left.

The Spartans, with the artillery next to the Spartan commander and Thureophoroi supporting it. Light Horse are in reserve.
Philip advanced his main body into the gap between the fields. The Spartan stayed stationary and opened up with the bolt shooters. They destroyed the Thorakitai. The next turn Philip was bereft of initiative (1 PIP again). He moved his cavalry up through the muddy field to support the pike. The Spartan bolt shooters fired again and destroyed the Thureophoroi! The Macedonians were not looking in a good space! Fortunately in the next few turns, the leftmost phalanx is only recoiled a few times by the bolt shooters while Philip and his light horse rush to shore up the left wing.
With not enough PIPs to do terribly much, Philip sends in his right wing, and everything goes to plan (there was one?)! The cavalry rout the opposing psiloi, despite being overlapped. The phalanx on the right of the Galatians push back their opposite number, and the Galatians face a phalanx with a double overlap, and destroy it. Suddenly Philip is back in the fight. The Chalkaspides against the Spartan commander are forced to retire; in the circumstances (attacking uphill against the general and overlapped on the left owing to the Leukaspides having been recoiled by the bolt shooters) this was a good result.

After the initial contact; the psiloi and half a phalanx on the Spartan left wing have vanished. Philip and his light horse have extended their left flank after the loss of their medium foot.
The Spartans made the cavalry pay, destroying it with their light horse and own cavalry. However, the Galatians had their dander up, and they destroyed the rest of the phalanx in front of them. It was now 3-3. The bolt shooter recoils the phalanx opposite them again and the Spartan commander, oblivious to how the battle was developing, forges forward.

The Spartan left flank experiences some tit for tat.
Philip is unfazed, or at least his Galatians aren’t. They flank the next phalanx and contribute to its destruction by the Agema. The Spartan commander advances again (were the Chalkaspides skillfully recoiling to take away his overlaps?), and the bolt shooters are demolished by a determined assault by the Leukaspides. Philip and his light horse recoil the foot on the hill opposite them to ensure there were no more upsets in this bloody 6-3 victory.

The Spartans are routed by the savagery of naked Galatian headhunters.
This was the first outing of the Later Macedonians in a long time. They were not much chop in DBA 2.2. The phalanx could not win in time before the wings folded, but now that pike and blade pursue the dynamics of combat have changed a lot. Also the extra element of cavalry makes for a more interesting army, one I’ll be keen to get out on the board more often.
- Later Macedonians v. Polybian Romans
The success of the Later Macedonians had me wanting to see how they’d perform against Polybian Romans. They were predictably the defender, but had taken an Aitolian ally (II/31j), giving him a 3Kn and an ally block of 4Pk.
The Romans chose to have the wood on their side of the battlefield, hoping to expand out of column in front of it.

The Macedonians with the Aitolian ally on their left and their Thureophoroi on that wing.

The Romans with their cavalry on the left wing and the right wing in column waiting to deploy. The Triarii are deployed to meet the Xystophoroi.
In the opening moves the Romans throw forward a block of velites to delay the Macedonian advance. They are cut to pieces by Macedonian cavalry. The Macedonians reform their line and advance (this was a mistake, as the ally made this cost 4 PIPs, rather than the 2 PIPs available, but we let it pass).
When the Macedonians make contact the Aitolian Xystophoroi destroy the overlapped Triarii they meet. More Triarii plug the gap and resist valiantly, but another block of legionaries is destroyed and the situation is looking hopeless.
Who would have thought Roman cavalry could effect a turnaround? First one element destroys the opposing cavalry, aided by an overlap. The Macedonians falter (low PIPs) and next the Roman commander destroys the isolated Illyrian cavalry in a one on one, while the other cavalry, flushed with their initial success, tackle Philip, aided by velites flanking him, and win! Amazingly out of nowhere the Macedonian cavalry are routed and the disaster in the centre is averted.
Despite the loss the Macedonians acquitted themselves very well with the new list and the new rules. They are now an interesting army. Craig enjoyed both games, both which had surprising reversals of initial success. He’s keen to get his own army for DBA soon.
Syracusans can take the field
29 June, 2011

A possible Syracusan army

Asiatic skirmishers, Later Thracians and Kappadokians.

Cretan archers and Rhodian slingers for the Marian Romans.
Finally, I now have a Syracusan army that can take the field. If I went for no 3Cv I’ve got it all done. Or I can use some Carthaginians for the 3Cv. The 3Cv, and some 3Kn Xystophoroi, are my next project. They are prepped. The Army Page has been updated.

The Syracusan Hoplites.

The Syracusan artillery.

Another angle.
A few more battles
21 December, 2010
-
Game 1: Romans v. Later Carthaginians
I’ve not written up the last few battles, and I certainly haven’t taken pictures of them. The first was last month, when Joel came around for a game. He took the Polybian Romans while went with the Carthaginians. I decided to go with two elephants and two warbands. I got a towelling. I was the defender, I think. I got an edge amongst terrain and got low PIPs while the Romans advanced towards me. However I deployed with those big elephants it was going to be crowded. I didn’t get good match-ups and got worse dice. It was a 4-0 defeat. I had hoped my Gauls might get to take out a cavalry that they flanked at only 2-2 odds), but I failed. The elephants faced blade, and didn’t initiate combat; not getting to choose the match-ups they had no special advantage. The game showed I still have a lot to learn about Carthaginians; I felt I was better off without the elephants.
-
Game 2: Romans v. Later Carthaginians
The next game was quite a while later when I visited John for a game. It was the same armies again, except this time the Romans had the cavalry general that the list requires. I ended up in a similar fix; this time as the attacker. I was squashed by terrain, but at least had no elephants. Again I had low PIPs at the start, while the Romans had more than they could use. As the battle lines drew closer I got some high PIPs and tried to race my Numidians around one flank in front of the battle lines to the other. They got half way, and with a bit of measuring, I’d have seen they’d be ZOCed! I chose to let the Romans attack them, which they did with blades; this resulted in the Numidians being recoiled and unable to flee. Over a number of turns where I got 1 PIP they were slowly forced back, pushing back my spear at the same time.
Things were going badly, particularly when my psiloi-backed auxilia on one flank were doubled (another 1 by me!) in BGo by the daring Roman general (he had even odds). However, at this point I was saved by luck. My general and the other cavalry advanced through this wood to attack the Roman general; the plan was to get 2-1 odds on their general with ours in BGo. This depended on my cavalry recoiling theirs at even odds. They did better, doubling them! My general only recoiled the Roman one, but now the advantage on that flank tilted in my favour.
The Romans had now forced back my spear so far that they could flank a warband on a steep hill while they assaulted it with psiloi-supported blade. The first combat was 4-3 to them, but guess who won! And after that the other blade was toast. Luck turned things around for me in two bounds!
John was unlucky not to win against the warband, but the odds were not greatly in his favour there. I wonder if he might not have been better to have attacked the Numidians with his velites: 2-0 with overlaps. For a 1/36 chance of being 6-1ed he’d have had a 15/36 chance of doubling the light horse and winning the game (even if he’d not got the auxilia, he’d then have been able to get at the spear behind with blade).
My mishandling of the light horse created something of a Cannae situation, except it wasn’t my wings that folded in on the Roman centre, but my wings destroyed those opposite through the situation this manoeuvre created. Not a tactic I’ll try to repeat, though!
-
Game 3: Romans v. Later Macedonians
The last game was played last week. I got my Later Macedonians finished just in time for Joel to visit for the last time this year. I was keen to try them out against Polybian Romans. As they seem a tricky army to use I had a couple of experimental solo games before Joel arrived.
The problem with the Later Macedonians is that of all pike armies, protecting their flanks. They have plenty of BGo troops to protect one flank, if they can anchor it in BGo (and they have low aggression to make this likely), but they don’t have anything really strong to guard the other flank; the cavalry general and the light horse are really just a reserve, outclassed as they are by even the Roman cavalry contingent. I hit on the idea of positioning three big pieces of BGo so that there was a three base width gap between them, at least at the centre of the board. The Macedonians could then try to use the BGo to protect their flanks and then keep the cavalry in reserve. The problem with this is that neither flank is very strong, assuming they can get to both in time (as one may possibly be closer to the enemy’s baseline.
Anyway, in both the practice games the Romans advanced in column, using the road for speed; they could expand fairly confidently, as the Macedonians could not protect their flanks effectively beyond the BGo. The first time the Macedonians lost their mounted on one flank; the second they were winning in centre, where the three phalanx elements had taken one blade a piece. They were losing on one flank, though, where they were outnumbered. This was when Joel arrived. As the Macedonian LH run on the camp had been met by some Triarii that were QKed, and I’m sure it was 3-1 when I stopped, this can’t be quite right, but the protected pike were looking pretty good.
I made Joel take the mounted general and have aggression 4, as this would be post 204BC. Predictably he was the aggressor, and I laid my terrain in the way I’d been experimenting with. Joel however, got a base edge that put one piece of BGo close to him, too far for me to hope to use it as an anchor. The battle on that flank would be in the open, and he brought his cavalry around the hill to assist.
I didn’t help myself by advancing the pike too far; however, I had time to bring one of the 4Ax around from the left flank to assist the other and the 2Ps in the open; against the cavalry, they’d struggle for parity! The 4Wb was left to hold the other flank. Eventually they got bored and went looking for some unsupported spear, but with low PIPs and being out of command range, they never got to see action.
Joel’s blade came over the hill and linked up with his general. I got to attack first, and the odds were not brilliant; from right to left my general was on the outside flank facing the Roman 3Cv; my two 4Ax with a 2Ps in support faced his general and a 4Bd; then my light horse faced blades, and I’d brought two of the pike blocks across as well. My general managed to recoil his 3Cv; this left his general overlapped at 3-3, and the gods smiled, as we rolled 5-1 and his general was doubled. My 3Ax avoided being doubled against his blade and the game was mine!
Had I not got the chance to attack first and that lucky roll, I doubt I had much hope; the auxilia were very fragile against the blade in the open, and not so well matched against cavalry! Yet it was them who won the game.
-
IWC Ancient army?
My struggle to win with the Carthaginians had me thinking I needed more practice with them, and to make it more interesting I decided to make it a contest between them and the Ancient Britons. If the Britons could win they’d get to go to IWC instead! First up the Britons were the defenders, and the Carthaginians went for a small littoral landing of two psiloi and the auxilia, but the Britons put their chariots on that flank, so that plan lost all zest! The Carthaginians were forced to deploy this landing behind their battle line (with their predictable opening roll of 1 PIP). Their battle line consisted of the spear, backed by psiloi and flanked on each side by an elephant. With the auxilia and psiloi deployed awkwardly the advantage was with the Britons. As the spear tried to force the chariots back onto a marsh, one of them was exposed to a flank attack by some adventurous warband. These were made to pay in the next turn by an elephant, but that flank was in real peril: a lone psiloi and a light horse faced two each of their opposite number. These managed to get the Carthaginian light horse and then the elephant, but meanwhile they had lost a chariot to the auxilia and spear working together on the other flank. At this point the Carthaginian general was able to destroy one of the British psiloi that was in the open, making it 3-3. However, the Britons got the Carthaginian psiloi, which had been guarding the flank of their general, with their light horse. A victory that owed a good measure to Carthaginian ineptitude and too many elephants.
I had another game, this time the Britons were the defenders and the Carthaginians went for only one elephant. They were able to get their auxilia and two psiloi onto a steep hill before the British warband could get there. The battle at this point see-sawed for quite a while, but the uphill advantage proved decisive for the Carthaginians. I can’t quite remember how they won, but the Carthaginians won this battle. Their elephant got to destroy at least one chariot.
The Carthaginians, with their elephant and particularly their auxilia and psiloi have the edge over the Ancient Britons, so I would expect them to win. However, I still need a bit of practice using them. I’ll try them out solo against a few other armies when I get time.
Later Macedonians ready to go
21 December, 2010

All the options for the Later Macedonians.
The Later Macedonians (II/35) have been done for a week now, but I’ve not got a chance to photograph them. The last elements that were being waited upon were four more elements of pike, a 4Ax (Thorakitai), a 4Wb (Galatians) and a 3Ax (Illyrians).

Philip V addresses his phalangites.
The pike were done as leukaspides (white shields) and chalkaspides (bronze shields); for these I mixed in the Freikorp argyraspides codes (HG01 and HG02), as they are really differ only in having plumes.

The phalanx, chalkaspides, leukaspides and 'cyanaspides'.

From the side.

From the other side.
The Thorakites look quite striking all in white, and contrast with the more motley Thureophoroi. The Illyrians don’t mix so well, having huge spearheads, but won’t be used that much, as the Galatians have more utility.

Thorakites and Illyrians.

Another angle.
The Galatians, still with their kit off after 100 year in the Mediterranean and with obligatory severed head, are quite special for me, as I bought this set back in the 80’s when it first came out. I got them on a whim, as I was actually building a Welsh army at the time. I never painted them as I didn’t know about washes then, and they would have looked pretty hideous all in one flesh tone. I eventually sold them, so these aren’t the same figures, but it’s quite neat to finally get to paint them some 25 years on!

Galatian warband, ready to go toe-to-toe with the Greeks in a display of nudity!

From behind.
I’m now waiting for the QRF January sale before I can finish the Seleucids or the Syracusans, but if I get a bit of time I have 12 Gallic warband figures to finish (they’re around half done) and I could work on the Campanians, but I don’t know how much painting time I’ll get while the kids are on holiday.
Later Macedonians on the way
6 December, 2010
The next army I hope to have finished is the Later Macedonians. I’ve now got half of it painted, and I’m happy with the pike elements, so the rest should be straight forward. These are Freikorp figures and paint up well.

The first half of the Later Macedonians are done.
The seven cavalry figures I painted were an experiment before committing to another order of Freikorp figures. I’m happy with how they were to paint. The command figures were moulded all in one, while the light horse have separate riders. I took the possibly ill-advised decision to chop off the ‘grass’ that supported the front legs. I may find the back legs breaking if I’m not careful.

The mounted elements: Philip V surrounded by two elements of Tarantine cavalry, one will be in the Syracusan army.

Another angle.

And another.
The pikes took a little longer. I started one element with them at a 45° angle, which looked great, but was going to hit other figures too much, and with sharp Xyston points I didn’t think that was polite. Therefore I did another element with the spear vertical in the right hand. It’s not as good, but the shield with the hand ready to take the spear doesn’t look too silly. Having done this, I see Bob in Edmonton has managed to put very nice spearheads on broom bristles, which would have been an option.

The blue shield phalanx from the front. The third from the left has a bit of a lean on!
I used a pin vice to drill the place for the pike. This made a very snug slot the first time, but then needed to be filled in when I changed my mind. I found the point of a Xyston spear, along with a thimble, was the best way to start the vice, poking it into the base. Once I had a hole in the base I then used the side of the drill to cut into the side of the figure until it was snug with the hand.

From the side; the front rank show evidence of the repair when the pike was repositioned.
The rear rank have less armour and will be a good figure for dross pike elements. These figures were HG03 and HG04. For the next four elements I’ll mix in some HG01 and HG02, which only differ in the front rank in having a crest on the helmet; the back rank is armoured, but has no greaves.

From the other side.
Most of the variation in these figures is provided by head position. This makes for some interesting elements, with very few of the figures looking where they’re going!
Gladiator Hellenistic figures
6 December, 2010
I placed a large order for Gladiator figures. This was to get discounted postage, but also because they have quite a few packs of a single pose. I bought some of their hoplites, as I decided the Essex ones weren’t going to work with their ugly shields. I’m now happy with the modified Essex figures that have Freikorp shields. However, I painted an element of the Gladiator hoplites to see what they looked like.

Hoplites: from the left, Gladiator, modified Essex and Old Glory Campanians.
The Gladiator figures are a little squat against other manufacturers. In particular, they seem to lack necks!

From the side.

From the other side.
Gladiator have a good range of light troops, and there is some variety in these packs. I like their javelinmen and slingers in particular. I’ve painted up an element of each of these and of their Thureophoroi.

Gladiator archers, javelinmen, slingers and Thureophoroi.

From another angle.
These will be used in the Later Macedonian and the Syracusan armies.
Retrofitting hopla
17 November, 2010
I’ve been looking for good hoplite figures for a while. I guess I could go with Xyston, which are doubtless very good, but likely to be too big and are a hassle with their undrilled hands. I got some Gladiator hoplites, but am not really satisfied with them (though I’m yet to paint any). I actually like the Essex hoplite, but its shield is a travesty, being too small and having no rim. What’s a hoplite with a crap hoplon?

The old Essex hoplites.
I found a way around this when I got some of the hopla from Freikorp (for their HG17). I found it was actually quite easy to remove the Essex shields, although the spear had to come off as well (and it’s a whole lot easier if the figures aren’t based!). I used a craft knife and as the metal is very soft they came off without much effort, better still the arm stayed on! I painted the Freikorp shields up quite a while ago, but did nothing until last weekend about actually attaching the shields to the hoplites. I only have 8 of the Freikorp shields, so I painted up another element of hoplites and attached the shields using green stuff (as the concave backs made for poor contact with what remained of the figures’ arms.

The retrofitted hoplites.
One thing I’ve found with the Freikorp shields is that they seem to be quite porous, and washes are very dark on them, even after adding a transfer. By contrast, the Essex figures have very shallow detail, which means washes don’t pick up as much detail as on some figures. For all that, I like the pose of the Essex figure and the variations of armour and helmets that stop them being too uniform.

From another angle.
The hoplites are going to be used for a Syracusan army, though I’m sure they can morph into quite few other hoplite armies. Before I order any more shields, however, I have to paint some of the other Freikorp figures I’ve ordered, to check they’re a range I want to get more of. I’m working on a Seleucid elephant (HG10a), which I think has great animation, and compared to the CB one is a breeze to put together. I’m also working on a scythed chariot (HG27), which is very attractive, though a little big for the base. I’m also painting a command for the Later Macedonians from HG20 and HG21 and some Tarantine cavalry for these and the Syracusans (HG25).
Finally, I’m doing an element of Macedonian pike (HG03). These are nice figures, with a good pose and variations on the head position and helmet. The shield is also appropriately smaller than a hoplon. Once these are painted I’ll order some more of those hopla and the figures I need to complete the Hellenistics as Syracusans, Seleucids, Ptolemaics and even Pyrrhic (I only bought samples of the cavalry first up, but based on these I’m very happy with their range).

And another angle.
Painting Progress
1 September, 2010
Last month was my first back in painting since the overseas trip in June and July. A lot of my effort has been going into rebasing, a project that is still not even halfway completed. I started work on my early feudal Essex figures, rebasing what’d I’d already done. I then prepped the remaining figures. However, though I’ve got a couple of elements of knights almost complete, I’ve more or less decided not to continue with these, but to go back to classical armies. I also rebased a whole lot of goblins, allowing me to use them as pseudo-Ghaznavids and Samanids. This involved a small amount of painting. I’ve also started rebasing my Pre-feudal Scots, who are now just waiting for flock, a job that seems to take a fair amount of effort to do!
I’ve got fairly skilled at rebasing. I’m lucky that I used PVA to glue the figures to the base. I soak the bases off in shallow water and then brush the old sawdust flock off the bases in water; doing this over the sink the last time made things a lot faster. Besides using MDF bases and a new basing mix, the rebasing allows me to be more careful about positioning the figures, trying as much as possible to keep the ‘hands inside the bus’.
The other project for this month was completing the Komnenans. These are now only waiting on a 2Ps, which Steve kindly donated, as I underordered, and a 4Sp, as well as a couple of figures for camp followers. This is the last Outpost army I’ll do, as I find them quite a lot of work to paint. The variances in scale between figures also offends my sensibilities. Therefore, I was very happy that I was able to sell the two other Outpost armies that I’d bought. It’s good to think they may actually get to see a wargames table.
Shifting the two unpainted armies spurred me into a frenzy of reorganization. I have a box with about sixteen small drawers on it that each can hold the figures of an average army. This had filled up last year, and new figures were in various boxes, recently sorted into a filing box. This wasn’t terribly effective, as a lot of what was in the drawers was never getting looked at. I’ve now shifted all the fantasy figures to the box and filled the drawers with the historical figures. At last the figures that I’m most interested in, the classical ones, are easily accessible.
This reorganization, in turn, got me going prepping the classical figures (which is why those feudals got filed again!). I’ve now prepped my Southern Italians (Bruttians, Campanians, Apulians and Samnites). This involved drilling hands for a few hoplites, which thankfully went much better than my first efforts on the Komnenans. I made some hoplon-style shields for their cavalry using green stuff and some dark age round shields. Getting the green stuff out got me going on the Gladiator phalangites, which now all have similar shields. They just now need their pikes. The last bit of serious prepping is doing the spears on the hoplites, but I reckon while I’m in this frame of mind I’ll tackle it before I do any painting. Of course, then I’ll be overwhelmed by choice. One option is to do the Spanish; they’re lovely figures, and their mounted are done (as is the camp, if they can get it off the Carthos!). But the Campanians are looking interesting, as I’m keen to see how their hoplites paint up. And then there’s the Syracusans (and all those hoplite morphs they’ll allow), the Later Macedonians (and a similar wealth of morphs), and the Polybian Romans. Which will it be? Do I have the discipline to finish one, or will I do a bit of each?
I’m planning to paint a Komnenan Byzantine army with Khurasan figures at some stage, but although I’ve finally started, and nearly finished a stand of Normans for the Latinikon, and they paint so easily and look lovely, I reckon I’ll hold off on them until I’m done with the classicals. I’ve more or less decided that I’m tired of allowing preparation for IWC next year dictate what I paint! The Outpost figures should do just fine if I don’t get around to painting a Khurasan army.
Anyway, I’ve got a graph of painting progress. I rearranged the spreadsheet it’s drawn from by excluding figures I’ve sold or consider surplus (they’re not waiting to be painted if I don’t intend to paint them!). However, this changes the quantity of figures purchased, as these purchases are as though they never happened! Anyway, that saves me from recording a negative purchase for last month, but is less than ideal, as if I sell a painted army the purchases for some time in the past will be retrospectively adjusted. All likely to be of little interest to the reader, but keeps me amused!

Figures purchased and painted by month

Figures purchased and painted by year. If I counted figures sold as a negative, this year would be the first I'd painted more than I'd purchased. Can I avoid any big purchases this year to make that still happen?
Komnenans really finished this time
23 August, 2010
I’ve now flocked the Komnenans, and prepared their army page. I also got the Manichaeans (3Ax) done, so I only have one more element of 2Ps to do and an element of 4Sp (which I can’t see much use for!) to have all the options.

The Komnenans arrayed.
Rather than start on the feudals, I also did a couple of elements for some Hellenistic armies, an element of Hoplites and an element of Phalangites. These were test elements to see how they looked and how hard they were to paint. On both counts I was very pleased. The challenge with the hoplites was to avoid having their spears poke elements to their front and rear. I hope I’ve managed this by angling their spears down, as in a famous statuette.
 Until I’ve done another element I can’t swear that this problem is solved, but it’s looking pretty good. The spears are Xyston ones, and I chose the purple shields on the basis that the tyrant Timoleon had a unit so equipped. I have to confess to being guided by what I think will look nice as much as what is accurate, so, for instance, I’d rather not do the backs of the shields red if that would draw too much attention to them. Similarly I’m not convinced that bronze shields look so good (particularly as a background to transfers), so I probably won’t do any like that. The Essex figures look very nice; I like the pose, and the mix of equipment. Their clear lines make them easy to paint.

Phalangites and Hoplites.

From the rear.
The hoplites will be for a Syracusan army, but will in time be able to morph into quite a number of armies. The phalangites are for a Later Macedonian army and I prepared these at the beginning of the year. They are Gladiator figures, and these are really more Seleucids with their trousers, but I’ll probably do a pair of elements of them anyhow. I have quite a few Gladiator phalangites, and some Hinchcliffe ones; I doubt I’ll ever paint the Hinchcliffe ones, but the Gladiator ones are OK.
One of the impetuses for painting these figures was that I’d placed a small order with Essex for some kite shields. I want to see what they’re like, as I thing the Khurasan shield is not the right shape for a transfer (and I’m much too lazy to paint shields by hand!). I took the opportunity of this order to get a few mounted elements to finish of the Hellenistic armies (as some of the figures I got from Mike Sanderson were unusable. I’ll try to get on to painting the feudals, but all those ancients are sorely tempting: the various Hellenistics and the Ancient Spanish in particular.
A recent purchase was a clip-on loupe that attaches to my glasses. I figured it would be more comfortable than the head-mounted one I have. I’m still getting used to the different depth of field of these, but they are lighter.

Not identical to what I've got, but close enough.

