Painting update
12 April, 2020
It’s been a very long time since I’ve written anything here. I have been playing a few games. In particular I’ve been playing Sellswords and Spellslingers with Kieran quite regularly. I even have some figures in 28mm I could paint for it. In additition last year I made some 15mm terrain for it, scrubs and boulders. I also bought some trees, but didn’t get so far with them.

Boulders and shrubs for SoBH and SS&SS
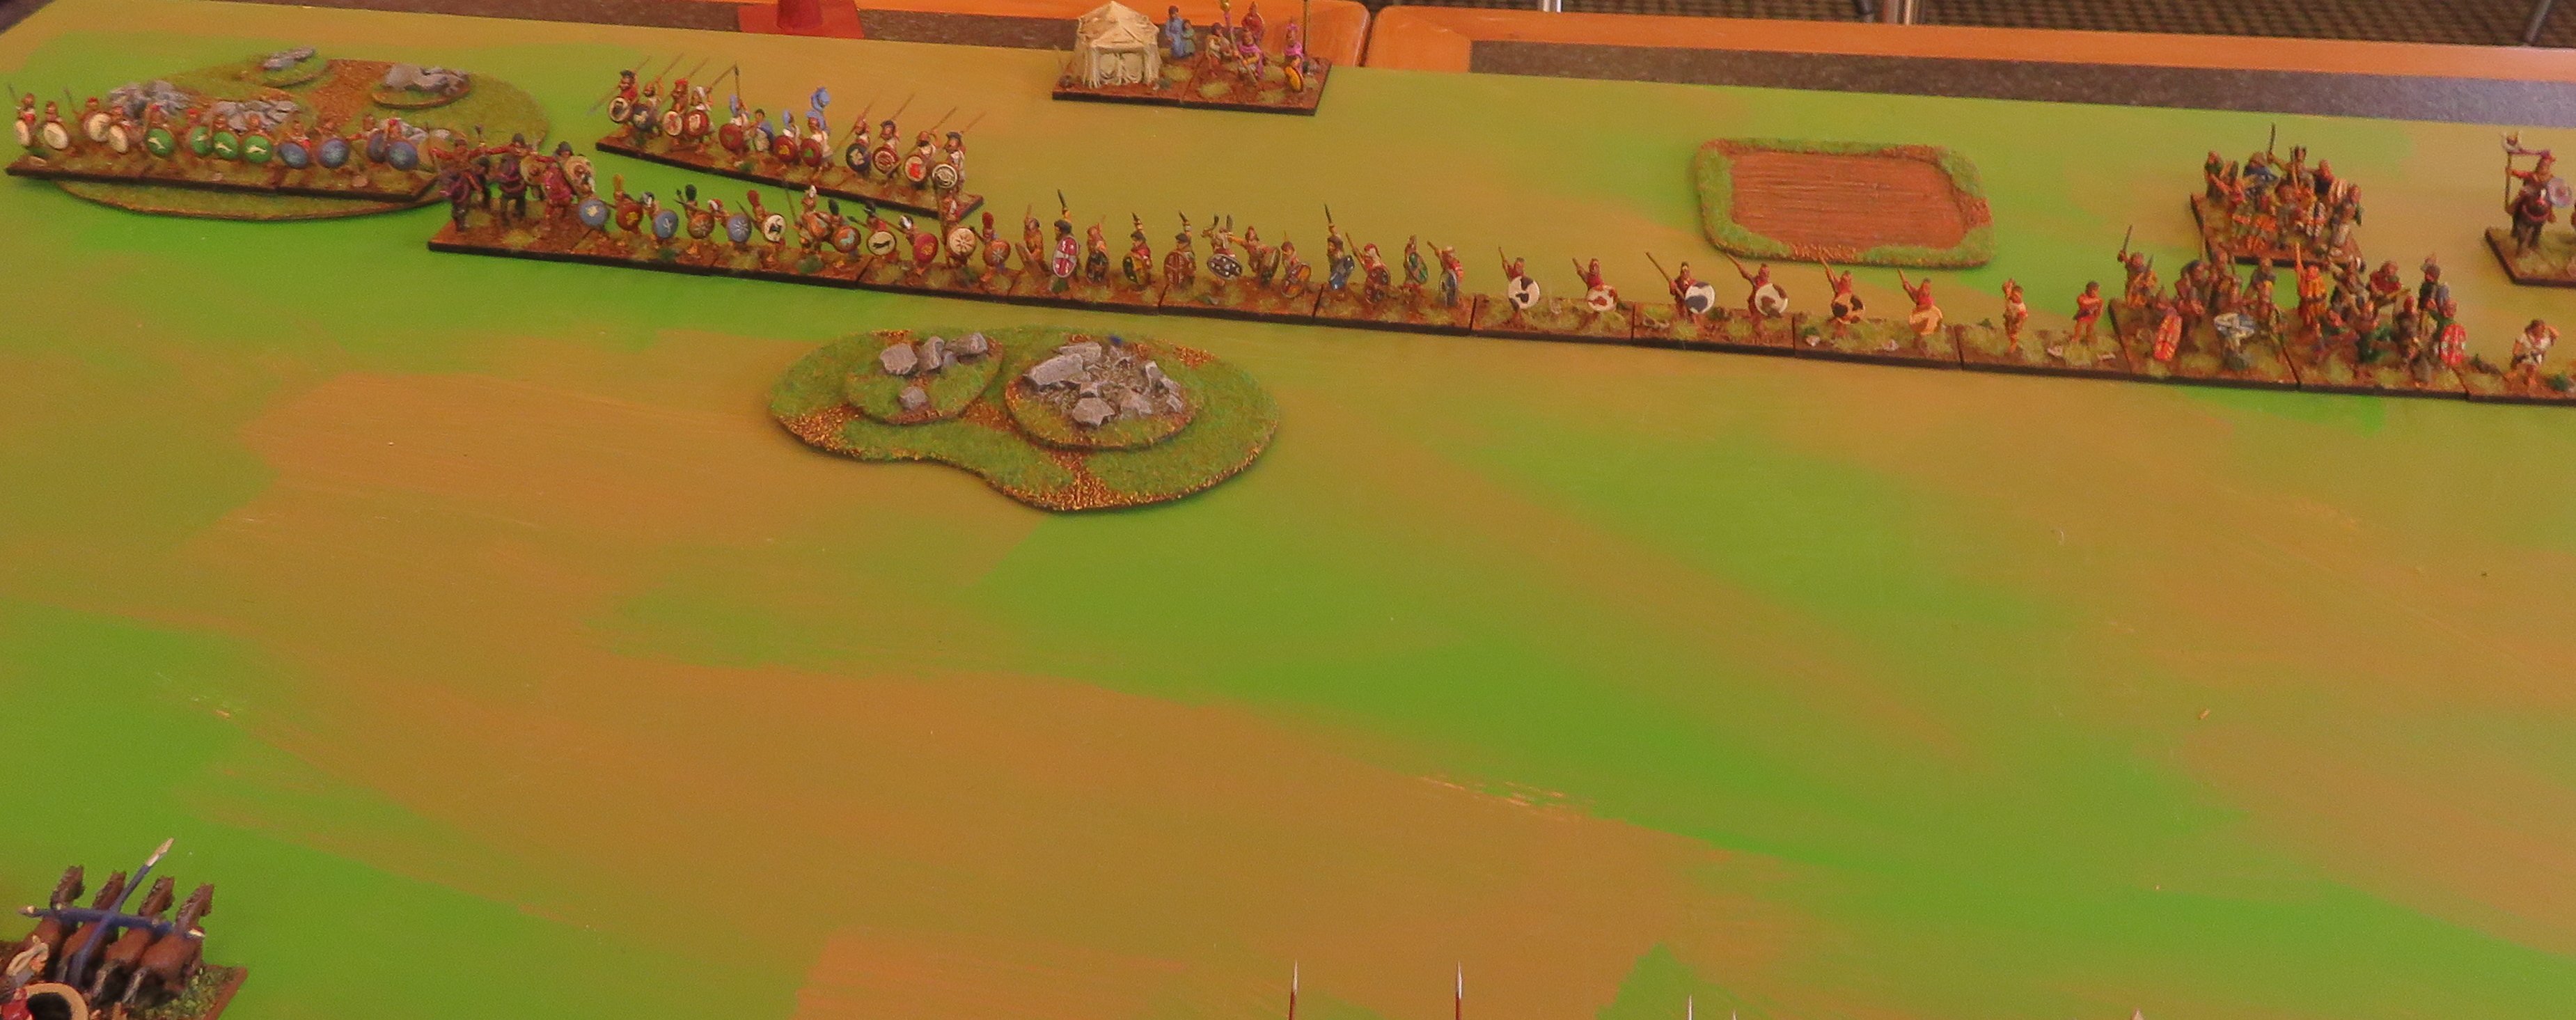
I have also ugraded my hills for DBA. I used a t-shirt base for the polystyrene hills. It gives some protection and makes them non-slip.

Numidian light infantry try out the new hills.
I may yet make some difficult hills that incorporate rocks. I got some moulds from the hobby shop last year; you can see some of the first lot of rocks incorporated into the scrubs above.
Otherwise, I have been playing DBA quite frequently. I’ve gone out to Nick’s regularly and we’ve used a number of armies each time. I also went to a pub on the North Shore during the week before the lockdown started. It was a great occasion and once lockdown ends could become a fixture. I had three games of DBA in the evening.
I have quite a few figures ready to paint. Rather than finish any of them I have got elements for four armies ready to go. Which ones will I do first?

Clockwise from the back: Late Imperial Romans, Syrians, Communal Italians and Veteran Carthaginians. 15 mounted and 114 foot.
The Carthaginians were started at the end of 2018, as were the Italians. I should get them finished first, as they are in various stages of completion. The Syrians will flesh out the Syrian Army that is complete, and I recently got their shields sorted, which was a major exercise, as they all come with little bucklers, and I want them to have shields with LBM transfers. Finally I bought the Romans at the end of 2018 and they’ve been at the back of the queue since then. I decided to get them all prepped, but I would like to paint them after the others (they’re the first of enough for BBDBA).
A Carroccio and Mithridates’ camp (also Veteran Carthaginian spearmen)
24 December, 2018
I’ve got a few more elements finished, and a number more very close to being finished. The first is the Command Wagon of my Communal Italian army (III/73a) that is taking shape. It is a morph of my Norman army, though I’m yet to paint most of it — the six elements of communal spearmen, the two elements of communal crossbowmen and the two elements of Contandini infantry (hordes). I’m actually planning to take a Medieval German ally (IV/13a), which allows more knights (3Kn/4Bd), and another element of crossbowmen. These are all started. I made the transfers for the Carroccio’s banner and the shields myself. I was following the picture in Ian Heath’s Armies of Feudal Europe (no. 94 on p. 111). I noted that some of cities (Bologna and Parma) had red banners and a cross on them. I somehow took from this a yellow cross, though when I reread the book I discovered that it should have been white.

The Communal Italian Carroccio.
Like the rest of the army, this is an Essex model. I chose to keep it to a 40 x 40 base, so I’ve not used the oxen. After I decided on this, I saw a very nice Carroccio with oxen. One advantage of the 40 x 40 base is that I can present the wagon side on.

Another angle.
The model came with a single monk (the one holding the crucifix), but I came across a few more while I was painting it, and decided to fill out the wagon a bit. These monks have picked up some dirty habits, courtesy of refreshing the ink in my wash just before doing them! They’re not just there to add moral support either; that monk in the middle is kneeling. If he stands up he’s a monster (a Museum miniature) … Beppo abandoned his questionable early life as a wrestler for a life of prayer, but should the wagon be under serious threat, he may revert to his old character, so watch out!

And another.
The wagon is guarded by a select guard of uniformed troops.

From the rear.
The occasion that led me to finding the other monks was my decision to finish off my Mithridatic army. Part of the work is to do the camp— Mithridates tent— which was guarded, I believe, by a stag, a bull and a stallion. I’ve had these figures for a long time; I even started painting them, in a desultory sort of way, so it’s good to get them done finally.

Mithridates’ tent.

Another angle.

And another.
Mithridates’ army will be joined by an Armenian ally that can add more horse archers and some cataphracts. These are under way. I also decided that I could use the Carthaginian veteran spearmen as imitation legionaries, which would be an incentive to get them finished—well, some of them. I’m also doing another element of Cappadocian infantry also by Corvus Belli. In all, this will represent eight new elements for the army (and a ninth if the camp is counted). Here’s the first of the finished spearmen/imitation legionaries.

Carthaginian veteran spearmen (or are they imitation legionaries?)

Another angle.

And another.
Once I’ve got the Armenians and Carthaginians done, it’s back to the Italian spearmen and crossbowmen (who got demoted in the painting queue last week).
Conquest 2018, Pt. 3
17 November, 2018
The final day of Conquest was three BBDBA games. A lot hinged on the initial dice roll for who was the invader and got to set up second. As an army characterised by Phil Barker as particularly aggressive, the Later Carthaginians should have had the advantage here, but on this occasion they allowed themselves to be invaded for the first two battles.
- 1. Polybian Romans (Keith)
The first battle was against Keith’s Polybian Romans. I placed two large marshes and a difficult hill. The command with the Gallic Warband commander set up behind the hill; the spear were in the middle and the left flank with the C-in-C had a marsh occupied with two psiloi.

The Carthaginian right flank and central commands.

The two armies opposed; the Carthaginian left flank command can be seen in the foreground.

The Roman right flank and centre.

Their left flank.
I came to realise that the terrain was not working to my advantage, and things stagnated with neither side able to make much progress in the time was called. On the left flank the cavalry had to retire before the advancing foot.

Initial advances.

Working at correcting things.
On the right flank the warband struggled to move over the hill, and the command range of the commander slowed down the advance of the psiloi, who were needed to support the Spanish scutati.

Slow progress on the right flank.
At the time the game ended the Carthaginian centre was almost broken (a flanked spearman refused to break), the warband were starting to put pressure on the right flank, but were disorganised by the hill. On the left flank a stalemate had resulted.
- 2. Athenians with Thessalian allies (Colin)
Against Colin’s Greeks, the Carthaginians were again defending. Colin had cavalry seeking to destroy exposed psiloi on my left flank, and on the right flank they had Thessalian cavalry facing the Numidians.

Athenians with Thessalian allies on their left flank.]

The opposing Carthaginian left flank.

Their right flank and centre.
Things did not go altogether to plan for the Greeks, and the Athenian cavalry were briskly destroyed by valiant Libyans. This precipitated a collapse on that flank.

Libyan javelinmen gloriously see off Athenian cavalry, while Numidians rush to fill an anticipated gap.
The Numidians were trying to bolster the threat to the left flank. As it turned out, two of them could turn round, while two stayed to exploit the advantage. The Athenian light troops were no match for the Spanish, and soon the Gauls were ululating their way forward.

The Athenian right flank starts to fold as their light troops break and the Gallic warbands surge forward.
On the other flank, things were not so happy.

Thessalians have the Carthaginians at a disadvantage.
However, the Carthaginians had a lucky escape, when the Thessalian commander was killed.

Disaster for the Thessalians as their commander is killed.
For all this, the Thessalian cavalry still had the Carthaginians at a disadvantage.

Despite the loss of their general the Thessalians continue to apply pressure.
The Gauls broke the Athenians right flank, but not before two warbands were broken. They spent a few turns mopping it up (in hindsight I should have remembered that it should have been removed after losing half of their elements; this was possibly crucial). Meanwhile, the Carthaginian centre was faltering and eventually broke.

The Carthaginian centre breaks.
When time was called I need one more element to win. I might have got it had I remembered that a command is removed as soon as half of it has been destroyed; I might have gained an extra turn to get that last element. For all that, I was under pressure on the right flank and had my centre collapsing.
- 3. Seleucids (Gordon)
Finally, in the last game I was the aggressor against Gordon’s Seleucids. I exploited this to the hilt in choosing which commands faced which.

The Seleucid left flank facing Carthage invading Syria.

Their centre and right flank.
Taking note of where the Seleucid cavalry was, the Carthaginians chose to have their light troops in the centre to face the phalanx. Their spearmen would hold the right flank defensively, and the cavalry on the left flank could exploit their numbers against psiloi and light horse, while the Numidians faced the xystophoroi.
The Carthaginians meet the phalanx with light troops and the elephants and chariots with spearmen.

Massed cavalry face the beleaguered Seleucid right flank.

The two armies opposed.

The light troops advance while the spearmen wait.

Cavalry swarm forward on their left flank.
The Seleucid scythed chariots proved ineffectual, and the centre and right flank waited while the left flank sought to exploit its advantage. It did this rapidly. It lost two Numidians to the xystophoroi, but in the end prevailed so that the cavalry could chase down the exposed psiloi. Meanwhile, the rest of the Seleucids were advancing, but were unable to gain a significant advantage, and the phalanx was waiting to be rolled up on its exposed flank. At this point the Seleucid general capitulated.

The Seleucid right flank has collapsed and the phalanx is defenceless. The Seleucids capitulate.

The Seleucid elephants on their left flank had routed some Spanish scutati, but overall had made little impression in the short time they had before their other flank collapsed.
I was pleased with how the Carthaginians performed. I think the aggression dice is hugely significant for BBDBA. I wonder if deploying with alternating commands might not reduce this a little.
Conquest 2018, Pt. 1
12 November, 2018
This is the sixth Conquest DBA competition I’ve taken part in; my first was in 2009, and then there was a hiatus between 2012 and 2015. This time I took my Later Carthaginians again and the Syrians. I didn’t get the veteran spearmen painted in time for the trip, but there were a couple of new figures, more Libyan skirmishers, and some Liby-Phoenician cavalry; both of these elements were heroic on occasions.
The first day was DBA and the Carthaginians had three battles in the morning. It started with the ill-omened discovery that the white shielded spearmen had had a shield fall off.
- 1. Early Mycenaeans (Robin)
Up first was Robin’s Early Mycenaeans, with a menacing combination of heavy chariots and pike. I was the attacker.

Early Mycenaeans.

Another angle.
I was able to arrange my psiloi to neutralise his phalanx, and my spear and Numidians to face his chariots. On the flanks my match-ups were favourable too, and the general formed a reserve for the spear.

The Carthaginians.
Early up the new Libyan skirmishers routed some pike (6-1) and the blue shields did likewise to some heavy chariots; the white shields were less steadfast (disconcerted by the loss of one of their shields). The green shields recoiled the enemy general, while the Numidians suckered in their opposing chariots.

After the initial rounds of combat.
The battle developed rapidly; the general filled the gap left by the departing white shields, and the Numidians destroyed their opposing chariots. Meanwhile, the enemy general routed the green shields. However, the Numidians moved across and taught him a stern lesson, winning the game.

Victorious against one squadron of chariots, the Numidians then triumph over to the enemy general.
This was the first general’s scalp for the Numidians, but by no means their last.
- 2. Palmyrans (Eric)
Next up I faced Eric’s Palmyrans. I was again attacking. These had a fort positioned with mathematical precision on the field. I opted to have the fort on my battle line, and Eric garrisoned it with a bow element.

The Palmyrans and their fort.
I deployed to try to take the fort on the first turn.

The Carthaginian deployment.

Another angle.
The white shields were comforted to see their shield returned owing to the magic of Blutak. On the first turn I saw the Palmyrans advance with fearsome speed, and I failed to take the fort. I was then hampered by PiP dice of 1 or 2 for most of the game. Early up the blue shields fell to the enemy commander, and the Libyan skirmishers were routed by cataphracts. Things were looking bleak, but then the green shields took the fort on a solo assault and while the Balaeric slingers scorned the dangers of the opposing cataphracts and light horse for three turns, the Carthaginian cavalry destroyed an archer. The white shields had destroyed a cataphract unit (showing the difference a shield makes!). However, the enemy commander had destroyed one of the Numidian cavalry.

Things swing back towards the Carthaginians. The new Liby-Phoenician cavalry shine against archers.
On the turn that the second archer fell, the Balaeric slingers decided they’d done enough and retired. The game was now balanced 4-4. I rolled a handsome 3 for PiPs (the most since the first turn). I decided to bring the spearmen out of the fort and attack again with the Numidians. The double overlapped general was defeated and the Numidians collected their second scalp.

After the general is routed.
This was a very satisfying victory. I could bemoan my PiPs, but my troops resisted shooting with great determination, and my combat dice were good when it mattered.
- 3. Seleucids (Gordon)
The Carthaginian’s last outing for the day was against Gordon’s Seleucids. Again I was the attacker. And again I opted to face the phalanx with psiloi.

Seleucid deployment.

Carthaginian deployment.
The Carthaginians saw off the scythed chariot (against their spear). As the lines meet, Seleucid psiloi are overpowered by the Carthaginian cavalry and the Balaeric slingers flee the phalanx. However, one of the spear is routed by an elephant.

Early situation.
On the left flank the last psiloi fled, and the Seleucid general attempted to stabilise things. However, the Balaeric slingers demolished two elements of pike to win the game. The Gauls sat out their second battle, never moving.

Victory. The double-overlapped pike is destroyed.
The morning was hugely successful for the Carthaginians; all but the Gauls had been in the action, and the light troops had proved very dangerous.
Libyans
18 October, 2018

Libyans from Liverpool.
I’ve got quite a few figures started, but got a few elements finished over the weekend; one of them is some Libyan cavalry for the Later Carthaginians. These aren’t strictly necessary, but they seemed to have a bit more character than the staid Liby-Phoenicians. They’re certainly hairier!

Libyans and Liby-Phoenicians.
I also painted an element of Libyan skirmishers. This gives me three elements for using in BBDBA; again it’s not really necessary, but they’re nice figures.

Libyan javelinmen.
And here they are with their more established compatriots (there are a few more consorting with elephants).

BBDBA Libyans.
And finally, the figures that sparked off these purchases — a LH command for my Numidians. To justify buying them, I bought a whole lot of other CB figures …

Numidian commands.

Another angle.
Now I need to finish my Syrians, and the nine elements of Veteran Libyan and Liby-Phoenician Spearmen. They’re all started.
Browny-con
8 October, 2018
Browny-con was organised by Grant at his house and was a great success — 8 players and six rounds of DBA. We used a scoring system, but were relaxed about army choices, going for match-ups at each round.
A few missed games at either end missed all the rounds, and we scored 5 pts for a bye. Otherwise it was 8 for a win, 1 for a loss and 0 for a draw and you subtracted losses for your win and added kills for your loss or draw. The scores were:
Benny 35
Mark 32
Simon 30
Grant 28
Dave 26
Philip 24
Joel 23
Nick 18
Camps sacked and generals killed were (Camps sacked – Generals killed):
Benny (0-2)
Mark (0-1)
Simon (0-0)
Grant (1-2)
Dave (0-1)
Philip (1-0)
Joel (0-0)
Nick (0-1)
My games were:
1. Mitanni v. Sea People (Philip)
The Mitanni destroyed the Sea People using their light option (Psiloi and Fast Auxilia). It was their six chariots that proved superior to the auxilia and fast blade they met.
2. Campanians v. Polybian Romans (Joel)
Joel fielded a lovely BUA (Diocletian’s palace). I had him have it on his side and charged into contact with him, hoping to win on my left flank where I had fast auxilia and cavalry against his cavalry and psiloi. My centre crumbled (hoplites not enduring against blade), and things looked hopeless when my general 6-1ed his to turn around the game. I then destroyed the psiloi and cavalry on my left wing. It was a very jammy victory!
3. Mitanni v. Ugarit (Dave)
What I did to Joel, Dave did to me. I had the factors, I thought, in this battle — I had solid auxilia facing fast auxilia and I had a LCh facing a psiloi on the other flank. The dice went against me and I was 6-1ed repeatedly, losing my General and five other elements in an absolute rout.
4. Mitanni v. Midianites (Grant)

Mitanni face Midianites.
After lunch I faced Grant’s Midianites, and was grateful to finally be defending, avoiding sand dunes. I went for my heavy option of solid auxilia and solid bow. The battle was tipping in Grant’s favour when one of my bow was destroyed, but the dice went my way and I rolled up his flank and won quickly.
5. Late Carthaginian v. Pyrrhus (Benny)

Carthage faces Pyrrhus.
This was a game I thought I had; I managed to get my elephant to face Pyrrhus. All I had to do was QK his Kn general. Unfortunately, to do this I’d moved the elephant in front of a pair of Gallic warbands. If I’d moved the warbands first, I might have avoided this. It was a sideways shuffle. Predictably the elephant had to recoil — twice! On my left flank a psiloi was destroyed by an enemy one, allowing it to close the door on my auxilia, ending the game.
I was lucky to avoid losing two LH to a situation on the other flank. Benny’s LH and cavalry had advanced on opposite sides of the hamlet, so they were not lined up. The Numidians were positioned to ZoC both of them. Benny attacked with the Cv and the Numidians conformed (as he couldn’t). He then could close the door with the LH. Fortunately I won the battle. It’s an odd situation. Benny’s cavalry couldn’t advance as a group, as they weren’t one. He didn’t set out to create such a situation, but it was a nasty one.

Numidians before being attacked by cavalry with a LH overlap.
6. Mithridates v. Marian Romans (Nick)
Nick’s bad luck continued. He took an artillery element in the middle of his legionaries. It faced my Sarmatian Kn flanked by pikes. On my left flank the Romans had more BGo troops than I did facing each other across a wood. Nick’s PiPs were terrible, which prevented him from moving into the woods. He attacked with his legionaries, leaving a gap for the artillery to continue shooting at the Sarmatians. I was lucky to avoid losing anyone in these attacks, but got to charge the Sarmatians at the artillery and close the door on the legionaries in the gap with some LH. The gap widened, and after surviving a turn the artillery was destroyed. This gap was one that the Romans couldn’t fill, hampered by bad PiPs and poor combat dice.
It was a great day; most of the battles played very quickly. There’s talk of getting some HoTT armies together next.
Recent games
7 October, 2018
This year I’ve not had many games of DBA, but I’ve enjoyed the ones I’ve played. In the middle of the year we had a series of games organised by Grant at his house that he called Browney-con. I’ll finish the write-up some time soon. Otherwise, last month I caught up with Nick for a game of BBDBA at the AWC. My Carthaginians lost to his Polybian Romans, but I did take away from it a better combination of commands.

Carthaginians (right) facing invading Polybian Romans last September.
This weekend we had more games at the AWC (no photos this time). My Carthaginians went against Nick’s Polybians again. I was the attacker, and made things difficult for myself by deploying first! I possibly created an opportunity for myself, as my left flank was the high PIP command with all my Cv and LH. My right flank ended up in rough going against Nick’s high PIP command of Cv and 4Ax. Great dice allowed me to redeploy four of the Numidians to the right flank. In a tight encounter they managed to destroy that flank for the loss of only one Numidian. However, the command on that flank collapsed on the same turn, losing their Wb commander and two of their Scutarii.
Remarkably, the centre of Sp was unharmed, as was the left flank, apart from the Numidians that had done their march. That flank was in a stalemate with the Triarii. In fact, the spearmen were overpowering the Legionaries, and had inflicted a loss, as had the Wb general before he was killed.
The battle came to a conclusion with the Numidians ignoring the two demoralised commands facing each other and marching to the centre of the field to attack psiloi there. The spearmen had another success and in the last turn completed their great performance by killing another element of legionaries. The Numidians had already broken the command, however, with their attacks on psiloi, and the Roman high PIP command lost their general too.
After lunch we had two games of DBA. My Mittani were unsuccessful against Grant’s Midianites and Kieran’s Minoans, whereas Nick’s newly painted Later Crusaders were successful against Kieran’s Japanese, and Grant’s Ayyubid Egyptians. It was a really enjoyable day and there’s talk of more games too; hopefully we can get a campaign underway.
Conquest 2017
14 November, 2017
A few months back I decided to go to Conquest 2017. I’d not had much chance to play DBA this year and I was keen to get along, as I’d enjoyed the year before a lot. It also seemed a good motivation to get some painting done. Very kindly Keith, the organiser invited me to stay at his place for the event, something I really appreciated.
As I said in my last post, I’d chosen both my armies as a motivation to get more figures that I already had painted. However, I was rather slow getting them finished, and didn’t get much practice before the event. Fortunately, I was able to get a couple of games with Mike the Sunday before. this allowed me to try out the Normans in DBA, where they got a lucky victory against Mike’s Ottoman Turks. And it allowed my to try Pyrrhus’s army against them in BBDBA. This was invaluable, as I’d organised the army in such a way that it wouls have struggled, I’m sure, but with the suggestions of Mike, it did very well.
I’d organised the army as follows:
- Command Wing (medium PIPs): 3 x3Kn (C-inC), 3 x LH, 4 x 4Pk, 2 x Sp, 1 x Ps
- Centre (high PIPs): 8 x 4Pk (cmd), 3 x El, 2 x Ps
- Holding Wing (low PIPs): 3 x Cv (cmd), 4 x Sp, 3 x 3Ax
The theory was that the elephants would help the pikes create a breakthrough in the centre (hence the high PIPs); Pyrrhus would have the next best PIPs with much of the cavalry and the Oscans with the best BGo troops would hold one wing.
Against the Ottomans the Oscans were defeated as they had no BGo to anchor on, the centre did not make much progress, and the elephants were destroyed by LH, nor did Pyrrhus. With Mike’s suggestion I rearranged them as follows:
- Command Wing (High PIPs): 3 x3Kn (C-inC), 3 x El, 3 x LH, 2 x Sp, 2 x Ps
- Centre (Low PIPs): 12 x 4Pk (cmd), 1 x Ps
- Holding Wing (Medium PIPs): 3 x Cv (cmd), 4 x Sp, 3 x 3Ax
The centre was intended to be solid and just trundle forward, while I sought to win on the wings. Pyrrhus, in particular, had a potent mix of elephants, knights and light horse.
- Friday games
On the evening I arrived I had a couple of games with Keith. I used my Normans and he used his Samurai. In the first game Keith experimented with 6Cv. My archery destroyed them with exceptional dice. As a result of this Keith changed to a CP instead, and in the second game it was his turn to see his single archer do wonders. We finished a game a piece.
- Saturday Morning (Ancients DBA)
Pyrrhus had a dreadful morning; he died against Jim’s New Kingdom Egyptians and again against Gordon’s Seleucids. However, both of these were close games, and with a bit more care I might have won. The last game, against Keith’s Carthaginians, was more humiliating. Clearly concussed from his two earlier battles, Pyrrhus failed to roll more than 2 PIPs for the entire game. As a result he sat facing the Carthaginians until in desperation, after his camp was sacked and his cavalry wing was disintegrating that he sent his pikes in an attack against the Carthaginian foot. This failed, and the Carthaginians won a victory without any of their army breaking.

Pyrrhus attempts to break the Carthaginian foot to no avail (though he doesn’t die this time — photo taken by Keith).
- Saturday Afternoon (Medievals DBA)
For the afternoon competition my Normans had Viking allies and were:
4 x 3Kn (cmd), 2 x 4Bd, 3 x 3Bw; 2 x 4Bd and 1 x 4Bw (allies).
The afternoon saw the Normans facing Brian’s Rajputs. I made the mistake of having the Rajput fort, and the BGo terrain on my baseline. I abandoned the idea of trying to take the fort, and was cramped as a result. In the end I killed the elephant C-in-C with mine, but that was on the turn that my army broke.
The second battle was against Ben’s Yi Koreans. The Koreans occupied a wood on my left flank and proceeded to chip away at my knights that milled around in range. Meanwhile on my left flank my archers advanced out of a hamlet into firing range of the Korean cavalry. Their response was to charge, which largely failed, and saw them take casualties. They came back, this time with their general, and were again defeated, giving the Normans a lucky victory. If they’d waited a turn and attacked with their general, they may have had more success (then again they’d have been shot at). Credit should go to the Viking archers, who shrugged off an extended rocket barrage by the Korean artillery.
The final battle was against Jim again. His Free Company were not too different from the Egyptians, having fast blades and archers, but knights instead of chariots. The fast blades proved deadly, getting stuck into the Vikings, who had occupied a hamlet. They destroyed them, with the support of some knights, before my archers could break up his main line of battle. After that, they were able to roll up my right flank.
Overall, I won only one game that day, and finished very near the bottom of the table. However, the points system favoured results over a draw, which is a system I think is good: 8 points for a win, 1 for a loss and 0 for a draw. Losses and draws got points for enemy destroyed too.
- Sunday (Ancients BBDBA)
After such a bad showing on the Saturday, I didn’t approach the BBDBA with much confidence, especially as I was yet to win a game of BBDBA. My first game was against Keith’s Early Asiatic Successor army (Demetrius). I’d faced it last year with my Carthaginians. This time, however, I was the attacker, which meant I got to react to the entire deployment of Demetrius. This proved very useful, as the Oscans had the chance to avoid Demetrius’ xystophoroi and to contest a hill on the right flank.
In the centre my pike general deployed to the right of the opposing general, and on the left Pyrrhus deployed in reserve to meet the bulk of Demetrius’ elephants and knights. The advantage of deployment was complemented by favourable dice, and in the centre the pike to the right of Demetrius’ central commander was destroyed; he was soon flanked, but never flinched, and the centre remained otherwise static.
On the right, the Oscans hoplites withstood elephants and elephants successfully, and the auxilia were able to overcome opposing peltasts in order to start to threaten the cavalry general of that wing.

The Oscans approaching Demetrius’ left flank. Their hoplites face pike and elephants thoroughly undaunted.
However, it was on the left wing that the battle was decided. Demetrius had tried to change elements to avoid his knights facing elephants, but this left a hole in his line, and Demetrius himself had had to leave the reserve to join the battleline.
In the initial clash elephants faced off; one each fled, which gave the opportunity for one of Pyrrhus’ to attack Demetrius himself. This was the decisive combat, and the elephants finished off the commander giving Pyrrhus the advantage. He continued to exploit this by eventually overcoming pikemen facing his hoplites, as well as other casualties that I don’t remember now.

The crucial point on the left flank; elephants have fled in both directions, but one of Pyrrhus’ is able to turn on Demetrius himself.

The same point from a different angle. The pikes facing hoplites can be seen.
Meanwhile, some of Pyrrhus’ pikemen, dressed as Persian levy pike, had been defamed by Demetrius before the battle. Proving him wrong they eventually defeated the opposing pike (with cavalry support), breaking Demetrius’ second command and giving me my first BBDBA victory.

The beleaguered Demetrian pike general remains steadfast, but to his right his command collapses as Tarantine cavalry move up to overlap another pike block.
In the second battle I faced Brian’s Classical Indians. In this battle his fort was less dominant. However, when I looked at the terrain I considered trying to fight for the woods on my left with the Oscans. However, they would then face HCh, while the elephants of Pyrrhus’ command would be closer to his psiloi. I had the wings the other way around, which left me with only two psiloi to try to control the woods.

Pyrrhus faces Classical Indians.

Pyrrhus’ deployment from another angle.

And another angle.
As the battle unfolded, the Indians attempted to redeploy radically to face my deployment, and I tried to get across the board rapidly to trap his chariots behind his elephants and his line in disarray.
The plan met a hitch when the two psiloi were quickly destroyed by opposing archers. The elephants now risked being shot at and Pyrrhus and his knights were a cautious distance to their rear. In this unfavourable situation, the elephants decided to advance. They were met by opposing elephants, including the C-in-C. The odds were not good, but the dice gods favoured them, and I 6-1ed the C-in-C, doubling him. If Brian used his +1 the damage was worse, as he still died, fleeing into a HCh. He chose to die on the spot. All but one of my elephants was quickly destroyed, but the last one hatched a devilish scheme; attacking an elephant that had fled to the baseline. The hope was to lose, as he’d flee into a sub-general! He succeeded in this low devise, and in true Pyrrhic fashion succeeded in demoralising the command!

Just before contact. The elephants are almost in contact, while the Oscans are still a turn or two off. The game mat is one that I got on eBay from Poland. I’m pretty happy with it. The picture is another of Keith’s

Another picture by Keith of the same point. The psiloi can still be seen in the marsh on the left flank. The central command has a couple of elements of pike in reserve to replenish the back rank of the pike block; they are struggling to keep up.
My two remaining commands were now facing two headless chicken commands and the low PIP one. We ran out of time, but it was still closely balanced, although the Oscans were starting to look dangerous. All in all a great battle with its chaotic elephant battles!

The end of the battle with the Oscan auxilia looking dangerous. Even the camp was on the move!
For my last battle I faced Andrew’s Akkadians. I was the defender, for the first time in the competition. I deployed anchored on two patches of boggy ground. It was an interesting matchup against fast pike, and the Akkadians swept in very fast. However, the Epiriots proved too good, beating them at every point. In particular, the Akkadian horde on the hill facing the Oscans proved absolutely cowardly, and in the centre the Akkadian general, facing hoplites, was flanked and when the dice came up equal, the solid foot had the advantage and won.

Pyrrhus facing off against the Akkadians.

The Akkadian deployment.
However, it was Pyrrhus, in the only battle of the day he saw combat, that destroyed multiple elements. He came up into the battle line as it extended while his elephants tried to avoid facing psiloi. His inspirational leadership routed the enemy before him, and he took his second victory of the day.
This was my first victory against Andrew in a series of encounters that would have gone back to 2009, so I was pretty pleased. I suspect the unfinished bases of his troops may have demoralised them.
- Summary
The competition was a lot of fun. All the games were played in good spirits. I learned a lot about how hamlets work and came away considering a number of projects. Perhaps one day my Norse Irish will have a Brian Boru CP, or I’ll make a CWg for some Communal Italians. Also I will have to make a hamlet.
I’d like to thank Keith for organising the competition and for having me stay. The venue, the Woolston Club, was also really pleasant. I miss anything similar, to my knowledge, up in Auckland. Finally Comics Compulsion deserve thanks for running the overall competition.
Conquest, part 3, Sunday, BBDBA
10 November, 2016
The Sunday was three BBDBA games. Points were given for breaking commands and for winning.
- Game 1: Mark B (Palmyrans)
With my high aggression I was unsurprisingly the attacker against Mark’s Palmyrans. Mark went for an open battlefield with terrain only on one wing.

Palmyran deployment.
With a preponderance of cavalry facing my left wing, I thought I could meet it with Gisgo’s light horse and psiloi. Unfortunately, I forgot that light horse now can be double ranked, in which case they are 3-2 against psiloi.

The Carthaginian deployment.
The plan was that Hanno on the left wing would overpower the foot facing them, while Hiero held the centre and Gisgo the right wing.
Unfortunately, the dunes on the right wing hampered the cavalry outflanking, although they did destroy the three 3Bw on that wing. However, good shooting in the centre saw Heiro’s warband and cavalry shot, while Gisgo’s troops fought like demons to survive.

The Palmyrans on the Carthaginian right wing.
Despite their bravery, the centre collapsed, as did Gisgo’s command. In hindsight it would have been better to have had Hanno and Gisgo swap positions. Gisgo could have contested the dunes with his scutati, the LH could have stood up to the cataphracts, and the psiloi might have stood up to the bow, if they moved quickly. Hanno’s elephants would have worried the cataphracts, and the spear and cavalry could have supported them.
Mark also suggested that I might want to rethink my commands around two commands of 13 and one of 10. I’d certainly give it some thought.
- Game 2: Keith (Asiatic Early Successor)
Against the aggressive Demetrius the Besieger, I was still the aggressor, but as he was littoral too, I had him worried that I might do a littoral landing.

The two armies arrayed.
Demetrius placed his elephants in the centre with large pike blocks on either side. Light troops and cavalry were on his wings.

Demetrius’ left flank, wary of ship-born invaders.

Demetrius’ right flank with xystophoroi and cavalry.
Hanno thought to use Gisgo’s psiloi to neutralise some of the pike and his light horse to face the knights. He would take the right flank and attempt to break through the pike with warbands supported by elephants.

Hanno’s deployment on his right flank.

Hiero in the centre and Gisgo on the left again.
Gisgo soon discovered that his scutati were outflanked by the light foot in reserve. The bad going on the right flank again slowed up the attack by Hanno’s cavalry. However, the psiloi did very well. Destroying half a pike block and stopping them from advancing. The scutati were even more resilient than in the last battle and scorned to be outflanked. Gisgo, despite being outclassed had his opposing command on the back foot. Hanno’s elephants and warband were doing good work on the right, but his spear did not like the elephants they faced, and Hiero was wilting before the pike.
Nevertheless, in the turn on which my commands broke, I was one of breaking two of Demetrius’ commands. The warband just needed to destroy another pike block, and I think that Gisgo was threatening the C-in-C having outflanked him.
Despite Gisgo’s heroics, I think in hindsight I should have gone for the same order of battle as I should have used against the Palmyrans. Gisgo would have been more effective on the right and Hanno on the left.
- Game 3: Greg K (Eastern Patrician Romans with Later Pre-Islamic Arab Nomad Ally)
Surprisingly against Greg’s Romans I was the defender. This time I deployed with Gisgo on the right facing bad going that had congregated there. Hanno was on the more open left flank.
I took quite a few pictures of this game, so I’ll let them provide the commentary.

Carthaginian deployment.

The terrain facing the Carthaginians.

The Roman right flank with pre-Islamic Arab allies.

The Roman left flank with legions, warbands, archers and psiloi.

The Roman centre with auxilia, knights and a light horse reserve.

The Carthaginians surge forward.

Gisgo’s psiloi make a double move to contest the woods.

Gisgo’s scutati enter the woods.

The Roman auxilia move to meet the elephants.

Hanno’s cavalry advances to face the Arabs.

Roman knight face Hiero’s spear.

The centres about to clash.

Psiloi flee.

The auxilia are swept away by the elephants.

The Arabs are under pressure, but the Gallic warbands are split, losing mutual support.

Hanno’s spear and warband are ridden down by knights.

The Roman light horse rout the elephants.

Gisgo’s command is under pressure.

Hiero resists a flank attack, but the Carthaginian centre is gaping.
Hiero was eventually destroyed while flanked and his command broke, as did Hanno’s. I was looking to inflict one more casualty on the Roman central command to break it, but the gap created by the two elephants was one I couldn’t fill.
I came last in this competition. I didn’t get any points, as I failed to break any commands, though I got close in both my last two games. Despite failing to win, I enjoyed the games, and I learned a lot about how to play BBDBA.
Conquest, part 2, Saturday, DBA
8 November, 2016
I took a morning flight to Christchurch, which all went smoothly. I even saw Comics Compulsion, the shop that hosts Conquest, while catching a bus from the airport. The first day was six games using ancient armies for the first three and medieval for the last three.
- Morning games (Ancient armies)
My Carthaginians were my army for the morning. With an aggression of 4, I was pretty sure I’d be the attacker most games, and I was. I fielded 2 Cv (cmd), 1 El, 1 LH, 3 Sp, 2 4Wb, 1 4Ax and 2 Ps.
- Game 1: John (Polybian Romans)
As expected I was the attacker against John, who was borrowing Keith’s Polybian Romans. I should have made him deploy on the side with the wood. It proved to be a handicap to me.

The Carthaginian deployment is cramped by a large wood.
The Romans advanced rapidly, and I lost my Numidians by foolishly trying to get them in front of the woods when before the Roman cavalry arrived. My troops fought doggedly on the right flank, and I started to win on the left, but that needless loss of the Numidians cost me the game, which was a 3-5 loss after the warband was broken, and the auxilia and a spear.

The end, after casualties on the right flank, but success on the left.
- Game 2: Mark B (Palmyrans)
I was the attacker again against Mark’s Palmyrans. I was nervous of his cataphracts, but he was even more nervous of the elephant. He deployed near the camp and spent time manoeuvring. I rushed forward, reasoning that I had more hope of catching him before he’d finished his manoeuvres. As it turned out, I won a decisive victory in record time, as his general went against Androgeus while overlapped. 3-2 odds with knights against warband is good odds, but with is back against the wall, Androgeus 6-1ed the unfortunate general and added another head to his collection.

The Palmyran deployment.
- Game 3: Jim (Greco-Bactrians)
My last game of the morning was against Jim’s Greco-Bactrians. In this game I was able to extend my left flank enough to destroy three elements, but in the last turn I couldn’t find any more there, and my centre was buckling to the pikes they faced. I lost again, 3-4.

The Greco-Bactrian deployment.
- Afternoon games (Medieval armies)
In the afternoon I deployed my Komnenan Byzantines. These are similar to the Carthaginians in their use of mercenaries. They differed in having aggression 1. I fielded 4 Cv (cmd), 4 LH, 1 3Kn, 1 4Bd, 2 4Bw.
- Game 4: Gus (Mongols)
First up I was the defender against Gus’ beautifully painted Mongols. I achieved a very rapid victory; 4(G)-1, I think. I can’t remember the details, except that my dice were very strong.

The Mongol deployment.
As the game was over so fast, we had a rematch. Again I was the defender. Again it was a quick battle, but this time it might have gone Gus’ way, but my monks clearly were praying harder, as my dice again stayed strong. At one point our generals were each overlapped, but it was mine that triumped in a 4(G-2 victory!

The Mongol rematch.
- Game 5: Brian (Medieval Scandinavian Union with Medieval German ally)
My next game was against Brian’s Medieval Scandinavian Union with Medieval German ally. I was the attacker this time, and Brian had to use a waterway. I knew Brian was a tough opponent, and when I saw he had a party set aside for a littoral landing, I stymied it with my light horse, that deployed up against the waterway in two columns.

The light horse patrol the beach.

The landing party of 3Bd and Cv off to the side.
The landing party had to deploy behind the main body of the Scandinavians. Low PIPs made the initial contact slow, but when it came the Byzantines continued to roll high in combat and broke an element of 6Kn, and then another. It was 3-0 to me. However, getting the final element was not easy, and when Brian got his spearmen into combat I lost both the bow. In the final turn I finally got my fourth element, only to lose my knights (I think) to a 6-1 going against me. The battle ended as a 4-4 draw.
- Game 6: Keith (Wars of the Roses English)
I was the attacker in my final battle, against Keith’s Yorkists. Tired after the last battle, and bereft of inspiration in the face of unattractive terrain, I nevertheless attacked (the artillery made it hard to sit back). I foolishly got my light horse destroyed and lost 0-4.

Facing the English.

The Yorkists.
I enjoyed the day greatly. I was very pleased with the way I played against Brian, who I’d played before some years ago. He finished first. I was surprised to finish third, as I had only two wins, but these were big ones, and all but my last battle were hard-fought.

