DBA Day at the AWC
10 October, 2016
Sunday a week ago there was a very successful DBA day at the Auckland Wargames Club. As it led to other projects being planned, I’ve not got around to writing up any report until now. The format was friendly games; no set armies or points. I had five very enjoyable games.
- 1 – Marian Romans v. Alexandrian Imperial
My first game was against John, whose army is still being painted, so he borrowed figures from me. I’m pleased to say that they knew who their paymaster was, and fought accordingly!

A bird’s-eye view of the Marian Romans.
I was the defender and laid down some Marsh and ploughed fields (I’d just made some new terrain; I realised later that Marsh is not valid for Arable armies). Appropriate to the weather that day the fields were boggy.

The Romans, complete with an elephant.
![[a666: The Alexandrian deployment.]](https://hesperiana.files.wordpress.com/2016/10/a666.jpg)
The Alexandrian deployment.

The situation at the end. Not a single companion cavalryman left!
The surprising resilience of the Kappadocians secured a quick victory.
- 2 – Prefeudal Scots v. Vikings
The second combat was against Kieran’s Vikings. Again I was the defender and went for a marsh and a wood, which ended up being in the same corner.
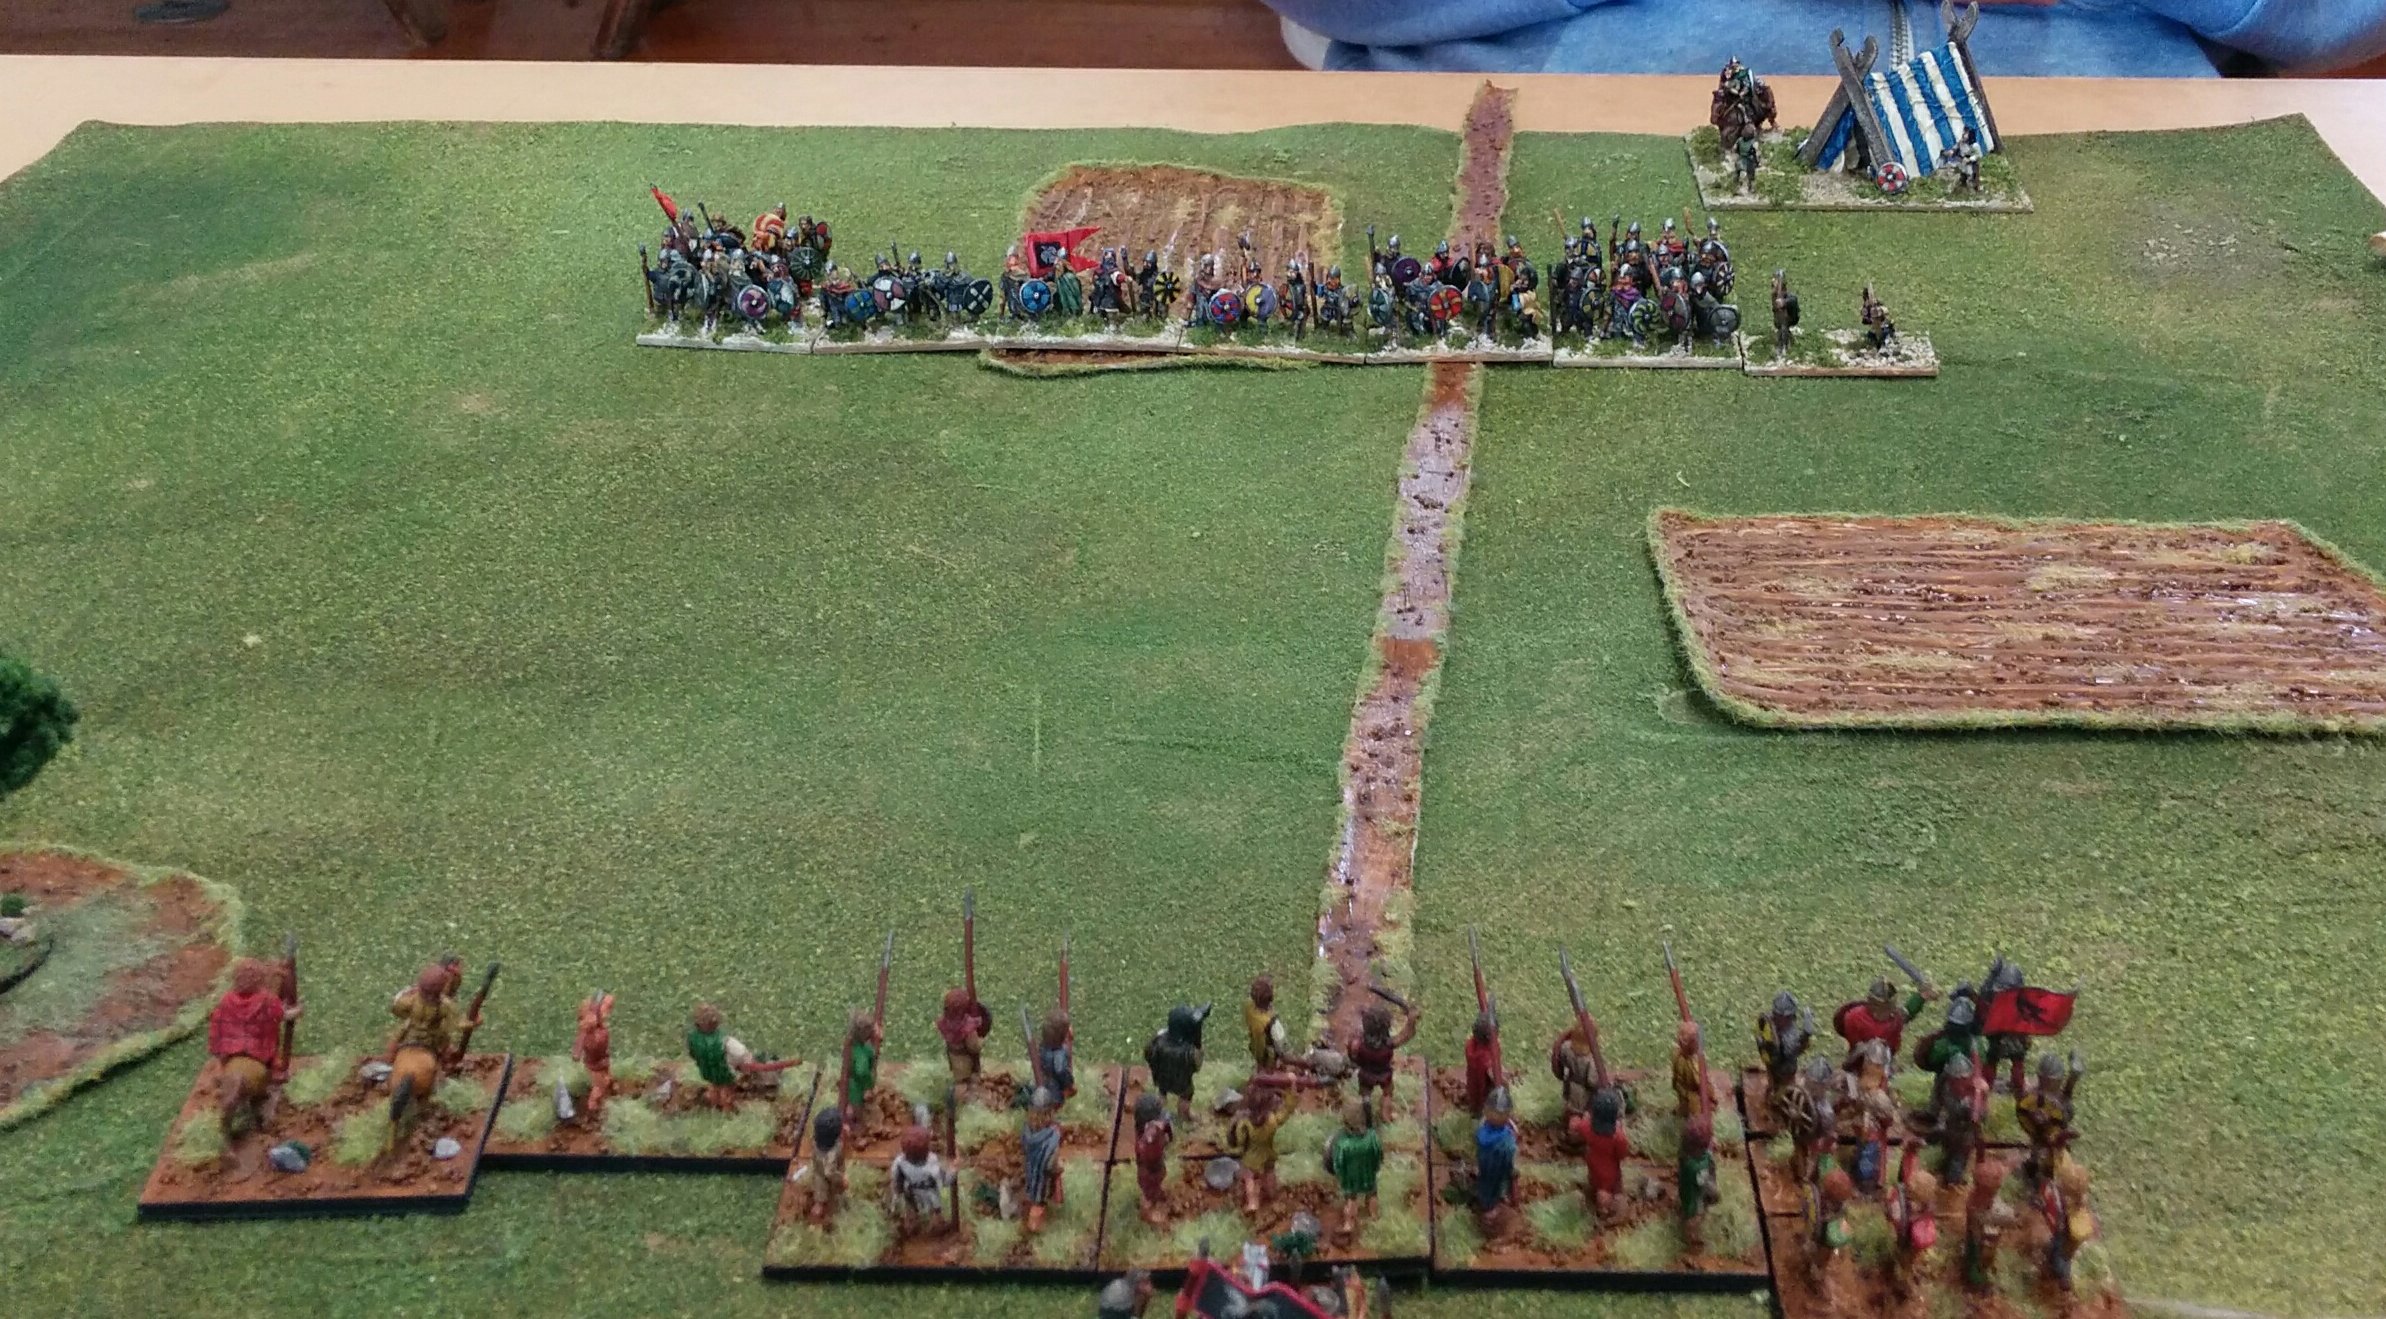
The Viking invaders of Scotland.

The defenders of Scotland (helped by some friendly Vikings on their right flank.
The battle was a close one, where the Scots won first blood, when the Galwegians broke an element of Vikings. However, the centre was somewhat of a stalemate, with a lot of toing and froing. On the Scots’ right their Viking allies did good execution and contributed to a close-fought 4-2 victory. Terrain and the greater mobility of the Scots were significant factors.

The finals situation; the wood has saved the fragile Scots left flank. Their Viking allies have hared up the field on the right flank, while a schiltron has collapsed in the centre.
- 4 – Later Macedonians v. Polybian Romans
After lunch I faced Joel’s freshly painted Polybian Romans. I decided I really should get my Later Macedonians out to meet them. Naturally in the face of unprovoked Roman aggression I was the defender again. I took two large terrain pieces to anchor my flanks and restrict the battlefield to the advantage of the phalanx.

The valiant Macedonians line up to hold Roman depredation at bay.

Scurrilous Romans set on spreading tyranny.
The battle was close fought, with the battle going in the Romans’ favour on their left flank, while the Macedonians secured the advantage on their own left flank, destroying both elements of Roman velites. However, it was the steadfastness of the Macedonian blueshields that secured victory; despite being flanked by Roman cavalry they repeatedly refused to break. In the centre the Galatians made noble execution of Roman legionaries and the whiteshields (leukaspides) broke their opposing legionaries.

The situation at the end; the Macedonian right flank is lucky not to have broken after their light horse fled, but the centre has triumphed.
- 3 – Later Macedonians v. Polybian Romans
Actually, there is a report that prior to this battle the Macedonian general was troubled by a nasty dream in which his thureophoroi proved his undoing. Romans report that this was an actual battle, but the more reliable Greek chronicler disagree (the battle just described was actually our second, as the first was over so fast!). The Macedonians defended again. Their terrain was too small to constrain the battlefield.

The Macedonian deployment.

The Roman deployment.
The Macedonian thureophoroi attempted to defeat the Roman velites and were disgracefully defeated (they are prone to this; witness their routing by Spartan artillery). Philip V tried to stabilise things, but was defeated himself; the battle was over without the main lines having contacted.

The final position. The thureophoroi were quickly routed and Philip was flanked and defeated. There was a scary big hole in the Macedonian line.
- 5 – Prefeudal Scots v. Carolingian Franks
The last battle was against Mike’s Carolingian Franks. The Scots had got on their boats and visited France. It didn’t go well for them.

The Carolingian Franks. The red beads denote those that can dismount.

The Prefeudal Scots.
How the Galwegians got to be in the centre facing knights I don’t remember (I think I deployed and then moved the line along a bit to fit it in the legal area and didn’t check who was facing who. Unlike the bold Kappadocians at the start of the day, the Galwegians didn’t produce an upset against the Carolingian commander. The schiltons were under pressure and collapsed, but not before a few knights had fled in the face of the Scots cavalry.

The final situation after the Scottish centre had collapsed.
All in all, it was a great day; there is another account of it here, and there are plans for more DBA action there soon.
Pokeno Invitational
7 February, 2015
Well, it’s been a while since I’ve posted anything. A few weeks back I had my first gaming of the year, a chance to catch up with Joel and John and to see Keith for the first time in a good long time. Keith has already posted about the day, which was really enjoyable. I lost most of my games and at the time complained of poor dice, but on reflection it was really poor planning — plans that depend on good PIP dice aren’t really plans, but endeavours in blind luck! Nevertheless, it was a lot of fun and it was good to see armies out on the table that haven’t been used in a while. My Comnenan Byzantines were used twice, as were my Normans (as Early Crusaders). My Polybian Romans and Late Carthaginians were also used (oddly we had three games going simultaneously first with the Romans on one side each and then the Carthaginians). Pyrrhus’ army, Prefeudal Scots and Saxons completed the turnout.
After that day, John and I continued at my house with a game of Song of Blades and Heroes. It was a chance to use the Gnolls and some terrain. The fight at a bridge resulted in the Gnolls losing decisively against some Normans. The bridge was a bottle neck that probably favoured the superior firepower of the Normans, though the Gnolls did get to achieve a few consolation kills.
The gaming renewed my enthusiasm for painting, and I’ve got my four blocks of Successor 4Pk closer to completion, but other projects still manage to finish before them!
On the Painting table
23 March, 2014
When I last wrote, I said the next project would be to paint seven 4Pk for my successor armies. Well, they’re over half done, but others have jumped the cue.
- Rebasing
The biggest project has been to rebase all my old armies. I had started this before I went to Adelaide, and a lot of my HoTT elements were all but done, just waiting for the flock. The impetus to restart this project was a desire to see how knights and spears compared under DBA 3.0. This got me redoing my first two armies, the Normans and Anglo-Danish. I also flocked the HoTT elements while I was at it.
Next, I rebased the Welsh, Irish and Vikings. This has taken quite a while, and is now almost completed. I’ve innovated by using No More Gaps to hide the bases. It adds more time to the job, but is worth it.
In the process of rebasing I got enthused with my Dark Age armies and the potential to use them for HoTT. I’ve now got the Scots Isles and Highland army complete again (it was demobbed for SBH figures. This started with the plan to create a Thegn general for the Prefeudal Scots so that they could have a 4Wb general with rear rank support and flanked by pike, something that’s likely to tear holes in most lines of foot. When I learned that the Scots Isles and Highland army is going to have a lot more choice in DBA 3.0, I decided to paint up the four elements of 4Bd I needed to get this back on the table. I’ve also painted a few more archers in mail to make their 3Bw more imposing. I also repainted the 5Hd.
So that’s some of what’s been jumping the cue for painting. I’ve also done a few HoTT elements, some Prefeudal Scots and Irish Lurkers — skirmishers on a 40×30 base along with a dog each. Finally I did a Cleric element — three medieval monks. Magicians and Heroes will follow.
- Song of Blades and Heroes
I’ve also been painting a few figures for SBH, actually quite a few. I’ve now finished thirty foot, and three mounted knights and a Hippogriff rider are close to being done. Most of these are Essex early medieval figures, dismounted Norman knights and Norman spearmen and archers. This adds some useful variety to my SBH range, but also is a way of getting started on painting some of these figures for an Essex Norman army. The rest are six halflings, two mailed Highland archers and a Druid from the Tabletop range. I’ve got more figures from Tabletop’s fantasy range. They’re a little larger than most of my figures and are very much ‘adventurers’, as they all have backpacks and other equipment. The wizards won’t quite look right in HoTT, but will be useful for SBH.

A halfling crossing the new bridge over the new stream with some of the assorted terrain additions doted around.
The other big activity for SBH is making terrain. I made a river (or a stream) using No More Gaps on a T-shirt. I rounded this out with a small bridge and then added a few tokens for treasure — chests, barrels, etc. I’ve done a tent and a small hut. And I’ve also made some hedges using Scotch Brite on iceblock sticks. The next stage for SBH is really dungeon tiles when I get a chance.

Another angle.

He hasn’t seen the two dragons, though!

Really just seeing if the timer makes a difference with the camera. I think it does.
- Plans
Those seven elements of pike should be finished next. Then I suspect I’ll be working on HoTT stuff: heroes, wizards, but also a dwarf and an elf army. More fantasy SBH figures may get done as well. I’ve started putting together a 3Cv for my Welsh; the North Welsh can have a South Welsh ally, who has to include the general element. I find this a bit odd — Welsh with two 3Cv seems too much. I might also work on the Normans, but I reckon the elves and dwarves will be more attractive.
Recent Gaming
23 March, 2014
I’ve not kept up with reporting games I’ve played. Part of the reason for this is because I’ve only got a camera that is not all that satisfactory. I’ve taken better photos with my phone than with the small camera I’ve tried to use. The tripod is broken and can’t support the large camera I’d used for my gallery shots.
The other reason I’ve not been active on the blog is that I’ve been too busy painting (more in the next post). Anyway, I’ve played quite a lot recently, and had some very good luck. Here are some photos that aren’t too blurry.
- Battlecry, 16 Feb 2014
Last month I got along to Battlecry for a day of demo DBA games. We got a bit of interest and should be running a competition next year as a result of this. We played DBA 2.2, as noted earlier on MEDBAG.
My first game was against Joel, a historical matchup of my Early Seleucids against his Classical Indians.

Early Seleucids face Classical Indians.

The Indians up close (some are hidden behind the trees.

The Seleucids.
I should have been in serious trouble as the Indians came around my left flank in large numbers. However, they were obviously unfamiliar with scythed chariots, as mine proceeded to tear them to pieces. I came away with a lucky victory.

Chaos on the left flank.
Next I faced John, who’d just finished his Celtiberians. I used my Gauls.

Gauls v. Celtiberians.

View from the Celtiberian camp.
I managed to meet his warband with my cavalry and used this to my advantage in a battle on a narrow frontage.

Gallic cavalry triumphant.
I then faced Mike, who used my Carthaginians. I took my Syracusans. As we are both littoral, this involved a waterway, which ended up to my back. Mike went for a littoral landing.

Syracusan v. Carthaginians.
I hurried to advance to reduce the potential for the littoral landing party to make trouble. I was able to sack his camp (the crucified Syracusan was a provocation!) and used my longer line to outflank his elephants. Another victory.

The Tarantines return from sacking the camp.
I think we played some more games that I didn’t take pictures of. The last on my camera was my Syracusans against John’s Celtiberians. I don’t remember for sure if I won, but I think my luck was pretty strong, and I used my advantage in cavalry to compensate for the vulnerability of my spear to his warband.

Syracusans v. Celtiberians.
Unrecorded is our final BBDBA game of Carthaginians and Celtiberians against Romans and Spanish. This was officially a draw, but I’m sure the Romans had the edge when we stopped.
- Auckland City Guard
Since then, I’ve mostly played DBA 3.0. Joel’s visited after work a few times, and I’ve got to the City Guard again. We’ve had a lot of fun trying out his Aztec hordes of doom, and we tried out a number of permutations of knights against spear.
From memory the time before last we played: Normans v. Anglo-Danish, Early Crusaders v. Comnenan Byzantines, Aztecs v. Prefeudal Scots and Vikings v. Anglo-Danish. I think there was an Aztec v. Early Crusaders too.
Last weekend I took some photos:
Our first game was his Aztecs against my North Welsh.

The Aztecs meet the Welsh.

The Welsh with their South Welsh ally.
The South Welsh cavalry got in the way of his archers and the spearmen got flanked; however, the Welsh had been making progress against the important Aztec elements.
Next we played Ptolemy against Lysymachus. The Ptolemaic army was quite different from what I expected. I tried a littoral landing of three auxilia in a line with side edge contact with the waterway. It seemed legal and threw Lysimachus’ plans to meet this treat. I got a narrow victory in this battle.
We then tried Carthaginians against Gauls.

Carthaginians drawn up against Gauls.

Carthaginians with a random stack of skulls next to their camp.
The Carthaginians won in a battle stacked in their favour (though elephants don’t quick kill warband any more). Our final battle was the Carthaginians against Aztecs. I didn’t take any pictures of this. The Carthaginians took only one elephant, I think. They were lucky in a battle between their two 2LH and the Aztecs two 2Ps. I killed both of them, but had I not, my back was to a wood, and I’d have been very much at a disadvantage.
A couple of games
15 June, 2011
I got a couple of games last month at the Auckland Wargames Club on a Thursday night. There were four of us there playing DBA. Geoff was trying it out with Philip, and they had a couple of Polybian Roman encounters against New Kingdom Egyptians. I played John twice. He used my Seleucids and I went Carthaginians. I went for maximum elephants and two psiloi / two warband. I won both games as the attackers. In both John had a central BGo hill. In the first I occupied this with Spanish and Gauls. My Gauls saw off his mounted who attacked on the flank while the Spanish got the scythed chariot. I think an elephant took out some pike (aided by two overlaps and a good die-roll).
In the second game I had my camp behind a swamp, but didn’t position any troops near it and John redeployed his psiloi and rushed them across on the first turn to sack it, ouch! I dithered a fair bit with redeploying mounted to retake the camp before realizing it was hopeless. I then advanced on a wood that had some pike in it (courtesy of the swap). These didn’t like meeting warband, but before this, I’d survived a SCh attack on my LH that was very lucky. I think I also got a 3Kn to gain a second lucky victory. Good fun! Good to see the Seleucids were so loyal to me!
Today I introduced my brother to DBA, on holiday from England. He’s a keen gamer, but has only played board games and computer games. I think he enjoyed the game. He wanted an army with horses, so I suggested Komnenans. I took Pre-feudal Scots, as the only near contemporary opponent that was nicely based (I forgot about the Goblins!).
Chris was coached by me and went for a flanking raid on my camp. My LH got the rearmost of his LH column and a Ps stopped them for one turn before they attacked and doubled it. Meanwhile on my right flank my commander and two warbands were facing a Norman mercenary knights and an auxilia with psiloi support. It see-sawed a bit, but when low PIPs kept the centre of the Byzantine army back, I was able to flank the knight with a spear, only for it to recoil me. I then attacked the knight with the spear (I had only one PIP). It died, but turned the knight, freeing the Scots commander from its ZOC and allowing him to get the psiloi that had gone for overlap support on the warband.
The camp resisted the attacks of the Pechenegs valiantly, and I got the auxilia with the warbands and the general flanking. It was 3-2 to me. However, in the last turn, after an attack on the centre had not done much of consequence, the Byzantines were able to overlap a spear that fell to the Varangians (the spear had got a stick to their disadvantage), and the two warbands were swept away by the knights. However, the camp continued to resist the Pechenegs and the game finished 5-3 to the Byzantines, repelling this unrecorded Scottish crusade (one of those that forgot what side the Greeks were on!).

The final position: the Scots needed heroism from their warbands to equal that shown in the camp. They might have taken out a cavalry on their left flank if they'd lasted another turn.
Pre-feudal Scots rebased
13 March, 2011
I’ve updated the army page for the Pre-feudal Scots. They had been rebased a while back, but I’d not got around to doing the finishing flocking. They were needed as a stand-in army for Greg at the IWC, which was the spur to do the flocking. They look much improved I feel.

The new look Pre-feudal Scots.

The old-look army.
I’d like to redo the rest of my Early Medieval armies, but I can’t see it happening at the moment. I really need to finish the Normans/Anglo-Normans to make it worthwhile, and I just don’t have the time. The only project I might get done is painting a couple of Seleucid knight elements to allow me to field that army (with generic Hellenistic pikes and light foot).
Painting Progress
1 September, 2010
Last month was my first back in painting since the overseas trip in June and July. A lot of my effort has been going into rebasing, a project that is still not even halfway completed. I started work on my early feudal Essex figures, rebasing what’d I’d already done. I then prepped the remaining figures. However, though I’ve got a couple of elements of knights almost complete, I’ve more or less decided not to continue with these, but to go back to classical armies. I also rebased a whole lot of goblins, allowing me to use them as pseudo-Ghaznavids and Samanids. This involved a small amount of painting. I’ve also started rebasing my Pre-feudal Scots, who are now just waiting for flock, a job that seems to take a fair amount of effort to do!
I’ve got fairly skilled at rebasing. I’m lucky that I used PVA to glue the figures to the base. I soak the bases off in shallow water and then brush the old sawdust flock off the bases in water; doing this over the sink the last time made things a lot faster. Besides using MDF bases and a new basing mix, the rebasing allows me to be more careful about positioning the figures, trying as much as possible to keep the ‘hands inside the bus’.
The other project for this month was completing the Komnenans. These are now only waiting on a 2Ps, which Steve kindly donated, as I underordered, and a 4Sp, as well as a couple of figures for camp followers. This is the last Outpost army I’ll do, as I find them quite a lot of work to paint. The variances in scale between figures also offends my sensibilities. Therefore, I was very happy that I was able to sell the two other Outpost armies that I’d bought. It’s good to think they may actually get to see a wargames table.
Shifting the two unpainted armies spurred me into a frenzy of reorganization. I have a box with about sixteen small drawers on it that each can hold the figures of an average army. This had filled up last year, and new figures were in various boxes, recently sorted into a filing box. This wasn’t terribly effective, as a lot of what was in the drawers was never getting looked at. I’ve now shifted all the fantasy figures to the box and filled the drawers with the historical figures. At last the figures that I’m most interested in, the classical ones, are easily accessible.
This reorganization, in turn, got me going prepping the classical figures (which is why those feudals got filed again!). I’ve now prepped my Southern Italians (Bruttians, Campanians, Apulians and Samnites). This involved drilling hands for a few hoplites, which thankfully went much better than my first efforts on the Komnenans. I made some hoplon-style shields for their cavalry using green stuff and some dark age round shields. Getting the green stuff out got me going on the Gladiator phalangites, which now all have similar shields. They just now need their pikes. The last bit of serious prepping is doing the spears on the hoplites, but I reckon while I’m in this frame of mind I’ll tackle it before I do any painting. Of course, then I’ll be overwhelmed by choice. One option is to do the Spanish; they’re lovely figures, and their mounted are done (as is the camp, if they can get it off the Carthos!). But the Campanians are looking interesting, as I’m keen to see how their hoplites paint up. And then there’s the Syracusans (and all those hoplite morphs they’ll allow), the Later Macedonians (and a similar wealth of morphs), and the Polybian Romans. Which will it be? Do I have the discipline to finish one, or will I do a bit of each?
I’m planning to paint a Komnenan Byzantine army with Khurasan figures at some stage, but although I’ve finally started, and nearly finished a stand of Normans for the Latinikon, and they paint so easily and look lovely, I reckon I’ll hold off on them until I’m done with the classicals. I’ve more or less decided that I’m tired of allowing preparation for IWC next year dictate what I paint! The Outpost figures should do just fine if I don’t get around to painting a Khurasan army.
Anyway, I’ve got a graph of painting progress. I rearranged the spreadsheet it’s drawn from by excluding figures I’ve sold or consider surplus (they’re not waiting to be painted if I don’t intend to paint them!). However, this changes the quantity of figures purchased, as these purchases are as though they never happened! Anyway, that saves me from recording a negative purchase for last month, but is less than ideal, as if I sell a painted army the purchases for some time in the past will be retrospectively adjusted. All likely to be of little interest to the reader, but keeps me amused!

Figures purchased and painted by month

Figures purchased and painted by year. If I counted figures sold as a negative, this year would be the first I'd painted more than I'd purchased. Can I avoid any big purchases this year to make that still happen?
Well, it’s been a while since there’s been any progress on the King Magnus campaign, and it may continue to be patchy, but last Wednesday Joel came over for a game, and not bringing any of his figures we decided to fight the next battle of the campaign. This battle was between Gilledomman of the Isles and Angus of the Scots. Gilledomman hoped to add Strathclyde to his possessions, invading in spring with an army of Islemen (6x4Bd including the commander), supplemented by some Irish mercenaries (2xsAx) and some Highlanders (2x3Bw, 1x5Wb and 1x2Ps).
Angus met this force with a muster of his spearmen (5x3Sp(L)), his thegns (1x4Wb), archers (2x2Ps), his retinue (1x3Cv), light horse (1x2LH) and Galwegian allies (2x3Wb). Joel commanded the Islemen and I the Scots. As the defender I got to set the terrain, and it was here I made my biggest mistake. I set terrain appropriate to the last two battles (nothing like preparing for the last war!). There were two steep hills in diagonally opposite corners, a wood and a road (I would have been better to put terrain in the centre of the field, as became apparent as I deployed).
Gilledomman didn’t get the edge he hoped for. Angus opted to position his spear on a hill in front of the camp and the rest of his army next to the wood. Gilledomman deployed in a long line to meet them, with his warband opposite the spear and his bow and bonnachts opposite the woods. Angus didn’t alter his deployment in response to this.

Initial Deployment: Angus' Scots on the right and Gilledomman's Islemen on the left.
As the Islemen advanced, Angus sought to pull his right wing across to confront the Islemen blade.

Turn 1: The thegns begin to wheel towards their left flank.
Gilledomman brought his troops off the hill as Angus moved his cavalry to the left.

Turn 2: Gilledomman's troops watch in surprise as the Scots attempt to move to their right.
Gilledomman’s fastest troops, his bonnachts, advanced on the left, as the Scots continued their risky manoeuvre.

Turn 3: The Islemen get closer as the Scots continue to move to the left.
As the line of Islemen bore down on them Angus and his archers formed the right flank for the warbands that were still on the march to the left.

Turn 4: The Islemen get closer.
The Islemen now had the warbands pinned, but more surprising was the effectiveness of their archery, which destroyed one of the Scots skirmishers.

Turn 5: Ouch, the Scots' right flank gets shorter.
On the next turn the Islemen got ready to attack, but before their right flank could charge they were beaten to it by the warbands, who used all 6 PIPs to charge into contact. The first fight was crucial, if the Galwegians could drive back the Highland rabble, they would provide overlaps on the two Islemen blade; unfortunately they got a ‘stick’ result. The other two combats were very desultory (we both rolled 1s twice!).

Turn 6: A promising opportunity for the Scots comes to nothing.
With the Galwegians overlapped on both sides their future was not promising, and sure enough they didn’t stick around. The Scots were now 2 down and looking very ill. However, on the right wing their other archers were made of sterner stuff, getting a ‘stick’ against the Irish that attacked them.
")
Turn 7 (Gilledomman): Galwegians go home! The Scots are two down.
Angus retires his two surviving Wb and his retinue. His archers are forced back by the Irish.
")
Turn 7 (Angus): The Scots fall back on the hill.
Gilledomman continued his run of great PIP rolls (three 6s in a row). He boldly takes on the Galwegians single-handedly, while his Islemen flank the archers. the Galwegians fall back, and the gritty archers get another ‘stick’!
")
Turn 8 (Gilledomman): The Islemen close in on the Scots position.
Angus orders his Galwegians to attack Gilledomman’s household troops supported by spear, but they show a lack of passion and fade away (they rolled 1 to 3). It’s now 3-0 to the Islemen and Angus’ is wondering what army will be left to him for summer if the Islemen keep coming after him. Surprisingly his army doesn’t fold this turn, as those doughty archers shrug off their flankers and the Irish!
")
Turn 8 (Angus): Galwegians lack spark—yet again!
Now Gilledomman’s PIP luck changes (2 PIPs). He sends in the Highland rabble against the Scots spear, only to see them driven back. Even more surprisingly, the archers prove too much for the Irish, who decide to make a run for it (1-6).
")
Turn 9 (Gilledomman): Angus' troops hand on grimly, heartened by the brave example of their archers.
Angus’ lines his spear up with the thegns and with their overlap support attacks Gilledomman himself, hoping to meet him in personal combat. The Islemen fall back before his charge.
")
Turn 9 (Angus): Gilledomman falls back before the Scots cavalry.
Now Gilledomman’s PIP luck changes definitively (the first of three 1s), helping to keep the Scots’ hopes alive. He opts for caution as he aligns his household troops with the Highland warband.
Angus, heartened by his army’s first success, has 5 PIPs and uses them to line himself and his archers with the main battle line. He also sends his light cavalry around behind the line to try to take the Highlanders in the rear.

Turn 10: Angus stabilizes his line and sends his light horse behind the enemy's line.
With only one PIP Gilledomman decides to line up his blade with the Highlanders. Angus has another 5 PIPs, which he uses to attack the warband with his horse and continue to lengthen his line to the left. The result against the Highlanders is a ‘stick’.

Turn 11: The Scots light horse fall on the Highlanders, but a stalemate eventuates.
With his one PIP Gilledomman sends some Islemen to chase off the archers, but do you think they’ll go! The Islemen retire in confusion. The Highlanders, however, force the light horse to recoil.
")
Turn 12 (Gilledomman): Go Scots archers! They won't give up.
Angus has two PIPs, renewing the attack on the Highlanders and lining up his spear on the hill. The warband had enough and forced back onto the Scots spear disperse. It’s now 3-2 to the Islemen, and their right wing is looking very unwell.
")
Turn 12 (Angus): At last, the bane of the spear is put to flight.
Gilledomman gets 2 PIPs and tries to push those archers out of the way. They get yet another ‘stick’! Angus has 3 PIPs and launches an attack on the lone Isleman facing the thegns. These get a ‘stick’; the archers at last are forced to flee.

Turn 13: The archers at last are forced to flee.
Gilledomman’s PIPs improve (3). He flanks Angus and his retinue, but is driven back. He also forces back the thegns.
")
Turn 14 (Gilledomman): Flanked, Angus drives back his attackers.
Angus pulls out the stops on the Islemen facing the thegns, sending in the light horse. This finally gets them, and the score is now 3-3. He brings up the archers to ZOC the Islemen that flanked him and he attacks Gilledomman himself, flanking him with spear, but the roles are repeated from his turn, and he’s driven back.
")
Turn 14 (Angus): The second time a flanked commander fights off his attacker.
With 6 PIPs Gilledomman ZOCs the spear that had flanked him and attacks the light horse, forcing them to flee through the thegns.
")
Turn 15 (Gilledomman): The light horse are chased off.
Angus has only 1 PIP; he advances the thegns to align with the spear.
")
Turn 15 (Angus): On a knife's edge. Can the Scots last long enough to get that one more casualty?
Gilledomman has 4 PIPs. He decides to work on those pesky archers. He moves his archers across to support his right flank. Then it’s all over. His archers, the same ones that shot the Scots archers, shot the Scots spear (6-1). The Scots archers, however, don’t give up, only recoiling.
")
Turn 16 (Gilledomman): The second distance shooting of the battle causes more casualties.
-
Aftermath
What looked like being a massacre was a hard-fought victory for the Islemen. Whether they feel strong enough to follow up their attack in summer is now uncertain. The thegns, remembering how poorly the Galwegians fought at Ebchester, placed the blame for the defeat squarely at their feet. As it was, with the Galwegians all put to flight and their territory now cut off from the Scots by the Islemen in Strathclyde, their defection was hardly surprising.
The Islemen will now get Galwegians instead of the Highland rabble and one of the Irish. The Scots will get some Orkney Vikings to replace them (2x4Bd).
-
Review
I was lucky to force the Islemen so hard after that peculiar deployment. Having said that two of his victories, both by shooting, were freak shots. Worse still from my point of view, I reminded Joel both times to do the shooting! On the balance, this was evened out by the Scots archer’s stubbornness. However, the fact that the Scots have 3Sp(L) was what allowed that second shot to succeed. I’m yet to use them well. At deployment I should have swapped one of the 2Ps for a 3Sp(L) so that it could have neutralized that warband.
The Battle of Stratford on Avon
1 January, 2010
King Magnus’ ambition to be ruler of all the British Isles led him to declare war on William Rufus’ Anglo-Norman kingdom in the south of England. Magnus challenged William for control of the province of Mercia, a challenge that the Norman accepted. Magnus’ voyage from Man was uneventful, as was that of his ally Angus of Scotland. His forces consisted of his huscarls (3x4Bd), household knights (1x3Kn), fyrd spear (7x4Sp) and archers (1x2Ps). Angus came with 1x3Cv, 1x2LH and 1x2Ps.
William met the invaders at a place where a road forded the river Avon, a place called Stratford. His army consisted of knights (4x3Kn), spear (5x4Sp), crossbowmen (1x3Cb) and archers (2x2Ps). In addition he had the promise of assistance of Gruffudd of Wales, who hearing that the Scots were assisting the Northumbrians, elected to help the English lest the Northumbrians grow too strong. He came with 1x3Cv and 2x2Ps.
The battlefield was level, apart from the river and the road and a wood and a low hill that faced each other across the road. Due to pre-battle manoeuvring, Magnus managed to meet William from the direction he desired, securing the hill to his own advantage. William deplyed his entire army on the right of the river with his spear in the centre and knights on each flank. The archers and crossbowmen were in reserve.
Magnus deployed with his huscarls in the centre, the knights in reserve and the fyrd on each flank. He expected the Scots to arrive from the same direction as him, while the Welsh would arrive on his right flank.

Initial Deployment: William on the left and Magnus on the right.
On the first turn Magnus’ entire host advanced in a line, while the English army, lacking direction (1 PIP) could only advance some of their army. Neither of the allies arrived.

Turn 1: the two lines start to close.
On the next turn it was Magnus’ turn to lack PIPs (1 PIP); therefore he held back the knights, who were going to be used on one of the flanks. William was more active (5 PIPs), and contracted his line on the right to let the knights advance. Both sides continued to wait for their allies.

Turn 2: William's knights move to the front.
On the third turn Magnus wheeled his line on the left and extended it on the right. William went to investigate the river, discovering that it was paltry. Angus arrived and deployed on the left flank, on the other side of the river. Gruffudd seemed close behind (5 PIPs), but William had to keep waiting.

Turn 3: the Scots arrive as William crosses the Avon.
On the next turn Magnus dithered (1 PIP), opting to continue his advance. William brought all his knights over the river and sent forward archers to delay the enemy’s advance. Angus, keen for a scrap (6 PIPs), sent his light horse forward to delay the king and hurried after them. The Welsh still did not show.

Turn 4: Scots light horse face off against the English king.
Then suddenly it was all over. Magnus continued his advance, recoiling some archers, and William decided to attack the impudent Scots horse. The odds seemed very good (1/3 chance of destroying them, with only a 1/12 chance of being destroyed), but these Scots were in a fell mood and William, advancing ahead of his men, was unhorsed and killed by the quick-moving Scots (5+2 v 2+6). His household troops fled and the battleline began to waver and retreat. In the retreat two elements of 4Sp were destroyed (reflecting the casualties caused by the loss of a C-in-C).

Turn 5: Angus' light horse crow over the body of the English king.
-
Aftermath
The Scots earned 2 prestige points for their victory. The English, in disarray, retreated from Mercia, which the Northumbrians took possession of. They then sent for William’s brother, Henry, in Normandy and prepared for more fighting in the summer.
The Northumbrians could advance on England proper in the next season, but they would be without the support of the Scots, who can only support within two moves of their army. There was a bit of a diplomatic incident over the body of William. It was reported that it was decapitated and the Scots would not give it back. The Normans said this was barbarous and unchivalrous behaviour. The Scots denied this and said it was typical of the Normans to make such claims, reminding them that on the contrary the Scots had been a Christian people for a good deal longer than the Normans, whose ancestors were not long ago committing pagan atrocities across Europe. Such a barb, however, got at their allies the Northumbrians, not long Christians either, and all round tempers flared.
Stories abounded as to why William had crossed the Avon; one that gained a good deal of credence was that he’d spotted a fine looking hind, and being a keen huntsman had set off in chase of it. The Scots got to it first and an argument ensued over whose catch it was. Versions vary as to how William was killed; some claim he was struck by a stray crossbow bolt!
-
Review
An interesting start to the campaign. Henry steps into a difficult situation. William could claim, with some justice, to have been very unlucky. Yet, there is a certain amount of risk in committing one’s general so early. Had he won, however, he was set to give the Scots a good mauling. As in the previous battle (for Ceredigion), victory was decided without the close-order infantry coming to blows.
Anglo-Norman Dismounted Knights
27 September, 2009
I’ve now finished 4 elements of dismounted knights to allow my Anglo-Norman knights to dismount:

Dismounted Knights
They are largely Essex figures, but the front element on the left has two Feudal Castings spearmen. The other spearmen and the two-handed swordsmen I got from Paul Potter in a trade. They mix well with the other knights and command figures that I’d already got.
I was particularly pleased with the flag, as it was small and folded and I was sure I’d make a mess of it. However, I noticed that a VVV roundshield transfer was actually a cross, and of the sort I was going to try to paint. all I had to do was paint the centre! I think it came out very well.

The Knights' Flag
I also finished two elements of Essex Norman light horse. These will be useful in allowing me to create non-historical armies to represent probable opponents in the up-coming competition. I’ll use them tonight, hopefully, in a contest between my ‘Picts’ and some Eastern Patrician Romans represented by a mixture of Normans, Irish and Galwegians!

Norman Light Horse
I should add that the ‘Picts’ are now complete, as I finished three more elements of Pre-feudal Scots spearmen; this means the Pre-feudal Scots are also finished. I only painted six figures this weekend, and converted two to being axemen, but I was able to base 7 elements and flock 13 elements (most of the painting was done last weekend).

