Practice games
15 January, 2019
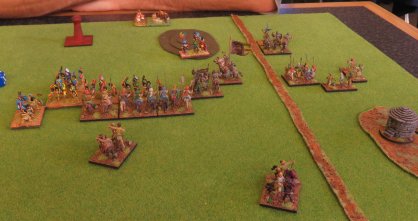
Yesterday I caught up with Joel for some very enjoyable practice games. In the first two games Mithridates squared off against Sulla. I took the scythed chariot to assess its potential, as well as an Armenian ally of a 4Kn amd two LH: Cv (gen), SCh, four 4Bd, two 3Ax, Ps + 4Kn, two LH.
- Mithridates v. Sulla
In the first battle, Mithridates was the defender, and went for a battlefield of two gentle hills, a hamlet and a patch of rocky ground (both RGo).
This battle opened fast, with Roman psiloi advancing to face the scythed chariot. I opted to go after it with the Kappadokians, who were supposed to face the Roman cavalry. They killed it, but then were facing Roman legionaries, and the whole battleline was disordered. My combat dice were bad, but they shouldn’t have saved me from being dragged into such a disruptive effort to save the chariot. I lost.
- Sulla v. Mithridates
The second battle saw Mithrdidates on the offence facing an impressive city in the Balkans (Diocletian’s palace).
This time the chariot got stuck into some blade, along with the cataphracts. In short order the chariot had destroyed some blades and advanced into overlap onto some psiloi that the cataphracts routed.
The Romans were limited by PiPs in their response, but they managed to destroy an Armenian LH (these had rushed forward to cover the cataphracts, and avoid being attacked by the Roman cavalry).
Mithridates decided to continue the attack with the cataphracts, and to send the chariot out to the left to attack another legionary element. The remaining light horse retired. The chariot failed this time, and the cataphracts got a draw with the legionaries — not good. Now we were 2-2, but I had only 9 elements to the Romans 10.
There was a lull while we both reorganised (and battled low PiPs).
The Romans won this one too, as I committed the imitation legionaries at little chance of success. The psiloi on their right fled, leaving its neighbour to be overlapped. I was pressured into this, as the two Kappadokians in the woods were risking being overlapped when the Romans advanced against them. On reflection, the Kappadokians would have been better on the other flank to face the cavalry. They did little in the woods. Overall, the verdict on the chariot is that it’s not a super-weapon, but could add some interesting wrinkles to a battle.
- Samanids v. Aztecs
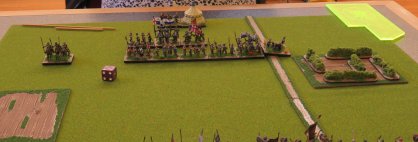
After lunch it was the turn of the Samanids. First up they faced Aztecs (in the New World too, a first for the fabled Samanid navy!). The Aztecs deployed between two woods, while the invaders chose to deploy in the open.
The Aztecs advanced beyond the woods. The Samanids saw an opportunity for their archers against the Aztec psiloi and moved them to their left as they advanced and methodically began to destroy hordes with their spear and cavalry.
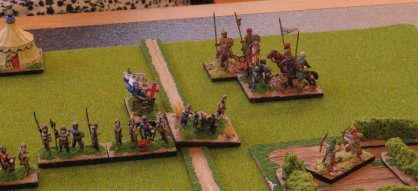
In time we succeeded in killing all but one of the hordes (that one being the one that Joel had hoped would go, as it had a warband behind it, waiting to attack). We also got the two psiloi with two archers and a psiloi. In the centre one enemy blade had also been destroyed. However, one of our cavalry was destroyed, as had a bow. The enterprising enemy blade rushed through the gap he’d created and attacked our reserve, an element of archers. It survived the first round of combat, and then we surrounded it.

The blade is surrounded. The enemy general had retreated a little, and the remaining horde and warband can be seen in the background.
It survived, forcing us to recoil. The next turn it got that archer, while the general was able to attack my remaining archer that was in a wood, which broke in terror. I lost 4-3, though 8 of the Aztec elements had been broken! An excellent game.
- Samanids v. Cortez
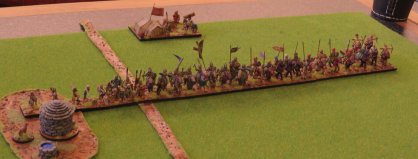
My last game saw the Samanids face Cortez (IV/19c) and his Tlaxcalan allies. This time they were defending. Their hills and rough going was all in one part of the battlefield, which they were defending.
I hoped to neutralise the artillery with my spearmen, while the archers shot from the protection of the hill. Getting into position on the hill took time, and the first element of archers to make it over the crest advanced into a hail of arrows and fled. The other two did get themselves into position, but did not feel they had the numbers to advance, especially as an element of spearmen had been shot away by the artillery.
What saved the Samanids was the slow reactions of the Spanish. In desperation the Samanid cavalry moved to outflank on their right flank. The response was a series of 1 PiPs. On the first, a single archer turned and shot at the Samanid LH, who recoiled to the edge of world. They paid for this by being fallen upon by the cavalry, who double-overlapped it and routed it. Another 1 PiP by the Spanish saw Cortez advance to face the cavalry. They ignored him and destroyed another archer. This continued until all three archers on that flank had fled. The Spanish response was to advance in the centre, but it proved too late; fast blade advancing uphill against solid bow in bad going made no headway. And the Samanid spear survived a round of combat against the Spanish solid foot.

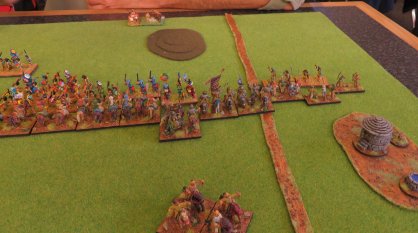
Cortez advances on the Samanid foot.In the background the dire state of the Spanish left flank can be seen.
Meanwhile, the Samanid cavalry surrounded the Spanish artillery, while one cavalry sought to delay Cortez (they’d recoiled when facing him with LH flanking; now the LH joined the fight on the artillery. Cortez could only look on as his artillery joined the rout.
The final battle of the day was my only victory, and it owed a good deal to luck, but I enjoyed all the games, and learned a lot about using these two armies. In particular, I can see mastering archers as taking a while. Also, the scythed chariot is a challenge to use so that it disrupts the enemy, and not my own army.
Conquest 2018, Pt. 2
13 November, 2018
After lunch on Saturday I had a chance to get my newly painted Syrians out. I realised, with relief, that they would not have to face Eric’s Hussites, and, with disappointment, that they would not meet Robin’s Ottomans. I’d had a couple of games the Monday before with Grant facing Normans impersonating WotR English, as there were two of those armies here, and I’d not learned how to face ranged elements well. I did better in the second of the games with Grant, which buoyed me up somewhat.
- 1. War of the Roses English (Keith)
Their first encounter was with the Keith’s WotR English. And sure enough, I was defending. However, the English did not go for too much terrain.
I deployed my Adath militia on a dificult hill and the rest of my army spreading out to the right of it.
Facing them the English deployed their artillery next to an enclosure (RGo) and on their open right flank they had a solitary cavalry, although their reserve would be able to reinforce it.
I hoped to attack the artillery with my javelinmen and archers; and I succeeded in getting the two Bedouin behind their lines, where they destroyed an element of billmen. The archers attacked the artillery on its flank, forcing it to turn to face. The English commander and the reserve billmen responded to the Bedouing threat. Overlapped by the billmen and attacked by the general, one of the Bedouin nearly won the battle, rolling 6 to 2. It was a stick!
On my next turn, I rolled 5 PiPs and becoming shaken by the enemy shooting (one of the Syrian cavalry had broken), I charged into the echeloned enemy line. It was a disaster. I’d somehow miscounted the enemy, and my elements did not end up facing the ones I thought they would. My general outdid the English one, rolling a humiliating 1 to lose the game.
In hindsight, the attack was folly, but it it uncomfortable receiving fire, and I couldn’t see a way of improving the situation for the Bedouin (the Turkomans might have been able to join them).
- 2. Aztecs (Colin)
For my second battle I was more comfortably defending, and I did not make it easy for the Aztecs, chosing a small hamlet (BUA), a gentle hill and a road.
The Aztecs massed their hordes on their right flank and their psiloi on their left. I had the luxury of deploying to choose my targets. My javelinmen and the horde faced the psiloi, while cavalry faced the warband and blades. My light horse screened the hordes.
On contact the general destroyed some blades and the warband went down to some ghulams. Elsewhere their general recoiled the other Ghulams, as did their psiloi my javelinmen.
Their general opted to retreat to the hill, while the hordes flanked and destroyed a Bedouin LH. On my turn, the ghulams destroyed another blade, and the javelinmen and archers got a psiloi to break the enemy’s resolve.
That was the last outing for the Syrians, as my next round was a bye. I was sitting second by my count, but my hope of winning rested on Keith’s English defeating Eric’s Hussites, as he had secured two more points in his defeat against me than I got in my defeat to Keith. As it turned out, his Hussites proved too tough for the English and I came second. It was a thoroughly enjoyable day — good opponents and good games played in a good spirit. I’d like to thank Keith for organising it!
Recent Gaming
23 March, 2014
I’ve not kept up with reporting games I’ve played. Part of the reason for this is because I’ve only got a camera that is not all that satisfactory. I’ve taken better photos with my phone than with the small camera I’ve tried to use. The tripod is broken and can’t support the large camera I’d used for my gallery shots.
The other reason I’ve not been active on the blog is that I’ve been too busy painting (more in the next post). Anyway, I’ve played quite a lot recently, and had some very good luck. Here are some photos that aren’t too blurry.
- Battlecry, 16 Feb 2014
Last month I got along to Battlecry for a day of demo DBA games. We got a bit of interest and should be running a competition next year as a result of this. We played DBA 2.2, as noted earlier on MEDBAG.
My first game was against Joel, a historical matchup of my Early Seleucids against his Classical Indians.
I should have been in serious trouble as the Indians came around my left flank in large numbers. However, they were obviously unfamiliar with scythed chariots, as mine proceeded to tear them to pieces. I came away with a lucky victory.
Next I faced John, who’d just finished his Celtiberians. I used my Gauls.
I managed to meet his warband with my cavalry and used this to my advantage in a battle on a narrow frontage.
I then faced Mike, who used my Carthaginians. I took my Syracusans. As we are both littoral, this involved a waterway, which ended up to my back. Mike went for a littoral landing.
I hurried to advance to reduce the potential for the littoral landing party to make trouble. I was able to sack his camp (the crucified Syracusan was a provocation!) and used my longer line to outflank his elephants. Another victory.
I think we played some more games that I didn’t take pictures of. The last on my camera was my Syracusans against John’s Celtiberians. I don’t remember for sure if I won, but I think my luck was pretty strong, and I used my advantage in cavalry to compensate for the vulnerability of my spear to his warband.
Unrecorded is our final BBDBA game of Carthaginians and Celtiberians against Romans and Spanish. This was officially a draw, but I’m sure the Romans had the edge when we stopped.
- Auckland City Guard
Since then, I’ve mostly played DBA 3.0. Joel’s visited after work a few times, and I’ve got to the City Guard again. We’ve had a lot of fun trying out his Aztec hordes of doom, and we tried out a number of permutations of knights against spear.
From memory the time before last we played: Normans v. Anglo-Danish, Early Crusaders v. Comnenan Byzantines, Aztecs v. Prefeudal Scots and Vikings v. Anglo-Danish. I think there was an Aztec v. Early Crusaders too.
Last weekend I took some photos:
Our first game was his Aztecs against my North Welsh.
The South Welsh cavalry got in the way of his archers and the spearmen got flanked; however, the Welsh had been making progress against the important Aztec elements.
Next we played Ptolemy against Lysymachus. The Ptolemaic army was quite different from what I expected. I tried a littoral landing of three auxilia in a line with side edge contact with the waterway. It seemed legal and threw Lysimachus’ plans to meet this treat. I got a narrow victory in this battle.
We then tried Carthaginians against Gauls.
The Carthaginians won in a battle stacked in their favour (though elephants don’t quick kill warband any more). Our final battle was the Carthaginians against Aztecs. I didn’t take any pictures of this. The Carthaginians took only one elephant, I think. They were lucky in a battle between their two 2LH and the Aztecs two 2Ps. I killed both of them, but had I not, my back was to a wood, and I’d have been very much at a disadvantage.


