Rebased Norse Irish
4 October, 2014
Well, it’s taken another fortnight since I said I’d get onto posting these pictures. The Norse Irish are not a powerful army by any stretch, but I’ve had a lot of good fortune with them in the games I’ve played (generally against historical opponents). Since they were rebased they managed to defeat Joel’s Vikings, and they have often won despite their limitations — the luck of the Irish!
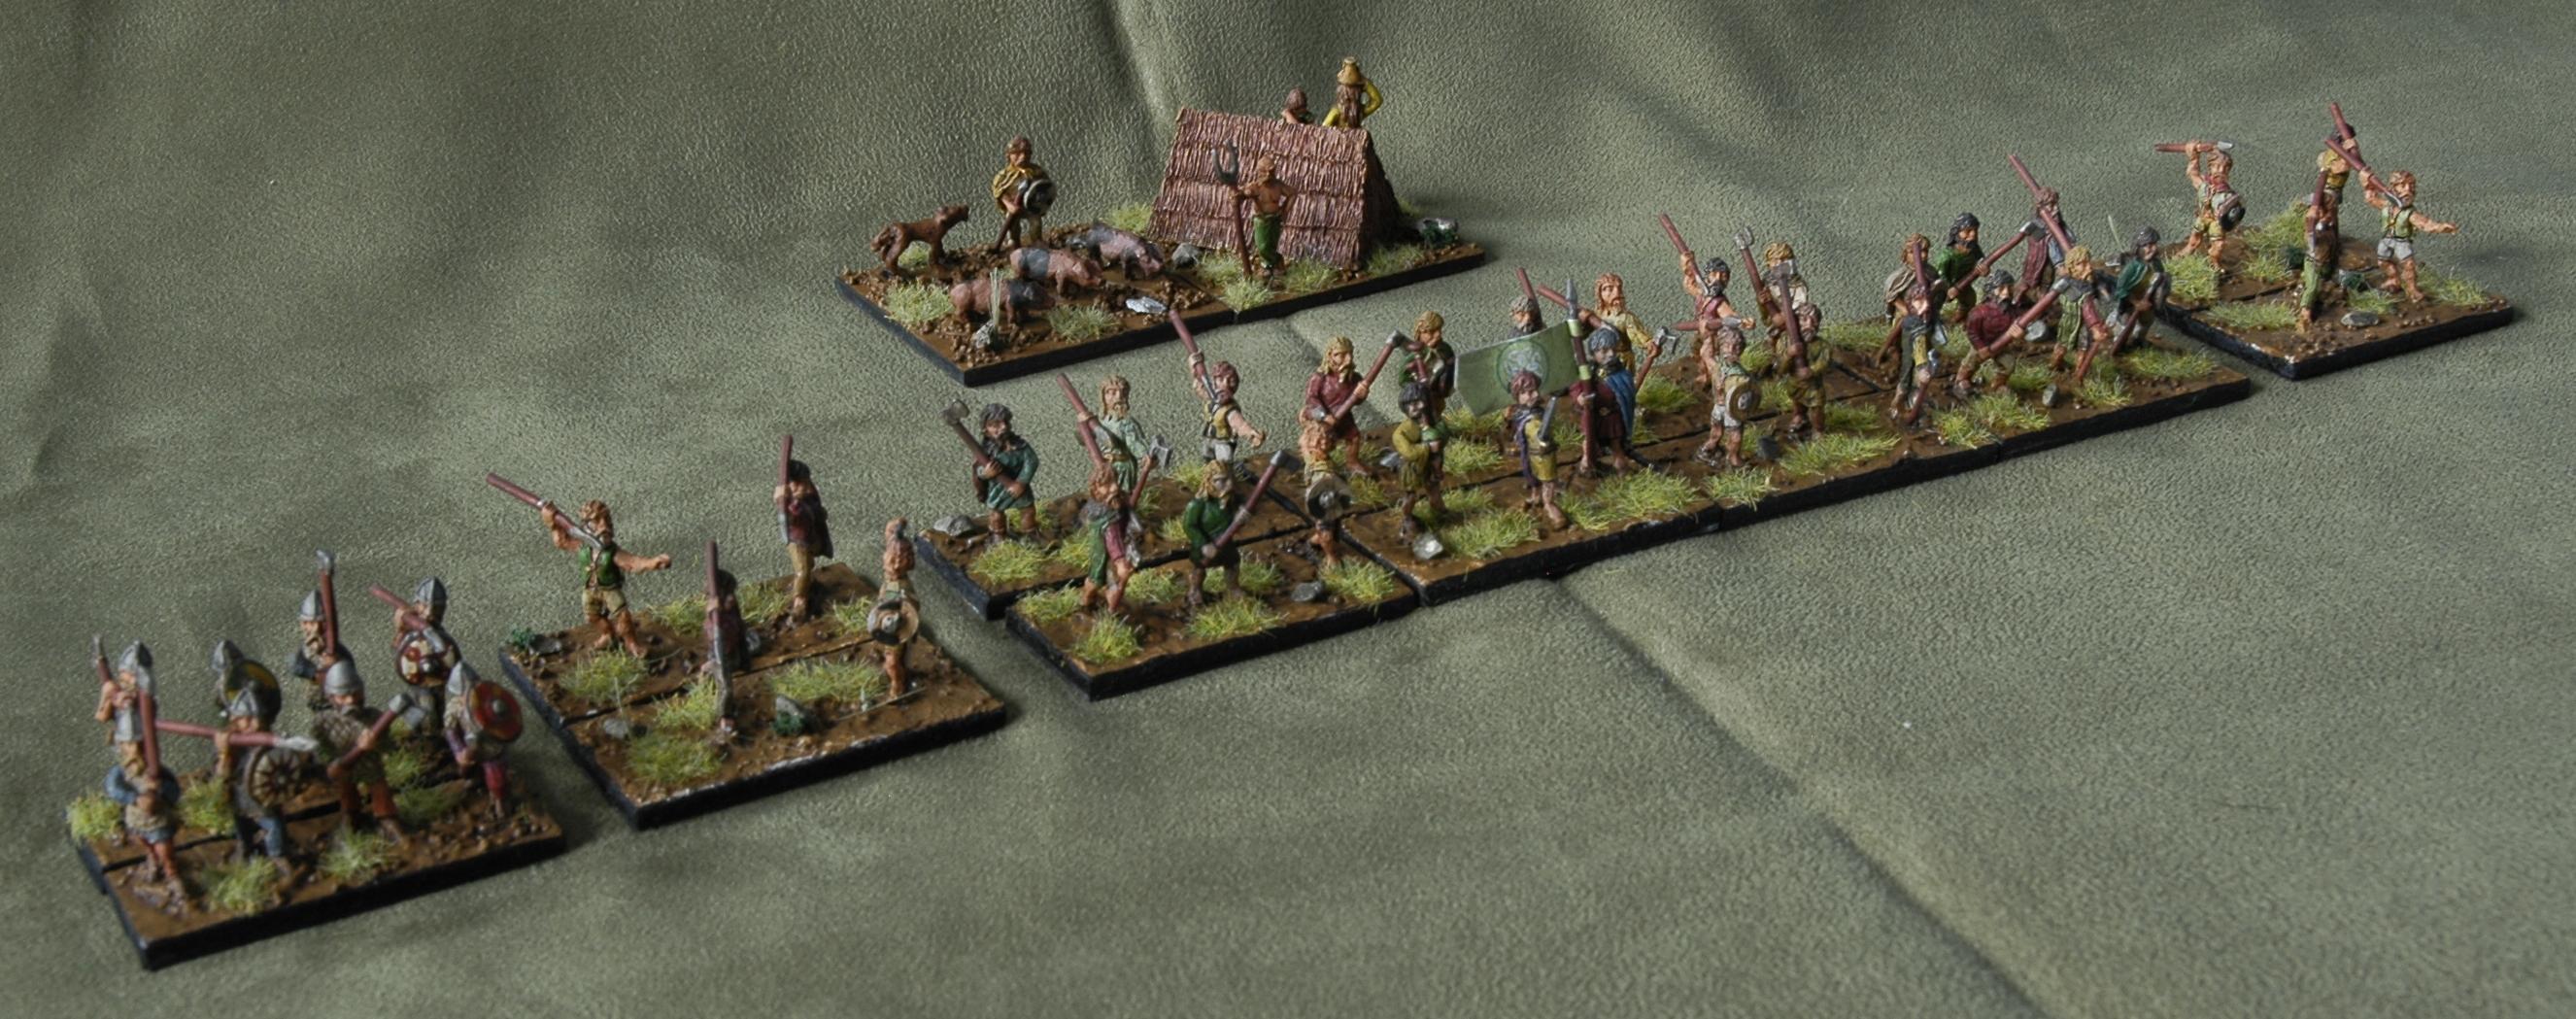
The whole army arrayed: Ostmen (4Bd) on the left and bonnachts (3Ax) flanked by kerns (2Ps) in the centre.
The army was one I painted early on; the paint job is nothing flash, but the rebasing has definitely improved their appearance.

Another angle.
The army is similar to the Ancient Spanish in having a lot of Auxilia and Psiloi. However, they have no mounted, and the 4Bd are less useful; they slow the army down and aren’t really enough to do much.

The bonnachts.

Another angle.
I’m working at expanding all my Dark Age armies for HoTT. To this end I’ve provided them with a few Lurker elements, skirmishers on a deeper base. The heroes and magicians will follow. Some already have Behemoths and fliers.

The rest; on the far left are some skirmishers based as Lurkers for HoTT; they have a dog! The Ostmen are part of the surplus available from the Viking army.

Another angle.
Coming soon, the Vikings, the last of the rebasing efforts.
On the Painting table
23 March, 2014
When I last wrote, I said the next project would be to paint seven 4Pk for my successor armies. Well, they’re over half done, but others have jumped the cue.
- Rebasing
The biggest project has been to rebase all my old armies. I had started this before I went to Adelaide, and a lot of my HoTT elements were all but done, just waiting for the flock. The impetus to restart this project was a desire to see how knights and spears compared under DBA 3.0. This got me redoing my first two armies, the Normans and Anglo-Danish. I also flocked the HoTT elements while I was at it.
Next, I rebased the Welsh, Irish and Vikings. This has taken quite a while, and is now almost completed. I’ve innovated by using No More Gaps to hide the bases. It adds more time to the job, but is worth it.
In the process of rebasing I got enthused with my Dark Age armies and the potential to use them for HoTT. I’ve now got the Scots Isles and Highland army complete again (it was demobbed for SBH figures. This started with the plan to create a Thegn general for the Prefeudal Scots so that they could have a 4Wb general with rear rank support and flanked by pike, something that’s likely to tear holes in most lines of foot. When I learned that the Scots Isles and Highland army is going to have a lot more choice in DBA 3.0, I decided to paint up the four elements of 4Bd I needed to get this back on the table. I’ve also painted a few more archers in mail to make their 3Bw more imposing. I also repainted the 5Hd.
So that’s some of what’s been jumping the cue for painting. I’ve also done a few HoTT elements, some Prefeudal Scots and Irish Lurkers — skirmishers on a 40×30 base along with a dog each. Finally I did a Cleric element — three medieval monks. Magicians and Heroes will follow.
- Song of Blades and Heroes
I’ve also been painting a few figures for SBH, actually quite a few. I’ve now finished thirty foot, and three mounted knights and a Hippogriff rider are close to being done. Most of these are Essex early medieval figures, dismounted Norman knights and Norman spearmen and archers. This adds some useful variety to my SBH range, but also is a way of getting started on painting some of these figures for an Essex Norman army. The rest are six halflings, two mailed Highland archers and a Druid from the Tabletop range. I’ve got more figures from Tabletop’s fantasy range. They’re a little larger than most of my figures and are very much ‘adventurers’, as they all have backpacks and other equipment. The wizards won’t quite look right in HoTT, but will be useful for SBH.

A halfling crossing the new bridge over the new stream with some of the assorted terrain additions doted around.
The other big activity for SBH is making terrain. I made a river (or a stream) using No More Gaps on a T-shirt. I rounded this out with a small bridge and then added a few tokens for treasure — chests, barrels, etc. I’ve done a tent and a small hut. And I’ve also made some hedges using Scotch Brite on iceblock sticks. The next stage for SBH is really dungeon tiles when I get a chance.

Another angle.

He hasn’t seen the two dragons, though!

Really just seeing if the timer makes a difference with the camera. I think it does.
- Plans
Those seven elements of pike should be finished next. Then I suspect I’ll be working on HoTT stuff: heroes, wizards, but also a dwarf and an elf army. More fantasy SBH figures may get done as well. I’ve started putting together a 3Cv for my Welsh; the North Welsh can have a South Welsh ally, who has to include the general element. I find this a bit odd — Welsh with two 3Cv seems too much. I might also work on the Normans, but I reckon the elves and dwarves will be more attractive.
The Battle of Dinorben (Norse Irish v North Welsh)
5 January, 2010
It’s possible that the reason Gruffudd ap Cynan did not show up to support William in Mercia was reports of an Irish invasion fleet heading for Powys (that and the unseemly shortness of the battle!). Powys in this campaign includes what is actually Gwynedd (Gwynedd is Conwy = Gwynedd below the Conwy), otherwise it would have no sea access. As it is, it’s curious that Angelsey, often attacked from places such as Man, being part of the capital, can only be approached by land.
The reports were well founded. Turlough Mór O’Connor looked to restore Irish influence in Wales after a hiatus of some 500 years! With a bad-going army his options for where he could attack were a little limited, but the Welsh seemed a reasonably attractive proposition, and if successful, he’d secure one flank of his kingdom. There were no allies to be had on either side; on further consideration the English could have sent help to the Welsh, and probably should have, but Henry was still trying to establish his control over his kingdom. Otherwise, the Islemen had plans to attack the Scots, so were not free to weigh into the conflict (assuming Magnus let them pass through Man).
Turlough’s army consisted of 6x3Ax (1=cmd), 2x4Bd and 4x2Ps. He was met by 1x3Cv (cmd), 2x4Bd, 6x3Sp(L), 1x3Bw and 2x2Ps. This was the first outing of the new Light Spear.
Gruffudd met the invaders inland in Powys at Dinorben, the site of an old fort. The armies drew up with a road between them, two steep hills on opposite flanks as well as two woods also opposite each other. Gruffudd deployed himself flanked by his Ostmen mercenaries in the centre of his line. On the left flank he had three light spear and his archers and on his right flank he had the skirmishers and three light spear in two columns hoping to occupy the hill in front of them.
Turlough deployed with his Ostmen on the road with kerns as rear support, three bonnachts on the hill to the right of them and the rest of the army in a line stretching into the wood to his left. Most of the kerns were on this flank.

Initial Deployments: Turlough on the left and Gruffudd on the right.
Turlough started well (6 PIPs) and advanced two kerns forward to contest the hill on his left flank. Gruffudd reacted to this by sending forward skirmishers to contest the hill and advancing his light spear onto it. The combat between the psiloi was a stalemate.

Turn 1: Gruffudd skirmishers fight uphill against kerns on the hill.
Turlough, with 1 PIP, retires the kerns not yet in combat, while the other kerns are pushed back by the skirmishers downhill from them. Gruffudd moves his other skirmishers up in support of the others and continues to advance onto the hill. The rest of his line also advances.

Turn 2: Gruffudd seems to be gaining control of the hill on his right flank.
Turlough sees an opportunity to attack the skirmishers on the hill and attacks one with flank support. In a fierce fight these are destroyed.
")
Turn 3 (Turlough): Turlough inflicts the first casualties.
Gruffudd reacts energetically to this setback (6 PIPs), attacking one of the kerns with skirmishers supported by light spear. This is again a stalemate. He also wheels his central troops towards the hill (he used the road for the outside element in a manoeuvre that I’d later decide was not legal).
")
Turn 3 (Gruffudd): Gruffudd can't get traction against the kerns on the hill.
Turlough now moves his other kern up to support the one on the hill, with the advantage of being uphill they succeed in destroying the last of Gruffudd’s skirmishers (2+4 v 1+1). With this loss, Turlough kerns need only worry about the archers on the other flank and Gruffudd’s cavalry.
")
Turn 4 (Turlough): Turlough goes two up in what should have been an unequal contest on the hill.
Gruffudd, now feeling less confident (1 PIP), moves the rear light spear element accross to create an echelon effect on the hill.
")
Turn 4 (Gruffudd): Gruffudd is still wrestling for control of the hill.
Now it’s Turlough’s turn to run out of steam (1 PIP) and he attacks the front element of spear with his kerns in a fierce but inconclusive combat (2+6 v 2+6).
")
Turn 5 (Turlough): More fighting on the hill.
Gruffudd finally gets his spearmen into position on the hill and drives the kerns back. Unfortunately Sp(L) are not Ax and the best he can manage is to force some of them to flee.
")
Turn 5 (Gruffudd): Gruffudd can feel some satisfaction in ridding the hill of pesky kerns.
Next follows a period of manoeuvre, where the rest of the Irish start to advance and the Welsh left flank tries to catch up with the centre. On the hill on spear advances, hoping to flank the kerns next turn.

Turn 6: The Irish begin to advance
The Irish continue to advance, while Gruffudd, struck by indecision (1 PIP), decides to advance the spear up the road to support his centre.

Turn 7: The battlelines get closer.
While the Irish move closer, Gruffudd decides to charge. He manages only one casualty, an element of Bonnachts unable to recoil. Turlough had foiled his plan to remove the psiloi support on Turlough’s command element by shifting it in behind Turlough. The commanders met at equal odds.

Turn 8: The Welsh charge, and succeed in destroying one element.
Turlough, however, fights back and his Ostmen cut down an element of light spear. Turlough himself forces Gruffudd and his retinue to recoil.
")
Turn 9 (Turlough): The Irish have the Welsh on the point of breaking.
Gruffudd can really only hope to get lucky against the Irish commander, but fails again, being forced to recoil before a hail of javelins.
")
Turn 9 (Gruffudd): Gruffudd is driven back again.
Turlough now finishes off the Welsh when his Ostmen destroy their counterparts who are overlapped on both sides. The Welsh break and run.

Turn 10: Viking mercenaries fighting for Gruffudd are the last of his casualties before the Welsh break.
-
Aftermath
Gruffudd retires to Gwynedd with his battered army. He will be hoping Henry of England sees fit to support him if the Irish attack again. Turlough’s army is largely unscathed and he will be looking to finish the Welsh off in the summer. Henry and some knights could really change the complection of this encounter, and assuming he wants Welsh support against the Northumbrians, there are good odds he will try to help his ally.
Gilledomman of the Isles will take note of this battle and hope that he can win against the Scots, as he fully expects to see Turlough’s army in Antrim before long.
-
Review
Gruffudd lost the battle in his reaction to the advance of the kerns onto the hill. He rushed to attack them, when he could have waited for the light spear to get into position against them and used the skirmishers for flank support. He also put himself at a disadvantage by advancing his centre (that illegal road movement when he wheeled was not to his advantage!). If he’d waited to gain control of the hill his centre would have been able to wait for the Irish to advance at a disadvantage; the battle in the centre was at long odd for him.
Light spear will take some getting used to. They have no advantage against the Irish, who have no mounted and they are weaker than regular spear in GGo. Still I would attribute Gruffudd’s loss to them, but to some poor tactical decisions.
This was the first battle in a while that was decided by the clash of the main battlelines. The last two have been won before they met.
Irish and Byzantines
12 November, 2009

The complete Norse Irish army with 4 Kerns, 2 Ostmen, 8 Bonnachts and 1 Rising Out
I did my first bit of painting in a while last weekend and finished off some figures I’d started month. I now have a Norse Irish army with all the options: 8x3Ax and even 1x5Wb for the Rising Out, which isn’t in the DBA list but is in the DBM one. The two extra elements of Bonnachts will allow the Scots Isles and Highland army to field them as Irish mercenaries against the Norse Irish in the King Magnus’ War campaign. I’m almost ready to start that campaign and am working on the last lot of figures for it now: 1x3Sp (Welsh spear), 2x3Bw (Welsh bow), 2x3Bw and 1x2Ps (Viking archers). When these are done, hopefully this weekend, I’ll be ready to start.

Two more Bonnachts and one Rising Out
I also finished off 3Kn for the Latinikon of the Komnenan Byzantine army. The rest of the figures for that have arrived, so it should be my next project, but I’m getting attracted to the Classical period. Blame Conquest for that, and winning a Corvus Belli Ancient British army there. Now I’m wanting to get some more Corvus Belli armies (Late Carthaginians and Ancient Spanish) as well as Hellenistic and Roman armies for them to fight. If this goes ahead, I may end up running a pre-history to the Hesperia campaign with them!

Outpost Crusader Knights for the Komnenan Latinikon
I played this game last Saturday. I set it up in a bigger room with less lighting than the room I’ve used before. I changed the aperture on the camera, which resulted in blurring of figures in front of the focal point. I won’t do that again. I wrote notes as I played, but didn’t write the report until later in the week—on the bus on my handheld. The perspective is different from previous reports I wrote straight after the game.
After his failed raid on Malcolm, Fergus mac Dougal, decided to try his luck in Ireland. He took some Highlanders, led by Angus Dubh, and some Galwegians, always keen for action (this was necessitated by a shortage Viking Bd and Irish Ax, which could be used by both).
He was encountered by the local Irish leader, Dermot O’Conall, near the coast. He was the aggressor, though the Irish were keen for action (both rolled high). He hoped to trap Dermot’s forces with their backs to the coast, but failed. Nevertheless, Angus pressed him to allow him to lead a landing force to get behind the Irish lines. Despite misgivings (all littoral landings to date have been disastrous), he assented to this plan.

Initial Deployment of Fergus and Dermot
Dermot got all the terrain he could hope for, and organized his line of battle with his Ostmen in the gap between the hill and the woods.

Turn 1: Angus lands near the Irish who react speedily
In the opening moves Angus landed opposite the hill; the Irish on it reacted quickly (5 PIPs) and turned to face. Meanwhile, Fergus advanced his Islemen, impatient at their speed, being forced to watch the battle on the hill while Dermot was content to wait for him.

Turn 3: The Highland warband drive the bonnachts up the hill while the archers are driven back to the coast
The archers shot at the bonnachts for three turns without effect. Only on the fourth turn did they force a recoil. Meanwhile, the Highland rabble, with skirmishers providing overlap, succeeded in chasing some bonnachts up the hill. They followed up, of course, giving their opponents the uphill advantage. It was around this time I realized some of the moves were illegal, the hill making both sides out of command control. Things slowed down as a consequence.

Turn 4: Disaster for Angus as the skirmisher are trapped by his own shooting
The rabble survived a round of combat before being able to attack with the skirmishers in flank support. This was a chance for a kill, but unfortunately in a tough fight they were forced to recoil, as were the skirmishers, who not having room were destroyed (this was a self-inflicted loss, as the archers had forced the bonnachts to recoil into where the skirmishers needed to go). The rabble was then, over a number of turns, forced back until off the board. The archers looked doomed, unable to move away from the bonnachts and vulnerable to being forced to recoil into the waterway. There was the depressing likelihood that Angus’ landing would lose Fergus the battle before the Islemen made contact.

Turn 6: the Highland warband are driven off the battlefield, but the archers continue to hang on
Dermot tried to ensure this by sending out a cloud of kerns to slow Fergus’ advance. Meanwhile he sent the bonnachts, buoyed up by having chased off the warband, to drive the archers into the sea (this was a slow process—no group moves on the hill and each element out of command range).

Turn 7: Dermot tries to buy time by using kerns to delay Fergus' advance
For his part, Fergus was keen to have his Islemen close with Dermot’s main line of battle before the archers were destroyed. Yet this was no simple matter; his flanks were in

Turn 8 (Fergus): the kerns are put to flight
bad going and had to make individual moves. the kerns were also effective in their delaying tactics. By turn 9 it looked as though the archers would not last another round.

Turn 10: A lucky break for Fergus; the archers destroy some bonnachts
Fergus was almost in position to attack. He was given a breathing space when his archers succeeded in breaking an element of bonnachts. Dermot decided to break off from

Turn 11: the bonnachts break off from the archers
the archers and attack the Islemen on their flank. It proved a good decision; the archers, starved of PIPs, played no further part in the battle. With the bonnachts flanking,

Turn 12: flanked Islemen are destroyed in bad going
Dermot succeeded in destroying an element of Islemen with an element of kerns—oh, the ignominy!
")
Turn 13 (Fergus): Last roll of the dice; Fergus gives the order to charge
This was a situation brought about by the PIP dice going against Fergus (he rolled a 1 that turn (turn 12) and followed it up with a 2; by contrast Dermot was on fire rolling two 6s!). On the verge of breaking Fergus gave the order to charge. He succeeded in leaving one of the Ostmen overlapped on both sides and then destroying it. It was too little too

Turn 13 (Dermot): Another element of flanked Islemen are destroyed and the Fergus' army breaks
late. Dermot was able to flank another element of Islemen and repeat what he’d done the turn before; game over!
-
Review
Dermot certainly had good luck with the PIP dice, particularly when it counted. He was able to neutralize the littoral landing on the first turn and then in the last two turns was able to manoeuvre for favourable flanking attacks while Fergus was unable to marshal his forces effectively (overall the average for the PIP dice were high, but favoured Dermot: 4.75 to Fergus’ 3.92).
The most serious problem was the set up. I think a littoral landing is really a recipe for disaster. If it’s too close to the enemy, you run the risk of fighting most of their army with part of yours, and being out of command control, making it hard for the the rest of the army to advance! Having said that, but for the mistake of firing on the bonnachts that cut off the skirmishers retreat, the fight on the flank could have gone differently. Otherwise, Fergus tended to see his Wb as useless against the Irish Ps and Ax and banish them to the wings. Yet the Galwegians could have gone after the Ostmen—they’ve a good record against Bd.
Of interest was to see how effective the Bd could be in bad going. The only edge the Ax had over them was mobility, and yet it was more PIPs that allowed Dermot to destroy the two Bd that he caught.
It was satisfying to see the kerns behaving like regular skirmishers, delaying the advance of the opponent’s battleline. They also had virtual immunity against Fergus’ army; only the archers and skirmishers could hurt them unless they were overlapped. And it’s quite satisfying to have been the element that destroyed some Bd in bad going!
Lesson for next time, and Fergus seems to be a slow learner, is avoid littoral landings.
Trouble at the Camp (Vikings v. Norse Irish)
14 July, 2009
A few days after defeating Anglo-Normans I tried the Irish against Vikings. I posted the following to Steve:
Well, my blog would be a little embarrassing—yesterday I tried Vikings against Norse Irish and totally screwed up the littoral landings. The Irish landed 2 Bd an Ax and a Ps behind the Viking lines. They were actually in range of the undefended camp. I then decided that was too bad a set-up by the Vikings and moved the camp and a Bd that was defending on the wrong side. I should have then repositioned the landing, but I didn’t. Despite some truly heroic dice-rolling by my daughter Anna the Irish landing was destroyed, losing them the game. As they were out of command range they sucked up all the PIPs. I should really have started over or not moved the camp, but I tend to favour the Irish (I’m trying them out), so I made the change in order to avoid what seemed an incompetent set-up.
The Battle of Long Bog (Norse Irish v. Anglo-Normans)
14 July, 2009
At the end of March this year to celebrate the completion of the Norse-Irish I tried them out in a solo game against an Anglo-Norman opponent. The Irish were defenders (I didn’t need to cheat about this, but I was prepared to). The Irish had to have a waterway and elected to have two woods close to it at either end of the board and a long marsh at 90 degrees to it in the middle of the board in relation to the waterway, and near and about two thirds of the way along the board in the other direction. The Normans thought of trying to put the waterway to the rear of the Irish, but eventually decided to be closest to the marsh and hope to get around its flanks with their cavalry in time to destroy the Irish in the open.
The Irish deployed with three elements of bonnachts supported by an element of kerns in a line in front of the wood behind which their camp was and then to have the rest of the bonnachts and kerns to line up alongside this group with the Ostmen to their rear. They hoped to gain the marsh before the knights and cavalry could catch them. They decided against trying a littoral landing (it’d only slow up the rush for the marsh).
The English had three elements of skirmishers (psiloi) behind the marsh, the four spear in a column in the gap between the marsh and their wood, one knight next to the waterway, and the other three knights, the commander and the cavalry on the far flank.
The Irish exchanged two bonnachts with two kerns to get the kerns on the open flank in the hope of racing to the marsh on their first turn and disrupting the cavalry. This proved a winner as they rolled enough PIPs to get a kern into the edge of the marsh and ZOC the column of knights. At this point the English commander realized the problem of having his commander on one wing and tried to move himself and two other knights to the other flank. The cavalry continued its outflanking manoeuvre, and the psiloi went into the marsh.
The Irish got some two more kerns into the marsh and one was destroyed in a combat with the English skirmishers (very bad dice). On the next turn the general flanked by two bonnachts poured in; they lined up with the psiloi and on the open flank outflanked the psiloi with a kern. The dice at this point really ended the game—both flanking bonnachts were destroyed! The general survived exposed but in a hopeless position. I decided to reroll to see what would happen and this time the expected happened: the flanked Eglish psiloi was destroyed, as was the one on the other end; the one facing the general was lucky to survive.
Now the battle was more evenly poised. The English had a bottleneck trying to get the knights out between the marsh and the woods—the spear were in front and blocking them. The surviving skirmisher abandoned the marsh and faced off against the general just out of range flanked by a knight. On the outer flank the cavalry avoided a kern doubling back to flank them while being attacked frontally by the Ostmen. They spent most of the battle fairly ineffectually retreating from the Ostmen while waiting for the knight on that flank to skirt the ZOC of the kern perched on the marsh’s edge and join them. The Irish then made the bottleneck worse by advancing an element of bonnachts into the spear who were too close to the marsh. They had to turn and face, blocking the English general. The element of knights next to the waterway advanced, while the Irish used good PIPs to send all the bonnachts and kerns in the woods out to try and get at the spear. As it eventuated, these bonnachts won the game. They got lucky against the knight: overlap and psiloi support made it 3-2. The knights recoiled when they charged the element closest to the waterway and then were destroyed when the Irish followed up—good dice did it.
The spear had managed to destroy the bonnachts in the marsh, but now were caught on their flank again by the bonnachts that had been victorious against the knights. Worse still a kern had moved across the marsh to flank them. They survived, forcing a recoil in the first combat, and charged in for a second time with a stalemate. The Irish then got the result they needed to win the game.
The mobility of auxilia and psiloi is quite neat, but their vulnerability in the open to knights (that went for the entire army!) was pretty unnerving. If it’d been a bonnacht that was supporting the Ostmen they might have been able to trap the cavalry, but the kerns were scared to leave the marsh lest they get hit by the cavalry.
The English knights could have, and should have, moved through the woods to get past the spear, but were mesmerized by the area of open ground between the marsh and the wood, which was blocked and they remained ineffectual. Otherwise their deployment was ill-conceived, with the general on one flank and the spear in column. Still, but for the PIPs that allowed the kern to obstruct on one flank it would have been a slaughter.
A much better deployment would have been to put the spear in a line behind the marsh and not move them. The skirmishers should have occupied the edges of the marsh on the first turn as the kerns did. This would have let the cavalry around where they could have hoped to catch some Irish in the open. Fighting for control of the marsh was a mistake; they were lucky not to lose all three psiloi. Sitting outside with the spear would have left what Irish made it to the marsh look foolish, cut off from half the army and the camp. Knowing what to do with the Ostmen was difficult. They were slow and were torn between chasing the cavalry and going after the spear. Once they opted for the cavalry their speed committed them to persevere with this.
It was a fun game. The Irish were always going to need a fair amount of luck to win, and they generally got good PIPs and the right combat dice (except at the start in what became a very quick alternate outcome!). Hindsight revealed the shortcomings of the English deployment, which the Irish were able to use to good effect.
Next I think I’ll go for a fight of Irish against Vikings, both are littoral, so it’d make for an interesting match-up, provided the Irish were defending.
Yet more armies
11 July, 2009
I’ve added pages for a number of DBA armies:

