DBA Day at the AWC
10 October, 2016
Sunday a week ago there was a very successful DBA day at the Auckland Wargames Club. As it led to other projects being planned, I’ve not got around to writing up any report until now. The format was friendly games; no set armies or points. I had five very enjoyable games.
- 1 – Marian Romans v. Alexandrian Imperial
My first game was against John, whose army is still being painted, so he borrowed figures from me. I’m pleased to say that they knew who their paymaster was, and fought accordingly!

A bird’s-eye view of the Marian Romans.
I was the defender and laid down some Marsh and ploughed fields (I’d just made some new terrain; I realised later that Marsh is not valid for Arable armies). Appropriate to the weather that day the fields were boggy.

The Romans, complete with an elephant.
![[a666: The Alexandrian deployment.]](https://hesperiana.files.wordpress.com/2016/10/a666.jpg)
The Alexandrian deployment.

The situation at the end. Not a single companion cavalryman left!
The surprising resilience of the Kappadocians secured a quick victory.
- 2 – Prefeudal Scots v. Vikings
The second combat was against Kieran’s Vikings. Again I was the defender and went for a marsh and a wood, which ended up being in the same corner.
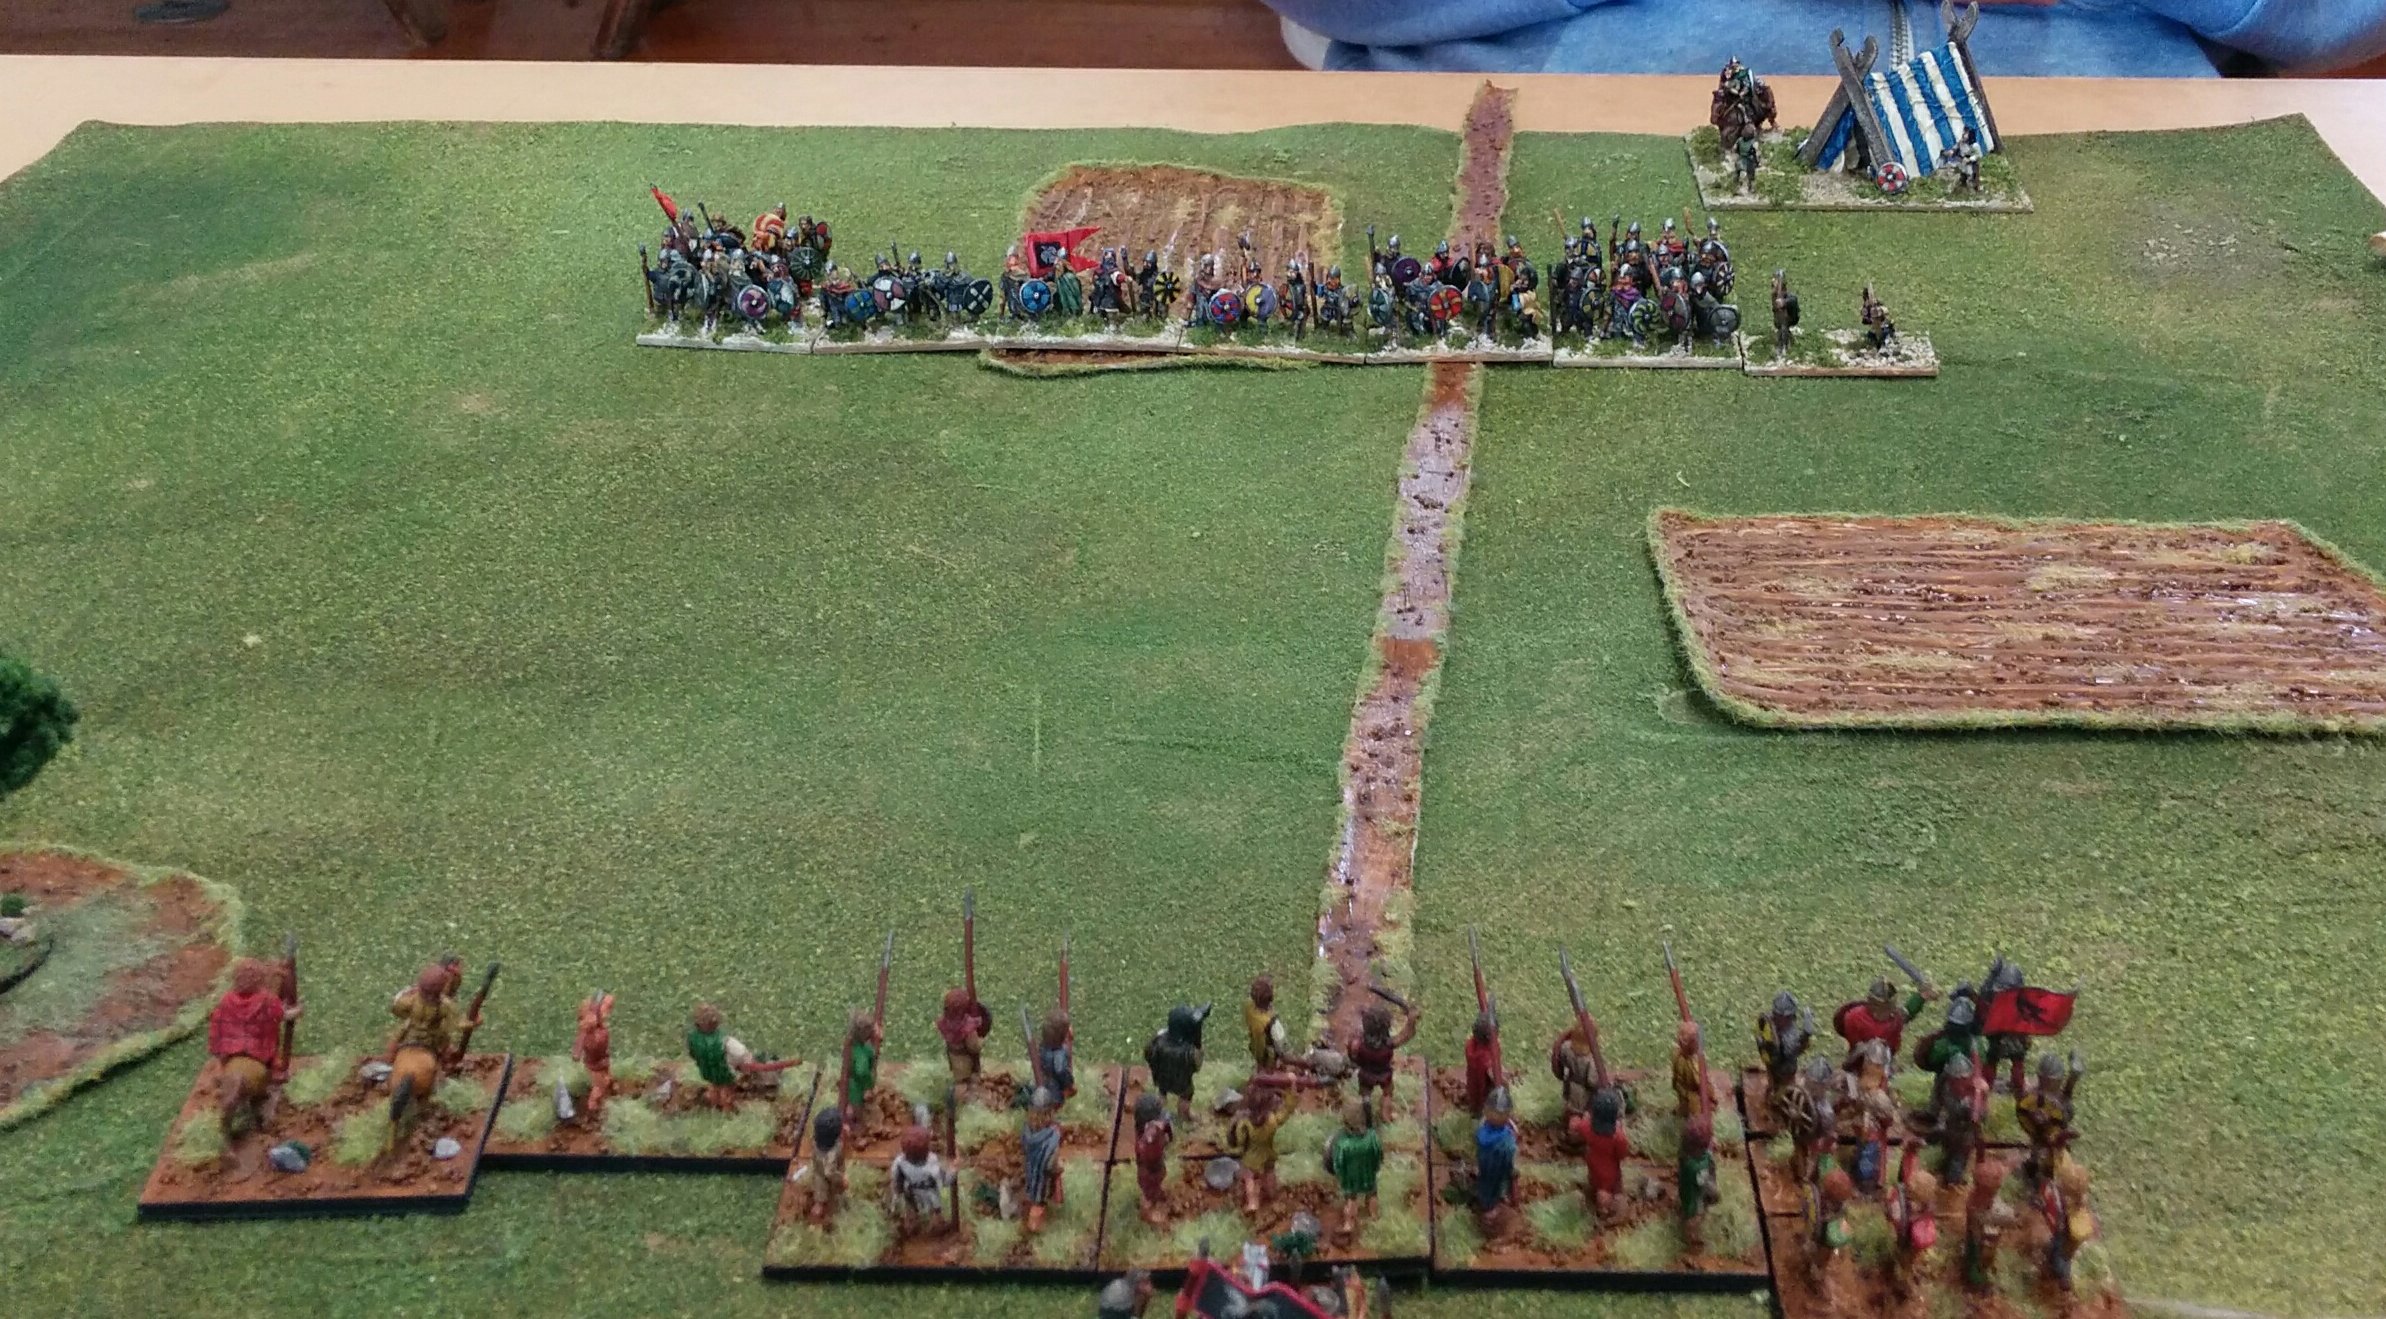
The Viking invaders of Scotland.

The defenders of Scotland (helped by some friendly Vikings on their right flank.
The battle was a close one, where the Scots won first blood, when the Galwegians broke an element of Vikings. However, the centre was somewhat of a stalemate, with a lot of toing and froing. On the Scots’ right their Viking allies did good execution and contributed to a close-fought 4-2 victory. Terrain and the greater mobility of the Scots were significant factors.

The finals situation; the wood has saved the fragile Scots left flank. Their Viking allies have hared up the field on the right flank, while a schiltron has collapsed in the centre.
- 4 – Later Macedonians v. Polybian Romans
After lunch I faced Joel’s freshly painted Polybian Romans. I decided I really should get my Later Macedonians out to meet them. Naturally in the face of unprovoked Roman aggression I was the defender again. I took two large terrain pieces to anchor my flanks and restrict the battlefield to the advantage of the phalanx.

The valiant Macedonians line up to hold Roman depredation at bay.

Scurrilous Romans set on spreading tyranny.
The battle was close fought, with the battle going in the Romans’ favour on their left flank, while the Macedonians secured the advantage on their own left flank, destroying both elements of Roman velites. However, it was the steadfastness of the Macedonian blueshields that secured victory; despite being flanked by Roman cavalry they repeatedly refused to break. In the centre the Galatians made noble execution of Roman legionaries and the whiteshields (leukaspides) broke their opposing legionaries.

The situation at the end; the Macedonian right flank is lucky not to have broken after their light horse fled, but the centre has triumphed.
- 3 – Later Macedonians v. Polybian Romans
Actually, there is a report that prior to this battle the Macedonian general was troubled by a nasty dream in which his thureophoroi proved his undoing. Romans report that this was an actual battle, but the more reliable Greek chronicler disagree (the battle just described was actually our second, as the first was over so fast!). The Macedonians defended again. Their terrain was too small to constrain the battlefield.

The Macedonian deployment.

The Roman deployment.
The Macedonian thureophoroi attempted to defeat the Roman velites and were disgracefully defeated (they are prone to this; witness their routing by Spartan artillery). Philip V tried to stabilise things, but was defeated himself; the battle was over without the main lines having contacted.

The final position. The thureophoroi were quickly routed and Philip was flanked and defeated. There was a scary big hole in the Macedonian line.
- 5 – Prefeudal Scots v. Carolingian Franks
The last battle was against Mike’s Carolingian Franks. The Scots had got on their boats and visited France. It didn’t go well for them.

The Carolingian Franks. The red beads denote those that can dismount.

The Prefeudal Scots.
How the Galwegians got to be in the centre facing knights I don’t remember (I think I deployed and then moved the line along a bit to fit it in the legal area and didn’t check who was facing who. Unlike the bold Kappadocians at the start of the day, the Galwegians didn’t produce an upset against the Carolingian commander. The schiltons were under pressure and collapsed, but not before a few knights had fled in the face of the Scots cavalry.

The final situation after the Scottish centre had collapsed.
All in all, it was a great day; there is another account of it here, and there are plans for more DBA action there soon.
Rebased Vikings
4 October, 2014

The entire army; there are extra figures for fielding the ‘Anglo-Norse’ in the King Magnus’ War campaign.
The Vikings are one of the first armies I finished, and one that has extra figures to serve in other armies and to allow it to be used for other more fictitious armies, such as the Anglo-Norse, or fantasy Vikings.

Another angle.
The army is not short of 4Bd; I’ve divided them into two sorts, the more professional huscarls and the Bondi.

The huscarls, more heavily armoured 4Bd

Another angle.
The figures are Feudal Casting, and some of the poses are ones I wouldn’t have chosen in the numbers I got, but the basis of this army was a DBA army pack with expansions.

The Bondi, more lightly armoured 4Bd.

Another angle.
In DBA 3.0 the 3Bd are different from the 4Bd, which makes the raiders worthwhile to have based differently.

Archers (3Bw or 2Ps), Raiders (3Bd) and Berserkers (3Wb).

Another angle.
Next up I’m painting some Khurasan Vikings as a Hero element for HoTT. However, I have a bit of a backlog in the painting queue, so I may not get to them for a while! At least I’ve finished with the rebasing!
On the Painting table
23 March, 2014
When I last wrote, I said the next project would be to paint seven 4Pk for my successor armies. Well, they’re over half done, but others have jumped the cue.
- Rebasing
The biggest project has been to rebase all my old armies. I had started this before I went to Adelaide, and a lot of my HoTT elements were all but done, just waiting for the flock. The impetus to restart this project was a desire to see how knights and spears compared under DBA 3.0. This got me redoing my first two armies, the Normans and Anglo-Danish. I also flocked the HoTT elements while I was at it.
Next, I rebased the Welsh, Irish and Vikings. This has taken quite a while, and is now almost completed. I’ve innovated by using No More Gaps to hide the bases. It adds more time to the job, but is worth it.
In the process of rebasing I got enthused with my Dark Age armies and the potential to use them for HoTT. I’ve now got the Scots Isles and Highland army complete again (it was demobbed for SBH figures. This started with the plan to create a Thegn general for the Prefeudal Scots so that they could have a 4Wb general with rear rank support and flanked by pike, something that’s likely to tear holes in most lines of foot. When I learned that the Scots Isles and Highland army is going to have a lot more choice in DBA 3.0, I decided to paint up the four elements of 4Bd I needed to get this back on the table. I’ve also painted a few more archers in mail to make their 3Bw more imposing. I also repainted the 5Hd.
So that’s some of what’s been jumping the cue for painting. I’ve also done a few HoTT elements, some Prefeudal Scots and Irish Lurkers — skirmishers on a 40×30 base along with a dog each. Finally I did a Cleric element — three medieval monks. Magicians and Heroes will follow.
- Song of Blades and Heroes
I’ve also been painting a few figures for SBH, actually quite a few. I’ve now finished thirty foot, and three mounted knights and a Hippogriff rider are close to being done. Most of these are Essex early medieval figures, dismounted Norman knights and Norman spearmen and archers. This adds some useful variety to my SBH range, but also is a way of getting started on painting some of these figures for an Essex Norman army. The rest are six halflings, two mailed Highland archers and a Druid from the Tabletop range. I’ve got more figures from Tabletop’s fantasy range. They’re a little larger than most of my figures and are very much ‘adventurers’, as they all have backpacks and other equipment. The wizards won’t quite look right in HoTT, but will be useful for SBH.

A halfling crossing the new bridge over the new stream with some of the assorted terrain additions doted around.
The other big activity for SBH is making terrain. I made a river (or a stream) using No More Gaps on a T-shirt. I rounded this out with a small bridge and then added a few tokens for treasure — chests, barrels, etc. I’ve done a tent and a small hut. And I’ve also made some hedges using Scotch Brite on iceblock sticks. The next stage for SBH is really dungeon tiles when I get a chance.

Another angle.

He hasn’t seen the two dragons, though!

Really just seeing if the timer makes a difference with the camera. I think it does.
- Plans
Those seven elements of pike should be finished next. Then I suspect I’ll be working on HoTT stuff: heroes, wizards, but also a dwarf and an elf army. More fantasy SBH figures may get done as well. I’ve started putting together a 3Cv for my Welsh; the North Welsh can have a South Welsh ally, who has to include the general element. I find this a bit odd — Welsh with two 3Cv seems too much. I might also work on the Normans, but I reckon the elves and dwarves will be more attractive.
Recent Gaming
23 March, 2014
I’ve not kept up with reporting games I’ve played. Part of the reason for this is because I’ve only got a camera that is not all that satisfactory. I’ve taken better photos with my phone than with the small camera I’ve tried to use. The tripod is broken and can’t support the large camera I’d used for my gallery shots.
The other reason I’ve not been active on the blog is that I’ve been too busy painting (more in the next post). Anyway, I’ve played quite a lot recently, and had some very good luck. Here are some photos that aren’t too blurry.
- Battlecry, 16 Feb 2014
Last month I got along to Battlecry for a day of demo DBA games. We got a bit of interest and should be running a competition next year as a result of this. We played DBA 2.2, as noted earlier on MEDBAG.
My first game was against Joel, a historical matchup of my Early Seleucids against his Classical Indians.

Early Seleucids face Classical Indians.

The Indians up close (some are hidden behind the trees.

The Seleucids.
I should have been in serious trouble as the Indians came around my left flank in large numbers. However, they were obviously unfamiliar with scythed chariots, as mine proceeded to tear them to pieces. I came away with a lucky victory.

Chaos on the left flank.
Next I faced John, who’d just finished his Celtiberians. I used my Gauls.

Gauls v. Celtiberians.

View from the Celtiberian camp.
I managed to meet his warband with my cavalry and used this to my advantage in a battle on a narrow frontage.

Gallic cavalry triumphant.
I then faced Mike, who used my Carthaginians. I took my Syracusans. As we are both littoral, this involved a waterway, which ended up to my back. Mike went for a littoral landing.

Syracusan v. Carthaginians.
I hurried to advance to reduce the potential for the littoral landing party to make trouble. I was able to sack his camp (the crucified Syracusan was a provocation!) and used my longer line to outflank his elephants. Another victory.

The Tarantines return from sacking the camp.
I think we played some more games that I didn’t take pictures of. The last on my camera was my Syracusans against John’s Celtiberians. I don’t remember for sure if I won, but I think my luck was pretty strong, and I used my advantage in cavalry to compensate for the vulnerability of my spear to his warband.

Syracusans v. Celtiberians.
Unrecorded is our final BBDBA game of Carthaginians and Celtiberians against Romans and Spanish. This was officially a draw, but I’m sure the Romans had the edge when we stopped.
- Auckland City Guard
Since then, I’ve mostly played DBA 3.0. Joel’s visited after work a few times, and I’ve got to the City Guard again. We’ve had a lot of fun trying out his Aztec hordes of doom, and we tried out a number of permutations of knights against spear.
From memory the time before last we played: Normans v. Anglo-Danish, Early Crusaders v. Comnenan Byzantines, Aztecs v. Prefeudal Scots and Vikings v. Anglo-Danish. I think there was an Aztec v. Early Crusaders too.
Last weekend I took some photos:
Our first game was his Aztecs against my North Welsh.

The Aztecs meet the Welsh.

The Welsh with their South Welsh ally.
The South Welsh cavalry got in the way of his archers and the spearmen got flanked; however, the Welsh had been making progress against the important Aztec elements.
Next we played Ptolemy against Lysymachus. The Ptolemaic army was quite different from what I expected. I tried a littoral landing of three auxilia in a line with side edge contact with the waterway. It seemed legal and threw Lysimachus’ plans to meet this treat. I got a narrow victory in this battle.
We then tried Carthaginians against Gauls.

Carthaginians drawn up against Gauls.

Carthaginians with a random stack of skulls next to their camp.
The Carthaginians won in a battle stacked in their favour (though elephants don’t quick kill warband any more). Our final battle was the Carthaginians against Aztecs. I didn’t take any pictures of this. The Carthaginians took only one elephant, I think. They were lucky in a battle between their two 2LH and the Aztecs two 2Ps. I killed both of them, but had I not, my back was to a wood, and I’d have been very much at a disadvantage.
28mm DBA Campaign Day at the AWC
20 June, 2011
Yesterday I got along to a 28mm DBA day at the Auckland Wargames Club. It had been proposed by Jerome, who on the day asked me to organize things. As we had no map and no theme—the armies were what people chose to bring—I went for what I could remember of the system described by Chris Brantley on Fanaticus:
http://www.fanaticus.org/discussion/
We went for random rounds that led to the loser becoming the winner’s vassal. After three rounds there were two equal factions and we decided the winner with a game of BBDBA.
The participants were:
Andrew: Sea-Peoples (I/28)
Alistair: Spartans (II/5a)
Mark: Gauls (II/11)
Steve: Marians (II/49)
John: Marians (II/49)
Jerome: Early Franks (II/72d)
Mike: Vikings (III/40b)
Richard: Ghaznavids (III/63b)
This made for a preponderance of blade armies, making my Gauls a better choice than I’d thought. I’ll only describe my games, except to say all the games came to a result apart from one in the first round between John and Andrew; they started late and their blade were only bouncing each other back when we called time.
In the first round I faced Jerome, who’d not played DBA before. Our armies were fairly similar, except my Gauls had more cavalry. Jerome stayed in a big wood initially, and when he started to move, he didn’t have enough PIPs to get fully out of it. I hoped to contact his general with my cavalry and overwhelm him, but I ended up making contact with my warband on his, and owing to the effects of pursuit it soon developed that I had the edge, as I could get rear-rank support when he was still in BGo. I lost my psiloi on one flank, but got a 6-1 on a double-rank Wb and from there the advantage stayed with me.

The final situation against the Franks.
My second game was against Ghaznavids; it was a match-up I didn’t expect to do too well at, as my Warband would not like his two elephants. However, Richard, had not played DBA since version 1 and didn’t know about the second move of warbands. I was blessed with a plenitude of PIPs at the right time and was able to get warbands into his spear. On the first round my cavalry bounced off his, but on the second I got a pair of warbands against the spear next to his elephant general and a psiloi onto the general. The dice smiled on me; both his spear fell to my warbands and then my psiloi rolled 5-2 on his general for a surprise victory. Richard would not have allowed me to get so close if he’d known about warbands’ charge move.

Warbands triumph over elephants.
For the third round I had the victors meet. I faced Sea People and didn’t get the table edge I’d hoped for. The Sea People deployed between two hills. I ended up losing as I got dragged into fighting in the centre rather than waiting to win on my right flank. This happened as I tried to provide overlap support on the right flank, which drew my cavalry forward to provide it. My one attack on the right flank (which took 4 PIPs to coordinate) was repulsed without success. In the centre my general was double overlapped and rolled a 1, silly chap!

The Gallic general cops out, and it's all over against the Sea People.
At the end of this round Andrew commanded me and Alistair, who had defeated Richard: one elephant recoiled into the other, oh dear! Richard had a point that this was a consequence of the depth of 28mm elephants. What happened was one elephant was recoiled then attacked in it flank. It turned to face, and coward that it was, recoiled again into the other elephant. In 15mm it would have recoiled behind the other elephant. The Spartan camp was a rhino being led away in chains; now they could use an elephant, or at least bits of one!
John faced Steve, and the resolution of this Roman Civil War was that Steve was his vassal as was Jerome, who had defeated Mike. Mike and Alistair decided to sit out the final battle, leaving Andrew and John to attempt to bring their inconclusive opening battle to a result. This time with allies. Andrew was the aggressor, so we got to match up our armies to our advantage. Andrew faced John on the flank with BGo, I faced Steve on the more open flank and Richard’s cavalry and elephants faced Jerome’s warbands with a bit of wood in the way.

The battlelines are drawn. The Sea Peoples on hte right with the Gauls in the forefront.

From the other end of the field.
On my end of the field I was hampered by low PIPs (1s) for about 3 turns. I decided to try to get my cavalry across my front and around the Roman flank. I was very lucky to do so without getting caught. Meanwhile, the Ghaznavids had lost a light horse to warband who closed the door with their second move. He then advanced against the Romans, hoping to get the elephants at the warband. However, his cavalry were swept aside by the Romans and it was all over in the centre.
I then had great PIPs. I was able to get my general behind the Roman line to attack their psiloi, something I can’t remember ever managing before. The warband had the PIPs to double-move into overlap and combat. It was looking good. The general despatched the psiloi. The cavalry on the flank had overlap from a warband; 3-2 odds and the Romans had nowhere to recoil. They got a stick, sigh! From there it all went wrong. The next combat was no longer 4-4 odds, but 4-5 and was recoiled. The last two were doubled and the Gauls were broken. But for that second combat I might have broken the Romans and kept the game alive. It was a victory for blades; curse their tenacity! Steve’s Marians soaked up the pressure from most of two armies and came out with barely a scratch!

The final result. The Ghaznavids are in retreat and four Gallic warbands have been broken. Meanwhile at the other end of the field little has happened.
This was an enjoyable day; it had a good turn out and all the games were played in good spirit. Some of the players decided DBA wasn’t what they liked; the fast-play rules have their own quirks that need to be learnt, and there is nothing in the rules to allow for better quality troops. Thank you Jerome for proposing the day and Andrew for providing me and Steve with armies.
This is the second such event at the AWC; I hope there will be more. I may try to encourage something similar to be organized at the North Shore Club, perhaps in 15mm and with a theme. It makes for a fun day.
Hordes
23 November, 2009
Last week I painted up three elements of 7Hd for the Battle of Hastings. I also finished all the figures I need for the King Magnus campaign.

Feudal Hordes
These are all Essex figures, some of which I got by trade from Paul Potter. They are pretty primitive looking figures, some are armed with lumps of wood or crude stone clubs. They’ll be used in campaign games for emergency reinforcements. The middle element is made up of figures without trousers, so it’s particularly suitable for the Welsh and Pre-feudal Scots, who don’t hold with such fashion!
I also finished one 3Sp and two 3Bw for the Welsh (Feudal Castings, of course). Until I’m inspired to paint the early Welsh option (lots of 3Wb), that’s all of them for now, though I do have the figures for some more command elements, particularly another mounted one, but I think other projects will take priority.

More Welsh
And I’ve done some more Viking archers (also Feudal Castings), only to decided that if I make the Anglo-Norse huscarls immune to QK, they won’t need any more light troops. Still, I’ve now got enough archers for two Viking armies, and I’ve probably got the blades too, if I painted the rest; again I can’t see that being an immediate priority.

Viking Archers
The Battle of Stamford (Harold v. Harald)
15 November, 2009
Well, I finally fought the battle between Harald Hardrada and Harold Godwinson that was the main point at which the alternate history for the King Magnus campaign branches from regular history. I decided not to make it a close refight of the battle of Stamford Bridge, but rather make it a regular DBA encounter between the two armies. I was thinking it’d be a walk-over for the Vikings as they out-classed the bulk of the Anglo-Saxon army (Bd v. Sp), but it proved to be an enthralling encounter.
Harald had defeated the Northern earls at Fulford and was advancing on Harold when the two armies met near Stamford. Harald had 11 blade, of which 4 were his huscarls, 6 were hird and one was an element of tag-along raiders (for variety!). He also had some berserks. Against this Harold met him with 3 elements of huscarls (4Bd), 8 elements of fyrd (4Sp) and an element of skirmishers (2Ps).
Harald was the aggressor and Harold met him along a road where two low hills faced each other. To one side of them was a wood. Harold was fortunate in getting the edge he wanted and deployed so that the fyrd would be able have the advantage of the hill. He deployed between the hill and the woods with his huscarls and anchored the line with his skirmishers in the wood.

Initial Deployment: English on the left, Vikings on the right.
Harald saw a number of ways of attacking this deployment. He opposed the fyrd with himself and his huscarls along with the berserks. He hoped to get around the hill with the berserks. He then opposed Harold and his huscarls with his hird. He hoped to be able to flank and destroy the skirmishers in the wood and turn the line on Harold.
Harold in turn could not see anything he could do but wait and try to strengthen his left flank. For the first four turns the Vikings advanced while Harold wheeled the fyrd to occupy the hill.

Turn 1: Harald advances; Harold wheels the fyrd onto the hill.

Turn 2: The advance continues.

Turn 3: The Vikings rumble closer.

Turn 4: The Viking huscarls wheel to face the hill and the hird continue to advance.
On the fifth turn the berserks attacked a lone group of fyrd guarding the flank, but were repulsed. On the next turn, with only one PIP, Harald detached some of his huscarls to support the berserks. Meanwhile, Harold deployed a second fyrd to strengthen this flank.
Turn 5 (Harald): The berserks are repulsed.
")
Turn 5 (Harold): Harold brings more fyrd to face the berserks.

Turn 6: Harald supports the berserkers with some huscarls.
On turn seven Harald attacked. While he and the huscarls waited at the foot of the hill, on the right flank the detached huscarls and the berserks tore the opposing fyrd to shreds. The huscarls rolled 6-1 and the berserks 6-2 (I’ll just give the dice rolls, attacker-defender)! On the other wing, however, things did not go so well. The skirmishers repulsed the hird (2-6) and Harold nearly destroyed the hird opposing him (1-6).
")
Turn 7 (Harald): The Saxon left flank is swept away.
Harold in reply advanced on the hird, but despite recoiling the enemy he destroyed none (had he not retired the skirmishers to prevent them getting flanked, however, with their overlap he would have!).
")
Turn 7 (Harold): Harold and his household troops force the Viking hird back.
On the next turn Harald finally assaulted the hill. With the end fyrd flanked he had a good chance of destroying another element, which he did. Otherwise he forced the fyrd to retire up the hill. However, on the left Harold, despite being overlapped on both sides, fought to a stubborn standstill, rolling his second 6 in combat. The fyrd in the centre also fought to a stalemate. Significantly, Harald had committed to this fight the hird that had been hanging back in the centre to stop flanking attempts on either half of the Viking battleline.
")
Turn 8 (Harald): Harald assaults the hill. Note how the central element of hird has been pulled into the battle.
Harold was staring defeat in the face: the fyrd on the hill was on the point of collapse. Nevertheless, he launced himself into the fray and destroyed the hird in front of him (his third 6!).
")
Turn 8 (Harold): Harold fights back, making it 1-3.
Harald, low on PIPs (2), could only react to Harold’s attack on the fyrd, but with the skirmishers having fled, he was able to flank Harold’s huscarls. These, however, proved stubborn and fought to a stalemate (4-5).
")
Turn 9 (Harald): Harold's huscarls stubbornly fight off a flank attack.
With this reprieve, Harold was still hanging on. He was now able to flank the hird in the centre. This resulted in another element of hird being destroyed. He continued his ferocious form rolling another 6, but the hird in front of him only recoiled, rolling 3. Better still, the huscarls that were flanked threw back their attackers (3-1).
")
Turn 9 (Harold): Harold's turn to flank! Now it's 2-3.
Harald continued to have low PIPs (2 again), and decided to end things by sending the berserks against the fyrd on the hill. It’d make a good spectacle from his vantage point. This used both his PIPs. Unfortunately, these fyrd, buoyed on by what they saw their king doing below them, completely routed the berserkers (1-6)! Suddenly the battle that had looked to be all over for the Saxons was in the balance!
")
Turn 10 (Harald): Harald has a grandstand seat of his berserks getting routed. It's now 3-3
In contrast to Harald’s dithering, Harold was all action (6 PIPs). The element that had flanked the hird last turn now rounded on the huscarls, while he moved the fyrd on the hill and the skirmishers to shore up his flanks. Harald’s huscarls proved as tough as Harold’s, though fortunately it was a stalemate (5-5), as otherwise the flankers would have recoiled into their own men! However, on the other flank it appears the hird were losing heart against Harold’s household professionals, having failed to break them when they were flanked. Harold rolled his fourth 6 and broke the hird in front of him (who rolled a 1). Remarkably the huscarls that had fought off their flankers repeated the exercise (6-1)! Harald’s hird was in flight and he was forced to retire from the field surrounded by his huscarls.
")
Turn 10 (Harold): Victory to Harold (5-3) as his huscarls show their professionalism.
-
Review
What a remarkable battle! I really thought the English didn’t have a hope, and I wasn’t happy with their plan, which was to sit and wait. When the flank on the hill crumbled, there was nothing they could do about it. In hindsight it was the committing of the hird that was ZOCing the two fyrd at the corner of the English line that was Harald’s undoing, but he was also handicapped by poor PIPs and some very dogged fighting by the English huscarls. It was quite neat to see how the huscarls on both sides fought—on both sides they shrugged off flank attacks. Otherwise, Harald’s gamble with the berserks only confirms the essential solidity of spear; they’re no walk-over.
-
Where now with the King Magnus’ War campaign?
I knew it was tempting fate to fight this battle. Still, Harald’s still alive and it’s reasonable to think he could retire from the field with his huscarls in good order. He would then retreat back to Norway, leaving Harold to meet William. As Harold has fought so valiantly it’s only reasonable that he get to refight this battle. If he loses (not a forgone conclusion by any means) I’ll assume that the Battle of Navenby that I fought a while back was Harald’s return to the North and rallying of the fyrd there against William. The campaign would then be back on track, assuming that Harold does as he’s supposed to against William!
I’m not sure what to do about Harold’s casualties. Do I allow him to make good the loss of the 3 fyrd, or do I fight this like a campaign with him down 3 elements? Alternatively I could give him some hordes to make up the numbers (though I’d have to paint them!). While I’m at it, I should really repaint Harold’s standard! The St. Andrew’s Cross dates back to when he was going to be a Pre-feudal Scot!
Prince Madog in Vinland
3 October, 2009
The story goes that Prince Madog set out from Gwynedd in 1170 and sailed to America. It now seems likely that he actually sailed through a temporal vortex to an unusual archipelago that was made famous in the account of St. Brendan. Madog planned to reach Vinland, which he’d heard about through family connections with the Dublin Vikings. It was also through these connections that he’d developed his proficiency at seafaring and his knowledge of Norse, both skills that would stand him in good stead on his voyage.
The first island Madog came to was one occupied by some very forlorn Vikings, who confessed, shamefacedly, to being leaderless and lost. Madog, clearly a plausible chap, declared with great confidence that he knew how to get to Vinland. He was so persuasive that he was made leader of this new combined expedition, even though the Vikings were contributing twice as many troops.
They sailed until they came to large and fruitful island, which Madog confidently asserted was Vinland. However, they soon found they were not alone on this island; others had sailed there before them. When Madog’s scouts reported back that the others on the island said they were Picts, Madog was deeply skeptical, “There’s not been Picts for hundreds of years. What are they playing at?”. When he saw the ‘Picts’, his suspicions only increased, “These don’t look like Picts! What’s their game? Those are Scots!”. The ‘Picts’, of course, were none other than Bridei mac Máelchú and his army that had encountered Patricius to their detriment the week before. They were enjoying some R&R after that encounter, and when word of this got back to Bridei, he was deeply offended; after all, Scots were those pesky invaders from Ireland! He refused to extend any hospitality to these visitors and demanded an immediate apology.
No apology was forthcoming; Madog addressed his troops, “There’s something shifty about these so-called ‘Picts’. I say we teach them to go around pretending to be what they’re not”. The Vikings needed little persuading. With that, they rushed out to do battle with Bridei’s men. Speaking of being what they’re not, Madog’s army consisted of 8x4Bd (Vikings), 2x3Cv (Madog and some more horsemen) and 2x2Ps (skirmishing Welsh). A skeptic might suggest that they were trying to replicate a Marian Roman army.
Madog narrowly beat Bridei in his decision to attack (he rolled 6 to Bridei’s 5; both had an aggression of 3). However, he did not get the edge that he wanted, and Bridei, cautious after his last choice of terrain, had gone for two small woods in opposite corners of the board, and a low hill to one side near the middle.
Bridei deployed with his spear in the centre flanked by light horse and skirmishers, while he stayed in reserve. Madog met this deployment by placing his Vikings in the centre, with himself in reserve, and a skirmisher in the woods on the left flank and his other cavalry and a skirmisher on the right flank.

Initial deployments
Bridei felt no need to alter his deployment and the battle got under way. Both rolled 6 PIPs for their first turn, and Bridei attempted to contest the hill with some of his light troops.

Turn 1: Bridei sends his skirmishers forward on his left.
Bridei then remembered that those weren’t 2LH, but 3Cv he was up against, and his skirmishers suddenly felt very vulnerable, but he decided to push on with the attack. If he could ZOC the 3Cv, it wouldn’t be able to attack the 2Ps.

Turn 2: Bridei’s left flank are in position to contest the hill.
Bridei with only 1 PIP decides to attack the hill to make the most of his slender advantage of an overlap. He does well to force the Welsh cavalry back, almost destroying them (2+6 v. 3+2).

Turn 3: Positions after the hill is assaulted.
Meanwhile, Madog, with continued good PIPs has rushed Vikings to support his men on the hill, and Bridei abandons his assault.

Turn 4: Bridei’s left flank retires before the Viking reinforcements.
Madog continues to advance, and commits himself to trying to overpower the Picts on his left flank. Bridei responds by ordering his spearmen to fall back.

Turn 5: Bridei retires before the advancing Vikings.
Madog with only 2 PIPs moves to the left flank and orders the skirmishers out of the woods to support him. Bridei, by contrast, gets 6 PIPs, and continues the retreat of his spear, while his right flank light horse race between the battle lines directing rude gestures and taunts at the Vikings.

Turn 6: Bridei gambles on overpowering Madog’s left flank with all his cavalry and most of his skirmishers.
Madog recovers his composure (5 PIPs), but he’s now out of command range of his right flank. He orders a general advance. Bridei, with another 6 PIPs, organizes his forces on the left flank, and brings his skirmishers in behind the spear on the right flank to support them against Madog and his retinue.

Turn 7: Bridei masses his forces on the left wing.
Madog continues to plough forward, trusting to speed to overcome the enemy before they can do too much damage on the right flank. Bridei is let down by the PIP dice (1 PIP), but decides to strike at the weakest point in the line, personally riding down the Welsh skirmishers that are the link between the cavalry and the Vikings. He succeeds. First blood to the Picts.

Turn 8: Bridei has broken through on the left flank.
However, the Vikings have finally made contact with the Pictish spear with an overlap on their left flank. They anticipate a rout, but the Pictish spear prove surprisingly doughty. The second element along from the left is held to a stalemate, while the others only manage to push the Picts back, scarcely what they’d hoped for. Madog orders his cavalry on the right to retire to the hill, while he moves across to try to repair the damage.
Meanwhile, Bridei decides that the Viking line looks most inviting. He orders the spear that had fought the Vikings to a standstill to retire to the Pictish line, while he and his light cavalry attacked the left flank of the Viking line. In a savage encounter (both rolled 6), he destroyed the Vikings, giving heart to his spear.

Turn 9: Bridei leads by example, routing an element of Vikings.
Madog redoubled the attack on the Pictish spear, while he drew alongside the other cavalry in preparation for driving out Bridei’s cavalry. However the second attack was even less successful. That second element along, although still overlapped, actually pushed back the Vikings this time and at the end of the attack battle honours were shared, with one stalemate and each having two push-backs, a truly dismal outcome for the Vikings.
Bridei attempted to repeat the flank attack of the previous turn, but was this time repulsed with his light horse recoiling towards Madog. Meanwhile, the Vikings continued to underperform, with those in the stalemate conflict now being recoiled.

Turn 10: Madog’s attack is in disarray, but Bridei’s light horse are now vulnerable.
Madog continues to issue orders (5 PIPs), attacking the exposed light horse with his cavalry. This succeeded, but the attacks of the Vikings were woeful, two being repulsed and the other a stalemate.
Bridei’s attempted to strengthen his right flank, while launching another flank attack, this time supported by spearmen. However, this attack was a stalemate and two other attacks by spear on Vikings resulted in one being driven back and the other element throwing back its attackers, despite being overlapped on both flanks.

Turn 11: Bridei’s attack on the left flank ends in stalemate.
Madog now had a chance to defeat Bridei by flanking him against the Vikings. The odds were still in Bridei’s favour, but defeat would destroy him. Bridei triumphed in a cautious encounter (both rolled 1s!) and his spear on the right flank remained composed, despite being flanked, fighting the Vikings to a stalemate.
")
Turn 12 (Madog): Madog’s desperate roll of the dice fails, and his army is at the point of breaking.
Bridei decides to attack the Welsh cavalry while leaving his spear to flank an element of Vikings. His attack is indecisive and he’s forced back. The spear, however, destroy the Vikings that they flank. At this point, despite finally destroying the left flank of the Pictish spear, the Vikings have had enough and break. Bridei’s troops hail their leader’s inspirational victory.
")
Turn 12 (Bridei): Bridei’s spear destroy another element of Vikings, while on their left flank the Vikings finally, but too late, defeat some of the Pictish spear.
-
Review:
Bridei won the only way he could in a spear vs. blade match-up — on the flank. He made good use of the opportunity Madog provided when he committed himself to his left flank. This gave Bridei his first two victories, against the skirmishers and the Viking’s right flank. By contrast, Madog, perhaps, overestimated how long it would take for his advantage to tell in the close-order infantry contest. Having said that, the Pictish spear proved unexpectedly tough. By being drawn forward by the Picts, he also lost any terrain help he might have got from the hill and the woods. He believed that if they could only close with the spear, the Vikings would soon overpower them.
The terrain placement by Bridei was much better, in that there was no edge that would severely disadvantage him.
Bridei was possibly stung by comments at the end of the last battle that his command element was ineffectual, as he personally put to flight three of the Viking elements. His element was the most effective one the Picts had against blades, and he used it to good effect!
Viking Army
20 September, 2009

The Completed Viking army
Earlier this week I finally finished the Viking army. I had redone all the shields of the Huscarls a few weeks back and started on the rest of the Hird. I finally finished them this week: 5x4Bd and 1x3Bd (Freelance raiders).
The completed army consists of:
6x4Bd: Huscarls (arrayed three deep next to the command)
6x4Bd: Hird (arrayed either side of the Huscarls; I’ve got too few of these compared to the Huscarls, but the difference between them is fairly slight)
1x3Wb: Berserks (on the front left)
1x3Bd: Freelance Raiders (behind berserks)
1x2Ps: Skirmishers (behind raiders)
I’m not sure when they’ll get to fight, as what time I’ve had for gaming recently I’ve spent painting—an enthusiasm not to be wasted while it lasts!
Trouble at the Camp (Vikings v. Norse Irish)
14 July, 2009
A few days after defeating Anglo-Normans I tried the Irish against Vikings. I posted the following to Steve:
Well, my blog would be a little embarrassing—yesterday I tried Vikings against Norse Irish and totally screwed up the littoral landings. The Irish landed 2 Bd an Ax and a Ps behind the Viking lines. They were actually in range of the undefended camp. I then decided that was too bad a set-up by the Vikings and moved the camp and a Bd that was defending on the wrong side. I should have then repositioned the landing, but I didn’t. Despite some truly heroic dice-rolling by my daughter Anna the Irish landing was destroyed, losing them the game. As they were out of command range they sucked up all the PIPs. I should really have started over or not moved the camp, but I tend to favour the Irish (I’m trying them out), so I made the change in order to avoid what seemed an incompetent set-up.

