Painting update
12 April, 2020
It’s been a very long time since I’ve written anything here. I have been playing a few games. In particular I’ve been playing Sellswords and Spellslingers with Kieran quite regularly. I even have some figures in 28mm I could paint for it. In additition last year I made some 15mm terrain for it, scrubs and boulders. I also bought some trees, but didn’t get so far with them.

Boulders and shrubs for SoBH and SS&SS
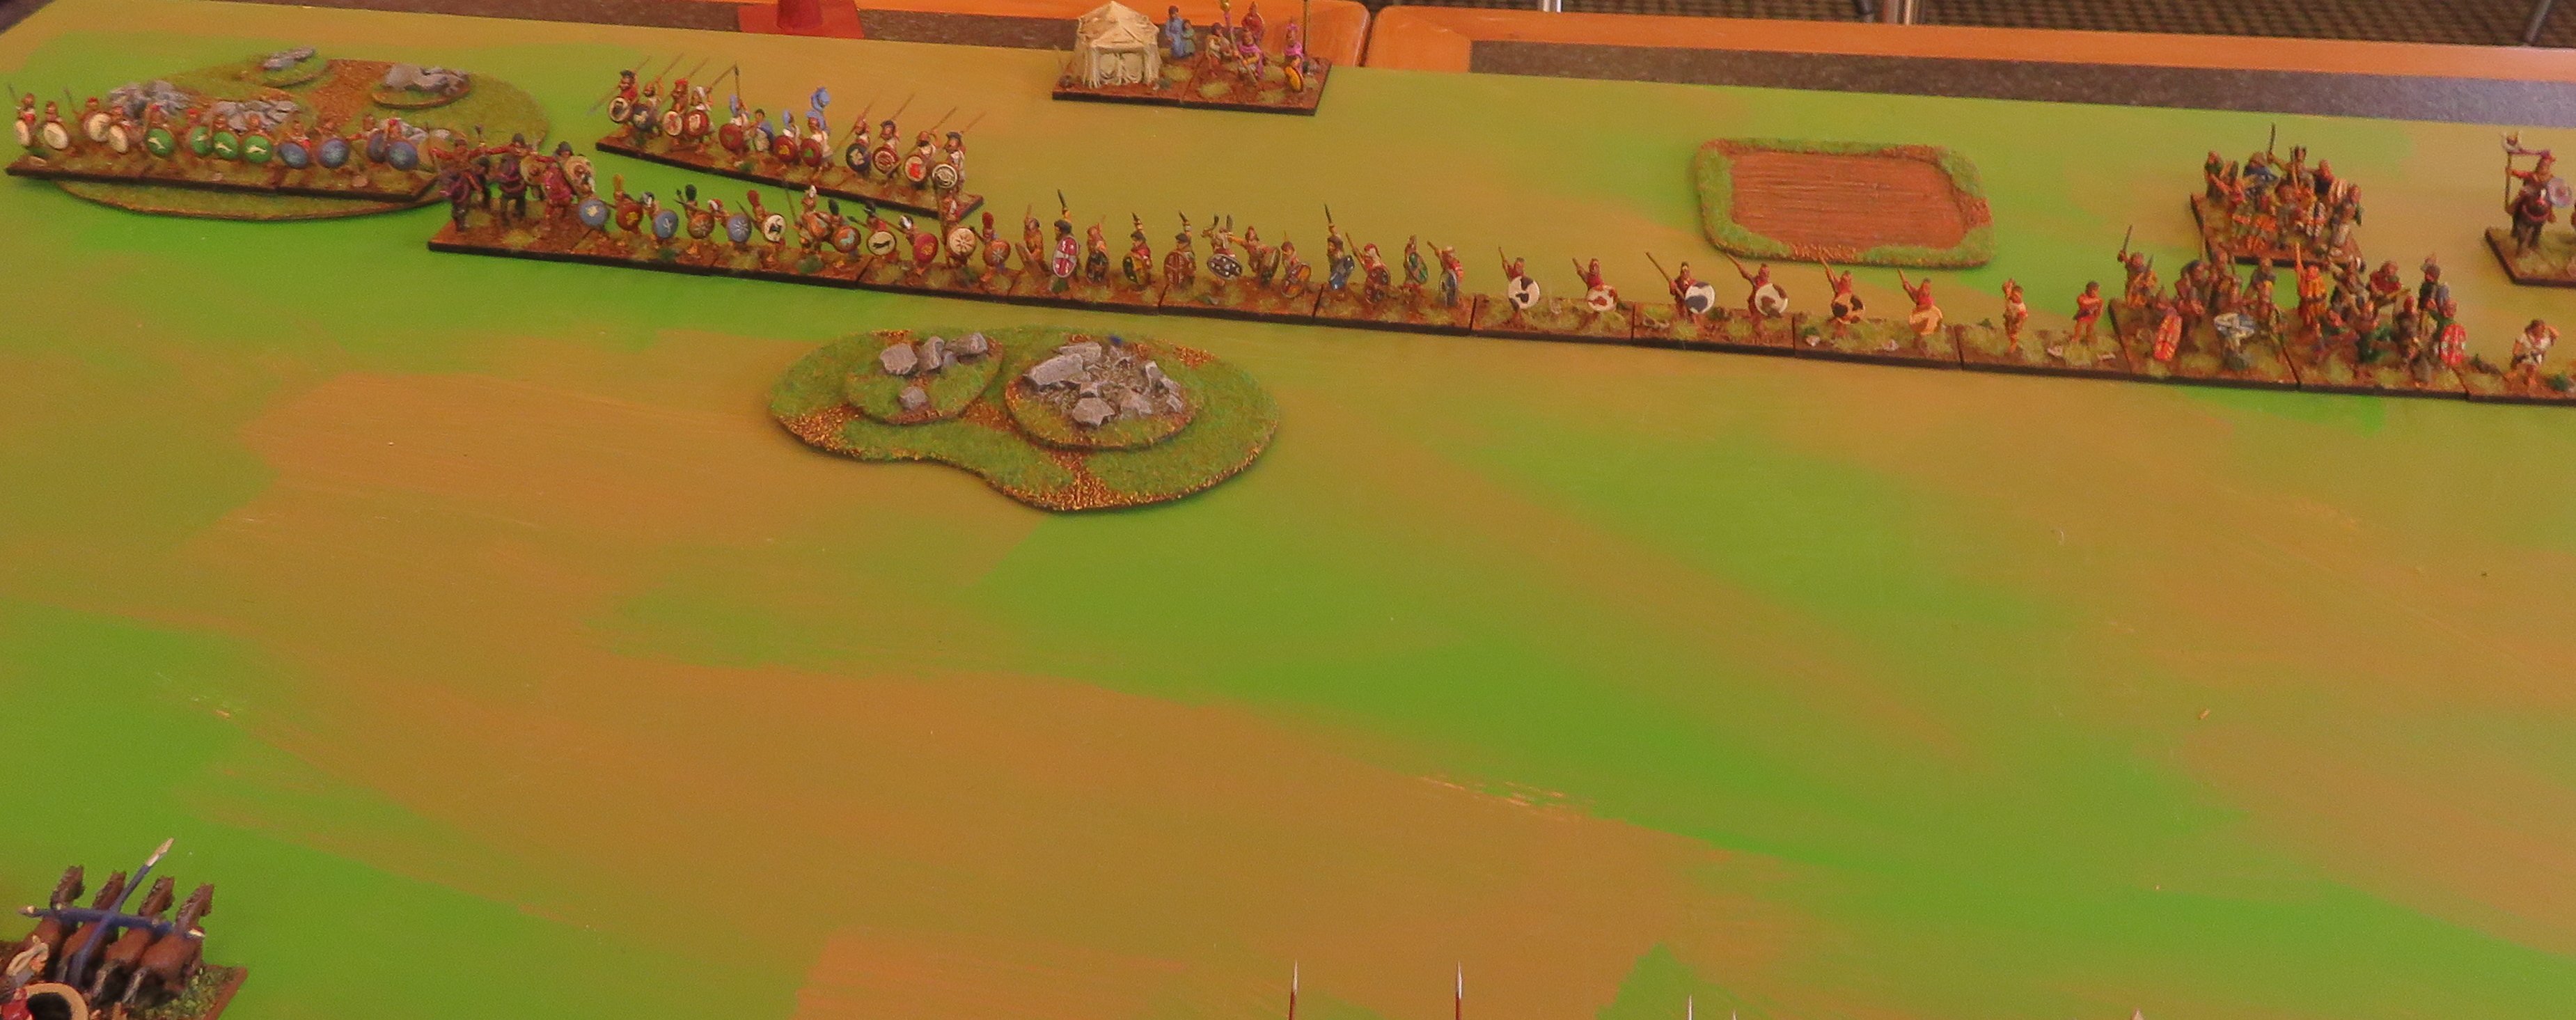
I have also ugraded my hills for DBA. I used a t-shirt base for the polystyrene hills. It gives some protection and makes them non-slip.

Numidian light infantry try out the new hills.
I may yet make some difficult hills that incorporate rocks. I got some moulds from the hobby shop last year; you can see some of the first lot of rocks incorporated into the scrubs above.
Otherwise, I have been playing DBA quite frequently. I’ve gone out to Nick’s regularly and we’ve used a number of armies each time. I also went to a pub on the North Shore during the week before the lockdown started. It was a great occasion and once lockdown ends could become a fixture. I had three games of DBA in the evening.
I have quite a few figures ready to paint. Rather than finish any of them I have got elements for four armies ready to go. Which ones will I do first?

Clockwise from the back: Late Imperial Romans, Syrians, Communal Italians and Veteran Carthaginians. 15 mounted and 114 foot.
The Carthaginians were started at the end of 2018, as were the Italians. I should get them finished first, as they are in various stages of completion. The Syrians will flesh out the Syrian Army that is complete, and I recently got their shields sorted, which was a major exercise, as they all come with little bucklers, and I want them to have shields with LBM transfers. Finally I bought the Romans at the end of 2018 and they’ve been at the back of the queue since then. I decided to get them all prepped, but I would like to paint them after the others (they’re the first of enough for BBDBA).
Practice games
15 January, 2019
Yesterday I caught up with Joel for some very enjoyable practice games. In the first two games Mithridates squared off against Sulla. I took the scythed chariot to assess its potential, as well as an Armenian ally of a 4Kn amd two LH: Cv (gen), SCh, four 4Bd, two 3Ax, Ps + 4Kn, two LH.
- Mithridates v. Sulla
In the first battle, Mithridates was the defender, and went for a battlefield of two gentle hills, a hamlet and a patch of rocky ground (both RGo).

The two armies arrayed.

Mithridates.

Sulla.
This battle opened fast, with Roman psiloi advancing to face the scythed chariot. I opted to go after it with the Kappadokians, who were supposed to face the Roman cavalry. They killed it, but then were facing Roman legionaries, and the whole battleline was disordered. My combat dice were bad, but they shouldn’t have saved me from being dragged into such a disruptive effort to save the chariot. I lost.
- Sulla v. Mithridates
The second battle saw Mithrdidates on the offence facing an impressive city in the Balkans (Diocletian’s palace).

The Roman defenders.

Mithridates.
This time the chariot got stuck into some blade, along with the cataphracts. In short order the chariot had destroyed some blades and advanced into overlap onto some psiloi that the cataphracts routed.
The Romans were limited by PiPs in their response, but they managed to destroy an Armenian LH (these had rushed forward to cover the cataphracts, and avoid being attacked by the Roman cavalry).

The Roman response on their right flank.
Mithridates decided to continue the attack with the cataphracts, and to send the chariot out to the left to attack another legionary element. The remaining light horse retired. The chariot failed this time, and the cataphracts got a draw with the legionaries — not good. Now we were 2-2, but I had only 9 elements to the Romans 10.

After combat, the chariot and cataphracts are destroyed.
There was a lull while we both reorganised (and battled low PiPs).

The armies regroup.
The Romans won this one too, as I committed the imitation legionaries at little chance of success. The psiloi on their right fled, leaving its neighbour to be overlapped. I was pressured into this, as the two Kappadokians in the woods were risking being overlapped when the Romans advanced against them. On reflection, the Kappadokians would have been better on the other flank to face the cavalry. They did little in the woods. Overall, the verdict on the chariot is that it’s not a super-weapon, but could add some interesting wrinkles to a battle.
- Samanids v. Aztecs
After lunch it was the turn of the Samanids. First up they faced Aztecs (in the New World too, a first for the fabled Samanid navy!). The Aztecs deployed between two woods, while the invaders chose to deploy in the open.

The Aztec hordes (literally).

The Samanids
The Aztecs advanced beyond the woods. The Samanids saw an opportunity for their archers against the Aztec psiloi and moved them to their left as they advanced and methodically began to destroy hordes with their spear and cavalry.

Contact against the hordes.
In time we succeeded in killing all but one of the hordes (that one being the one that Joel had hoped would go, as it had a warband behind it, waiting to attack). We also got the two psiloi with two archers and a psiloi. In the centre one enemy blade had also been destroyed. However, one of our cavalry was destroyed, as had a bow. The enterprising enemy blade rushed through the gap he’d created and attacked our reserve, an element of archers. It survived the first round of combat, and then we surrounded it.

The blade is surrounded. The enemy general had retreated a little, and the remaining horde and warband can be seen in the background.
It survived, forcing us to recoil. The next turn it got that archer, while the general was able to attack my remaining archer that was in a wood, which broke in terror. I lost 4-3, though 8 of the Aztec elements had been broken! An excellent game.
- Samanids v. Cortez
My last game saw the Samanids face Cortez (IV/19c) and his Tlaxcalan allies. This time they were defending. Their hills and rough going was all in one part of the battlefield, which they were defending.

Cortez.

The Samanids.
I hoped to neutralise the artillery with my spearmen, while the archers shot from the protection of the hill. Getting into position on the hill took time, and the first element of archers to make it over the crest advanced into a hail of arrows and fled. The other two did get themselves into position, but did not feel they had the numbers to advance, especially as an element of spearmen had been shot away by the artillery.
What saved the Samanids was the slow reactions of the Spanish. In desperation the Samanid cavalry moved to outflank on their right flank. The response was a series of 1 PiPs. On the first, a single archer turned and shot at the Samanid LH, who recoiled to the edge of world. They paid for this by being fallen upon by the cavalry, who double-overlapped it and routed it. Another 1 PiP by the Spanish saw Cortez advance to face the cavalry. They ignored him and destroyed another archer. This continued until all three archers on that flank had fled. The Spanish response was to advance in the centre, but it proved too late; fast blade advancing uphill against solid bow in bad going made no headway. And the Samanid spear survived a round of combat against the Spanish solid foot.

Cortez advances on the Samanid foot.In the background the dire state of the Spanish left flank can be seen.
Meanwhile, the Samanid cavalry surrounded the Spanish artillery, while one cavalry sought to delay Cortez (they’d recoiled when facing him with LH flanking; now the LH joined the fight on the artillery. Cortez could only look on as his artillery joined the rout.

Cortez is unable to save the day as his artillery is destroyed.

The Spanish notice their left flank has broken and start to flee.
The final battle of the day was my only victory, and it owed a good deal to luck, but I enjoyed all the games, and learned a lot about using these two armies. In particular, I can see mastering archers as taking a while. Also, the scythed chariot is a challenge to use so that it disrupts the enemy, and not my own army.
Samanid spearmen
12 January, 2019
The spearmen are finished and the Samanid army is ready to take the field.

Samanid spearmen.

Another angle.

And another.
The whole army is now done, and I’ve updated the Army Page for it.

The Samanid army.
Samanid archers
11 January, 2019
I’ve almost finished the Samanid army. It’s taken a little longer than it might have, and that is possibly because I had such high expectations of how it was going to look. I’m reminded of the Calvin and Hobbes cartoon, where Calvin is anticipating a propeller-head hat. It’s a brilliant sequence of cartoons; Watterson captures the wildly exaggerated expectations perfectly:

The whole sequence can be seen here.
I had been wanting to get these figures for some 8 years or so. I had just painted the Syrians and really enjoyed how they turned out. I wanted to capture that style with these figures, but I wouldn’t be able to use LBMS transfers. The VVV transfers seemed a bit lonely on the shields, and my attempts to encircle them freehand doesn’t entirely please me. The Dailami looked good, but not exceptional. that comedown, explains why I didn’t sprint to get the next six elements done. These archers may look a bit better (and it may be the different phone’s camera that has helped). The spearmen are very close to being done; just some webbing and basing to go.

Samanid archers. I’m please with how the axemen have worked out.

Another angle.

And another.

From the rear.
Painting hasn’t been helped by the hot weather. The wet palette has helped, but it is a struggle to keep paint a working consistency, and I have to keep cleaning dried paint of the brush. When the spearmen are done, they may be the last for a while!
Samanids
7 January, 2019
My Syrians are making progress towards being able to double as Samanids (III/43c). this is an army that has been a long time in the planning. If you click on the category of Samanids on the side bar, you will discover Shamanid Goblins as their precursor! DBA 3.0 removed the option of an elephant, but I do have two to paint, so in time this can become a Ghaznavid army too.
I’ve always liked the Khurasan figures, but their cavalry is being remodelled. However, a spur to getting this army was the idea was that the Syrian Ghulams could be used for the core mounted elements, and it is the ghulams that make this army look so cool. By rights the ‘noble cavalry’ should have less armour than the ghulams, but that’s not possible to see! At a pinch I could take a Central Asian Turkish (III/11b) and use the Syrian Turkomen to avoid painting an element of Khurasanian horse archers (as well as get an extra LH). However, I have got those horse archers, as well as an element of slingers (Ps) and I’ve done the first of the core foot, an element of Dailami javelinmen (4Ax). The remainder of the army are similar to these javelinmen, being Khurasan figures, and are close behind — three elements each of spearmen (Sp) and bowmen (4Bw or Ps, but I’m only doing the 4Bw). The peasant levy is an element that would be the Syrian Adhath militia, if I chose to take it, but I see the slingers as being more useful. Therefore, the army is now halfway complete.

From left to right, slingers, Dailami javelinmen, and Khurasanian horse archers.
The slingers are from the Khurasan Arab range, the Dailami javelinmen are from their Khurasanian range, and the horse archers are Essex.

Another angle.
The Khurasan figures come in packs of 12; in order to justify getting the pack of figures with axes, I’ve sprinkled them through the other elements, as a form of officer. I’ll also be able to paint another three elements of these Dailami to use as a Dailami ally (III/58c) if I want.

The other side.
The shields have VVV transfers, which are probably designed for smaller shields. I’ve tried to compensate by painting the rims in a matching colour, but these don’t look as crisp. The photos of these and the previous post are taken with a phone, and not as good as I normally manage.
Mithridates redux
6 January, 2019
The Mithridatic army has had an overhaul. Symbolic of this is the SCh. I’d stopped using it. Partly this was because it’s not that effective, but possibly as big a factor was that it didn’t look that good any more. It’s scythes bumped into everything; it disrupted its own battleline with them, and they got bent, looking shabby. I decided to shorten them. It may not look as dangerous, but it will be more attractive to put on the table.

The old scythed chariot with longer scythes.

The renovated chariot with more manageable scythes.
Otherwise, I’ve added five new elements of figures from Corvus Belli. One of these is Cappadocian infantry (3Ax). I now have two of these.

Cappadocians.

Again.
The other four elements are imitation legionaries. They are actually veteran Carthaginian spearmen, but are too good not to use as legionaries.
[

Imitation legionaries.

Another angle.

And another.
These have the same shield colours as the original Carthaginian spearmen. There are five more elements to paint, for BBDBA, and they will allow me to use them for a Mithridatic BBDBA army that has an Armenian ally.
Speaking of Armenians, I have all the figures for an Armenian DBA army; this is not too high up the painting queue, but I have painted four elements of them to use as an ally for Mithridates; these are two elements of cataphracts (4Kn). These are Freikorp figures, actually Parthians (after I bought them, Freikorp brought out an Armenian range). They have good poses, but the detail is not great in places, such as their faces.

Armenian cataphracts.

Another angle.

And another.
The other two elements are horse archers (LH).

Armenian horse archers.

Another angle.

And another.
Along with the camp that I painted last month, this army is largely new elements. I’m hoping its TLC will make it fight better.

Mithridates with an Armenian ally.
A Carroccio and Mithridates’ camp (also Veteran Carthaginian spearmen)
24 December, 2018
I’ve got a few more elements finished, and a number more very close to being finished. The first is the Command Wagon of my Communal Italian army (III/73a) that is taking shape. It is a morph of my Norman army, though I’m yet to paint most of it — the six elements of communal spearmen, the two elements of communal crossbowmen and the two elements of Contandini infantry (hordes). I’m actually planning to take a Medieval German ally (IV/13a), which allows more knights (3Kn/4Bd), and another element of crossbowmen. These are all started. I made the transfers for the Carroccio’s banner and the shields myself. I was following the picture in Ian Heath’s Armies of Feudal Europe (no. 94 on p. 111). I noted that some of cities (Bologna and Parma) had red banners and a cross on them. I somehow took from this a yellow cross, though when I reread the book I discovered that it should have been white.

The Communal Italian Carroccio.
Like the rest of the army, this is an Essex model. I chose to keep it to a 40 x 40 base, so I’ve not used the oxen. After I decided on this, I saw a very nice Carroccio with oxen. One advantage of the 40 x 40 base is that I can present the wagon side on.

Another angle.
The model came with a single monk (the one holding the crucifix), but I came across a few more while I was painting it, and decided to fill out the wagon a bit. These monks have picked up some dirty habits, courtesy of refreshing the ink in my wash just before doing them! They’re not just there to add moral support either; that monk in the middle is kneeling. If he stands up he’s a monster (a Museum miniature) … Beppo abandoned his questionable early life as a wrestler for a life of prayer, but should the wagon be under serious threat, he may revert to his old character, so watch out!

And another.
The wagon is guarded by a select guard of uniformed troops.

From the rear.
The occasion that led me to finding the other monks was my decision to finish off my Mithridatic army. Part of the work is to do the camp— Mithridates tent— which was guarded, I believe, by a stag, a bull and a stallion. I’ve had these figures for a long time; I even started painting them, in a desultory sort of way, so it’s good to get them done finally.

Mithridates’ tent.

Another angle.

And another.
Mithridates’ army will be joined by an Armenian ally that can add more horse archers and some cataphracts. These are under way. I also decided that I could use the Carthaginian veteran spearmen as imitation legionaries, which would be an incentive to get them finished—well, some of them. I’m also doing another element of Cappadocian infantry also by Corvus Belli. In all, this will represent eight new elements for the army (and a ninth if the camp is counted). Here’s the first of the finished spearmen/imitation legionaries.

Carthaginian veteran spearmen (or are they imitation legionaries?)

Another angle.

And another.
Once I’ve got the Armenians and Carthaginians done, it’s back to the Italian spearmen and crossbowmen (who got demoted in the painting queue last week).
Troglodytes and Lizardmen
18 December, 2018
My painting output has dropped a bit in the last month, inasmuch as I’ve not got a lot of finished work to show. However, I have been busy organising my paint. It is now all in dropper bottles. This was a slow and messy job, but a good chance to assess the quality of a some of my paints. They are a lot easier to use now, so I think it was worth the effort.

Paints all in dropper bottles.
Otherwise, I have started painting the carroccio and the foot to morph my Normans into Communal Italians. I’ve done the shields, using mostly VVV decals, but also a few of my own that I made (I needed some decals for the carroccio, and added a few for the guards).
I have also spent time buying boxes to store my figures in. This occasioned my discovering some partly painted warbands for Song of Blades and Heroes. It didn’t take long to get them finished, which is quite satisfying. The figures are all Splintered Light, which come in irresistible warband packs (I have a lot more I could get done).
The first warband is a group of Troglodytes; I painted a test figure of them two years ago, and I got the base colour done of the rest: link. They languished after that. I was not entirely happy with the colour, which was too similar to the lizardmen, despite using different colours for the base and drybrushing. I didn’t let that trouble me this time, and just got the detail done, which is not too much work.

Troglodytes!
The warband has a commander and a shaman, and large chap and a pet lizard of some sort.

About face!

And turn again!
The other warband was some lizardmen. They were at the same stage as the Trolodytes, and didn’t take a lot of work to finish. They also have a commander and a shaman; they also have a larger chap with a trident.

Lizardmen…

About face!

And turn again!
I hope to use these figures at some stage; I also would like to get the warband of ratmen painted. The base colour for them is done, and they should look great when finished. They would join quite an array of SoBH figures now.
That’s two groups of figures that I’ve taken out of half-painted limbo. My Veteran Carthaginians remain in this place, but I’ve hit on a plan to get some of them done. I’m going to finish four elements of them to use as imitation legionaries for my Mithridatic army. Getting them done is likely to push the Communal Italians back down the queue!
Conquest 2018, Pt. 3
17 November, 2018
The final day of Conquest was three BBDBA games. A lot hinged on the initial dice roll for who was the invader and got to set up second. As an army characterised by Phil Barker as particularly aggressive, the Later Carthaginians should have had the advantage here, but on this occasion they allowed themselves to be invaded for the first two battles.
- 1. Polybian Romans (Keith)
The first battle was against Keith’s Polybian Romans. I placed two large marshes and a difficult hill. The command with the Gallic Warband commander set up behind the hill; the spear were in the middle and the left flank with the C-in-C had a marsh occupied with two psiloi.

The Carthaginian right flank and central commands.

The two armies opposed; the Carthaginian left flank command can be seen in the foreground.

The Roman right flank and centre.

Their left flank.
I came to realise that the terrain was not working to my advantage, and things stagnated with neither side able to make much progress in the time was called. On the left flank the cavalry had to retire before the advancing foot.

Initial advances.

Working at correcting things.
On the right flank the warband struggled to move over the hill, and the command range of the commander slowed down the advance of the psiloi, who were needed to support the Spanish scutati.

Slow progress on the right flank.
At the time the game ended the Carthaginian centre was almost broken (a flanked spearman refused to break), the warband were starting to put pressure on the right flank, but were disorganised by the hill. On the left flank a stalemate had resulted.
- 2. Athenians with Thessalian allies (Colin)
Against Colin’s Greeks, the Carthaginians were again defending. Colin had cavalry seeking to destroy exposed psiloi on my left flank, and on the right flank they had Thessalian cavalry facing the Numidians.

Athenians with Thessalian allies on their left flank.]

The opposing Carthaginian left flank.

Their right flank and centre.
Things did not go altogether to plan for the Greeks, and the Athenian cavalry were briskly destroyed by valiant Libyans. This precipitated a collapse on that flank.

Libyan javelinmen gloriously see off Athenian cavalry, while Numidians rush to fill an anticipated gap.
The Numidians were trying to bolster the threat to the left flank. As it turned out, two of them could turn round, while two stayed to exploit the advantage. The Athenian light troops were no match for the Spanish, and soon the Gauls were ululating their way forward.

The Athenian right flank starts to fold as their light troops break and the Gallic warbands surge forward.
On the other flank, things were not so happy.

Thessalians have the Carthaginians at a disadvantage.
However, the Carthaginians had a lucky escape, when the Thessalian commander was killed.

Disaster for the Thessalians as their commander is killed.
For all this, the Thessalian cavalry still had the Carthaginians at a disadvantage.

Despite the loss of their general the Thessalians continue to apply pressure.
The Gauls broke the Athenians right flank, but not before two warbands were broken. They spent a few turns mopping it up (in hindsight I should have remembered that it should have been removed after losing half of their elements; this was possibly crucial). Meanwhile, the Carthaginian centre was faltering and eventually broke.

The Carthaginian centre breaks.
When time was called I need one more element to win. I might have got it had I remembered that a command is removed as soon as half of it has been destroyed; I might have gained an extra turn to get that last element. For all that, I was under pressure on the right flank and had my centre collapsing.
- 3. Seleucids (Gordon)
Finally, in the last game I was the aggressor against Gordon’s Seleucids. I exploited this to the hilt in choosing which commands faced which.

The Seleucid left flank facing Carthage invading Syria.

Their centre and right flank.
Taking note of where the Seleucid cavalry was, the Carthaginians chose to have their light troops in the centre to face the phalanx. Their spearmen would hold the right flank defensively, and the cavalry on the left flank could exploit their numbers against psiloi and light horse, while the Numidians faced the xystophoroi.
The Carthaginians meet the phalanx with light troops and the elephants and chariots with spearmen.

Massed cavalry face the beleaguered Seleucid right flank.

The two armies opposed.

The light troops advance while the spearmen wait.

Cavalry swarm forward on their left flank.
The Seleucid scythed chariots proved ineffectual, and the centre and right flank waited while the left flank sought to exploit its advantage. It did this rapidly. It lost two Numidians to the xystophoroi, but in the end prevailed so that the cavalry could chase down the exposed psiloi. Meanwhile, the rest of the Seleucids were advancing, but were unable to gain a significant advantage, and the phalanx was waiting to be rolled up on its exposed flank. At this point the Seleucid general capitulated.

The Seleucid right flank has collapsed and the phalanx is defenceless. The Seleucids capitulate.

The Seleucid elephants on their left flank had routed some Spanish scutati, but overall had made little impression in the short time they had before their other flank collapsed.
I was pleased with how the Carthaginians performed. I think the aggression dice is hugely significant for BBDBA. I wonder if deploying with alternating commands might not reduce this a little.
Goblin Stronghold
14 November, 2018

The Goblin’s stronghold.
Years ago I started a stronghold for my HoTT Goblins. I made the base and chose the figures, but never got around to finishing it. This week I finally got it out and got it finished. It’s fairly macabre. Are the Goblins preparing a barbecue?

Another angle.
I have started to move my paints to dropper bottles, and it seems I’ve mixed the Goblin green thicker than I did in the past. These two are very dark, while the axe-wielding one is much lighter (I painted him years ago). The Goblins are Chariot figures, and the other figures are all Donningtons.

And another angle.
I hope to get some more HoTT figures painted soon; Heroes and Magic Users for my human armies to start with.

